Step 1: Getting Familiar with the Theme Layout #
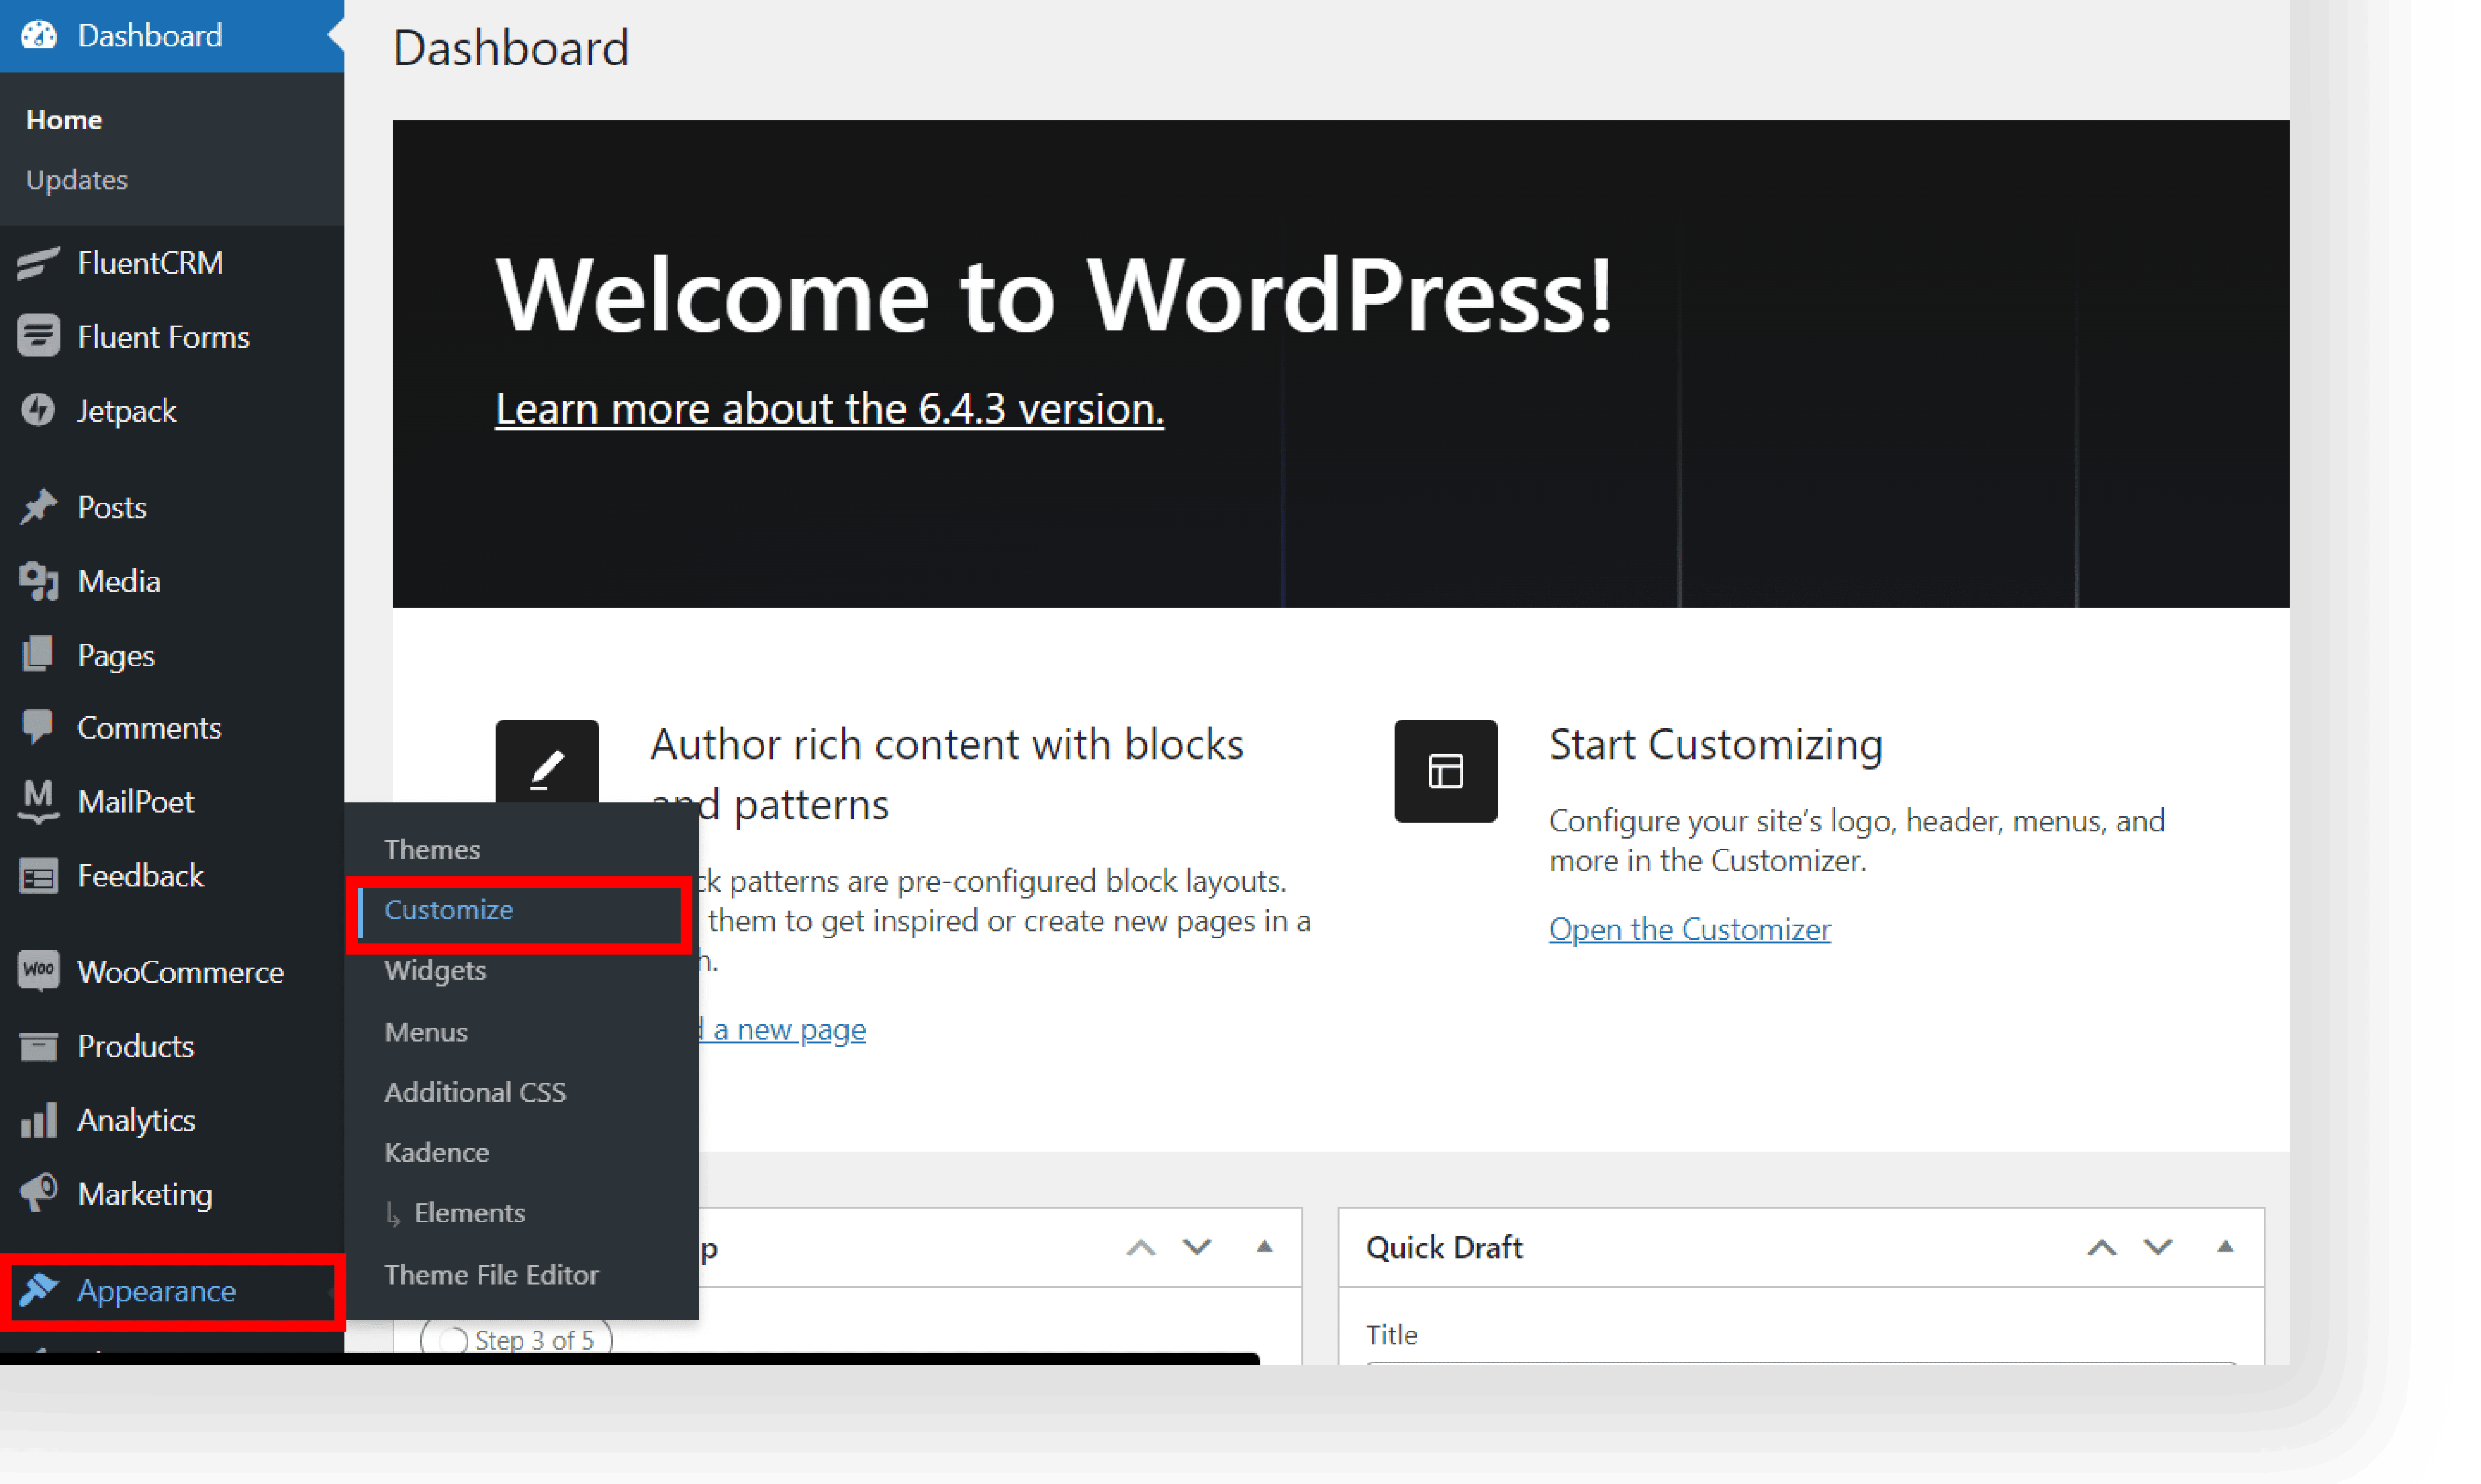
A. Log in to your WordPress Dashboard.
B. Navigate to Appearance → Customize.
C. Explore the structure and elements of the chosen Theme.
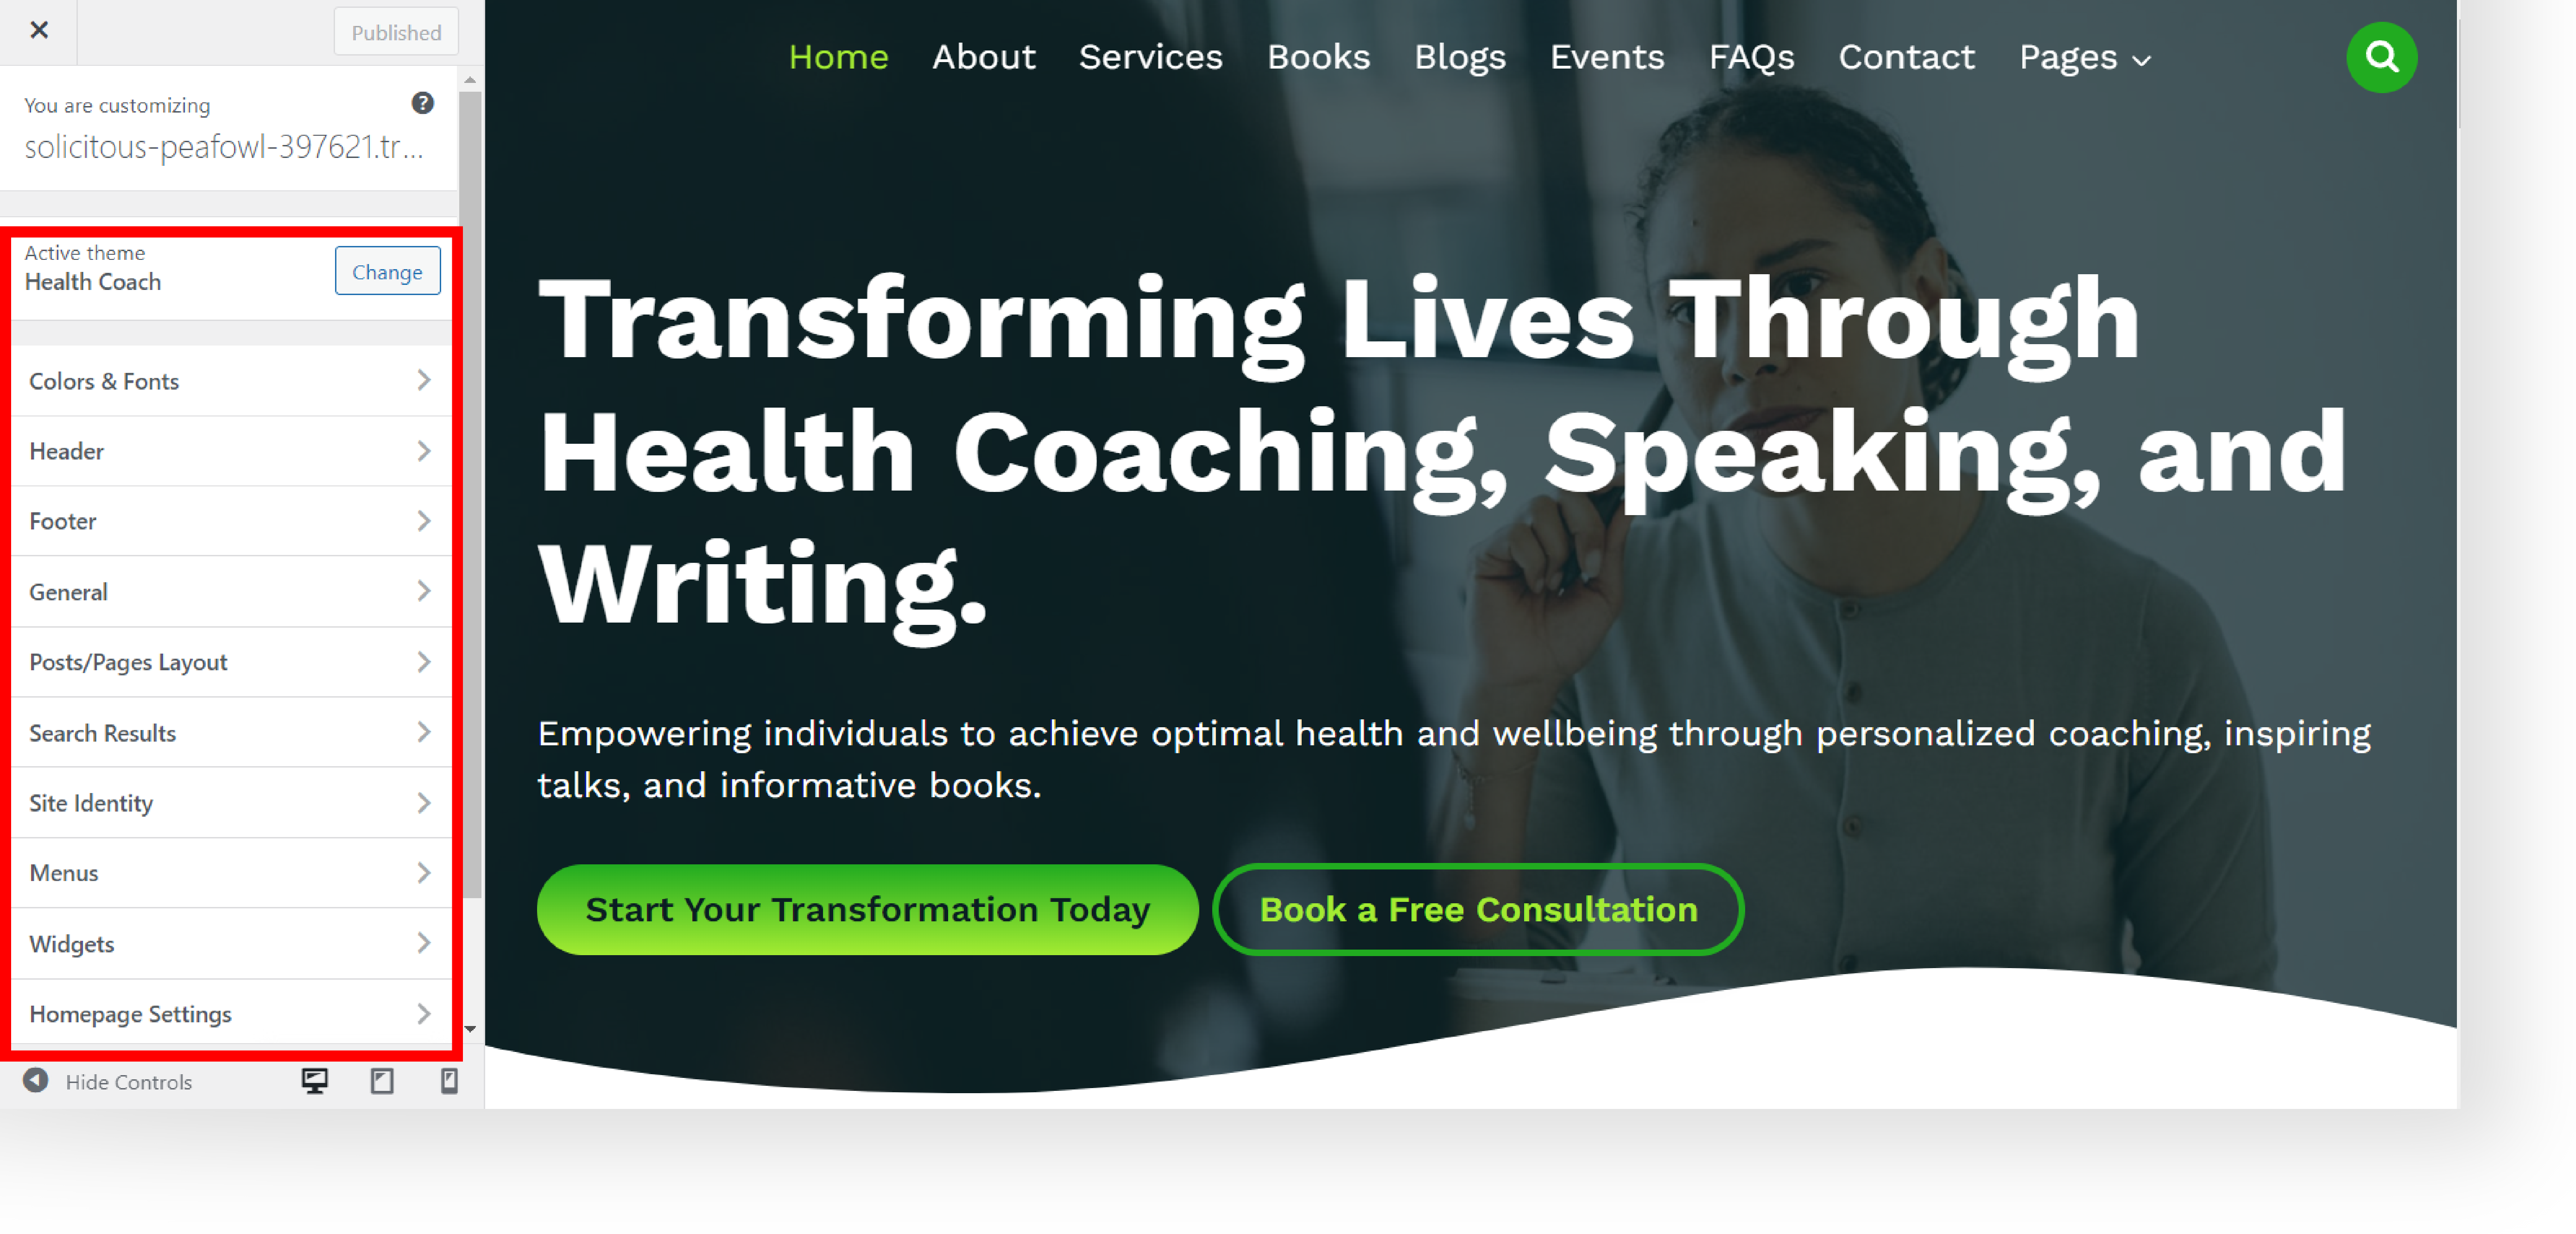
D. Identify areas for customization like color, typography, logo, text fields, buttons, or layout changes.
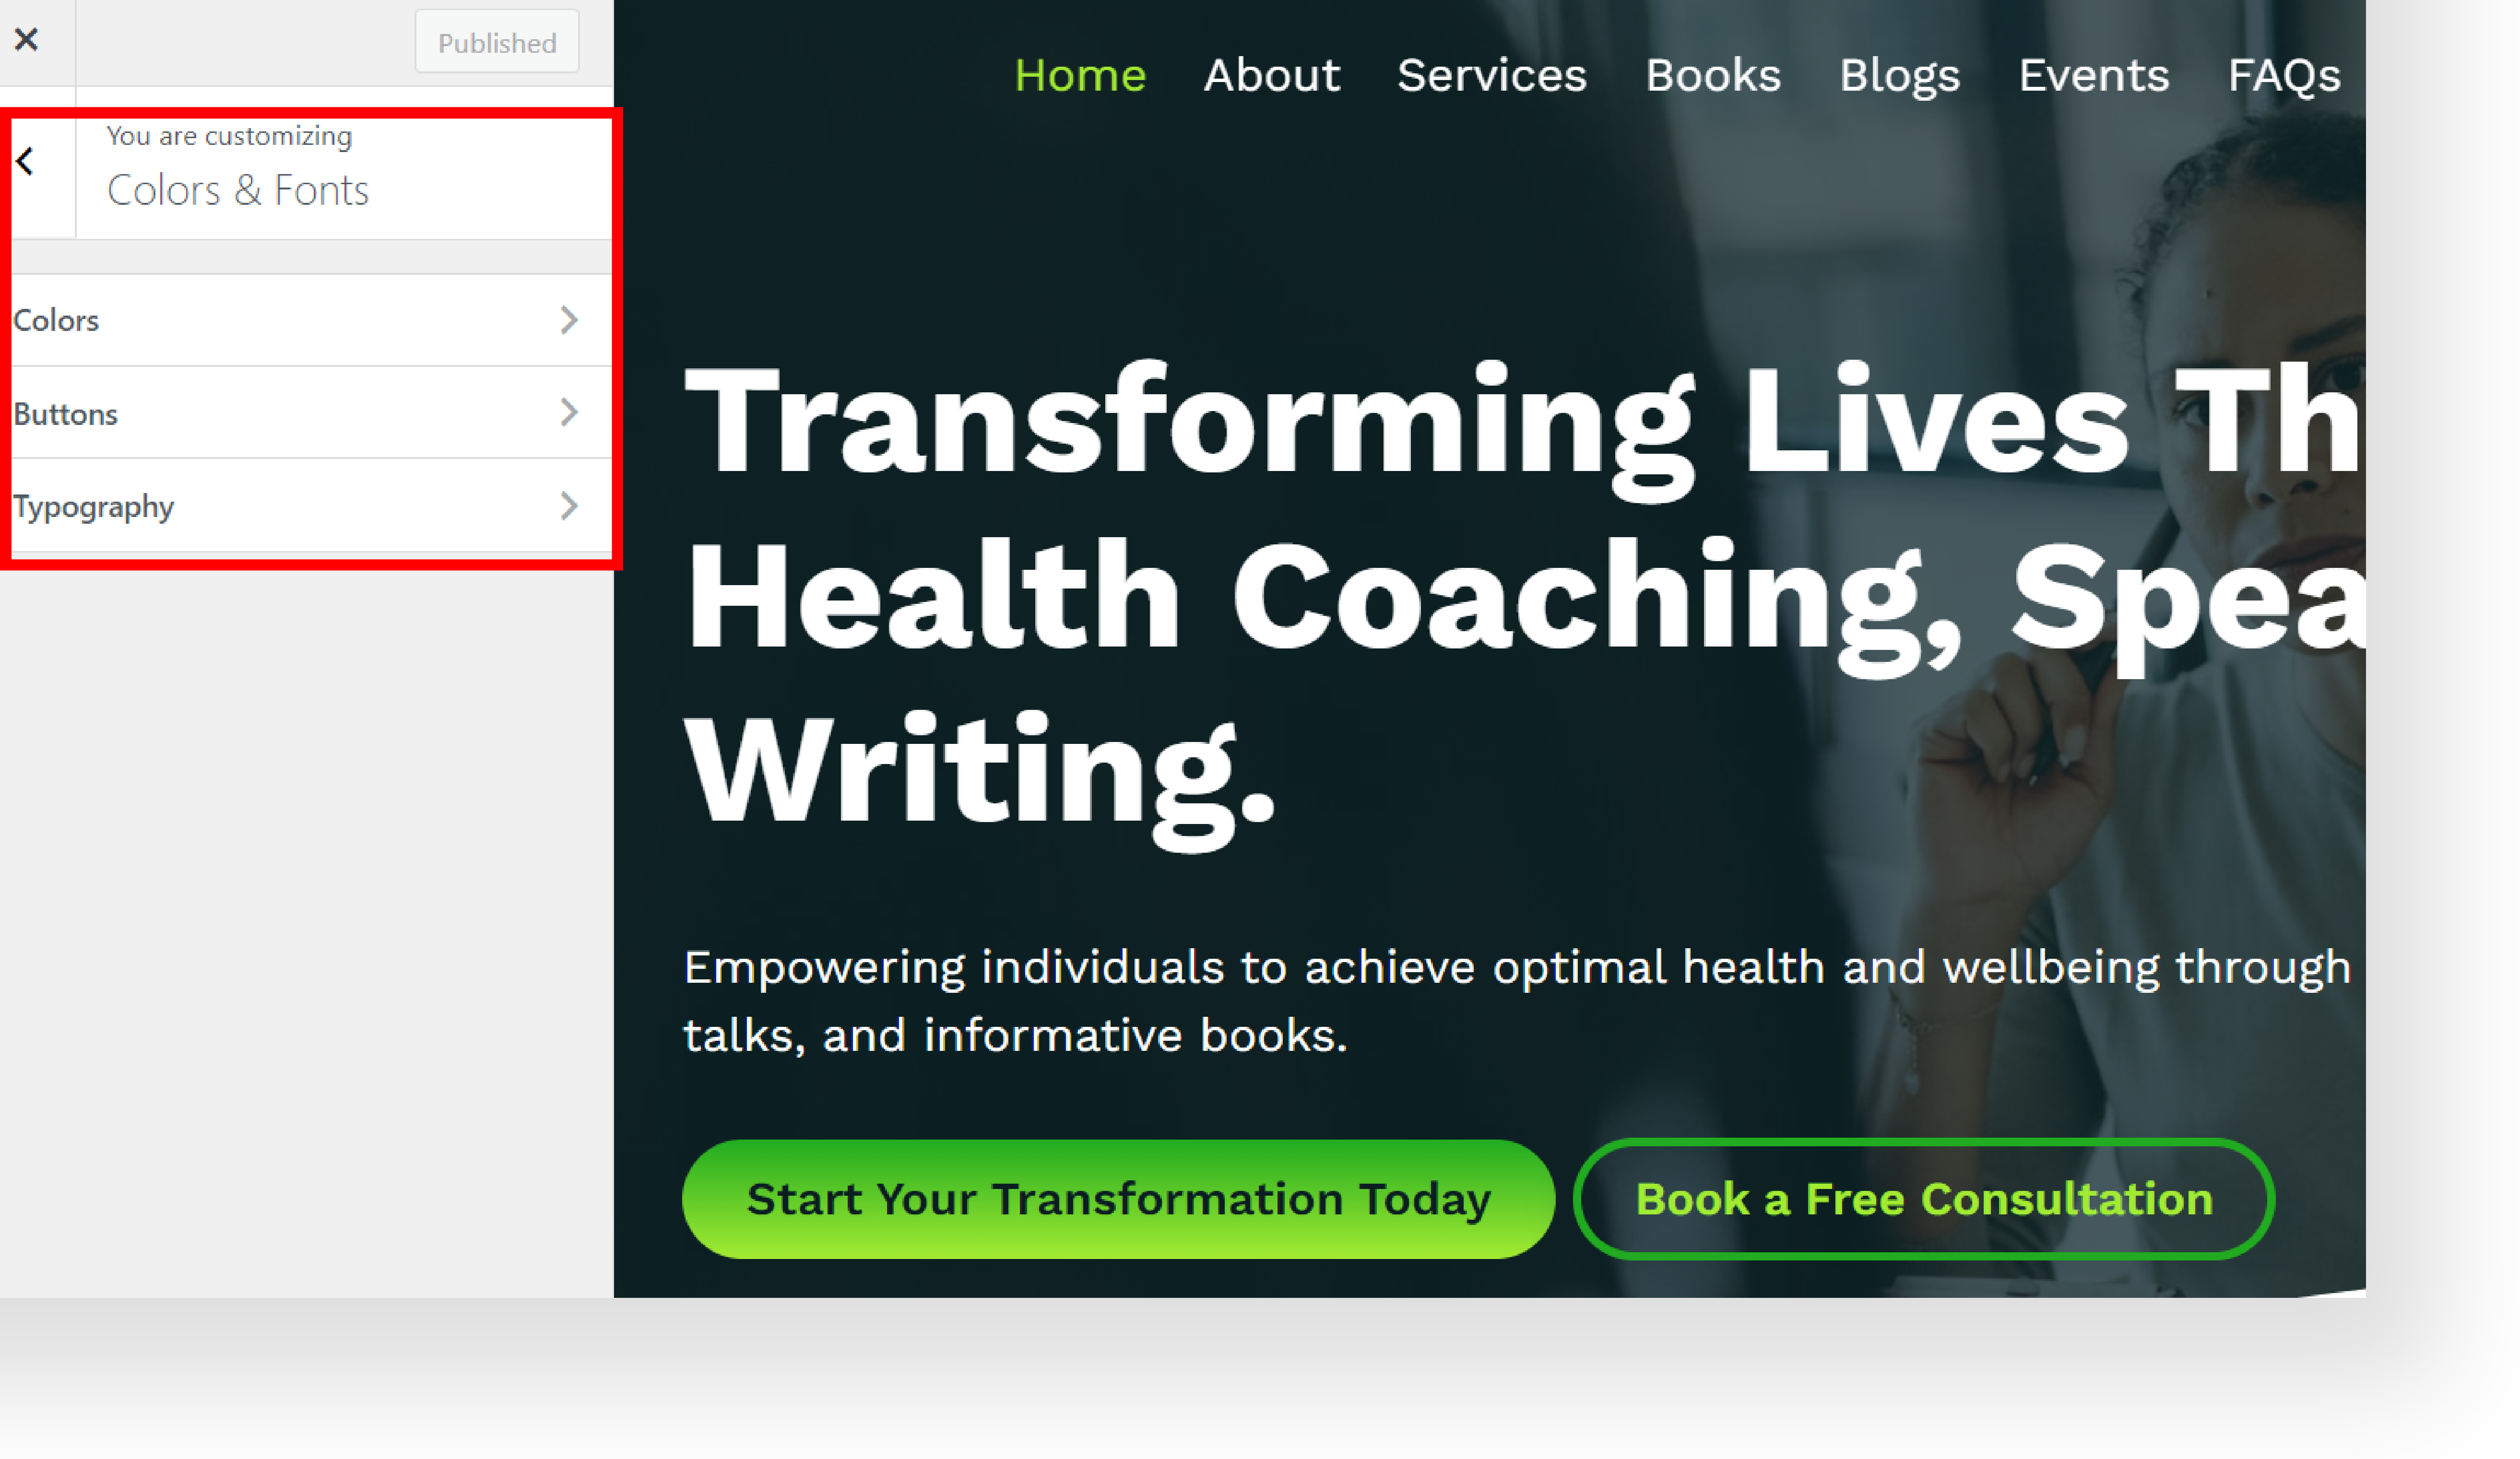
E. For every change always click Published.

Step 2: Customize Form Templates #
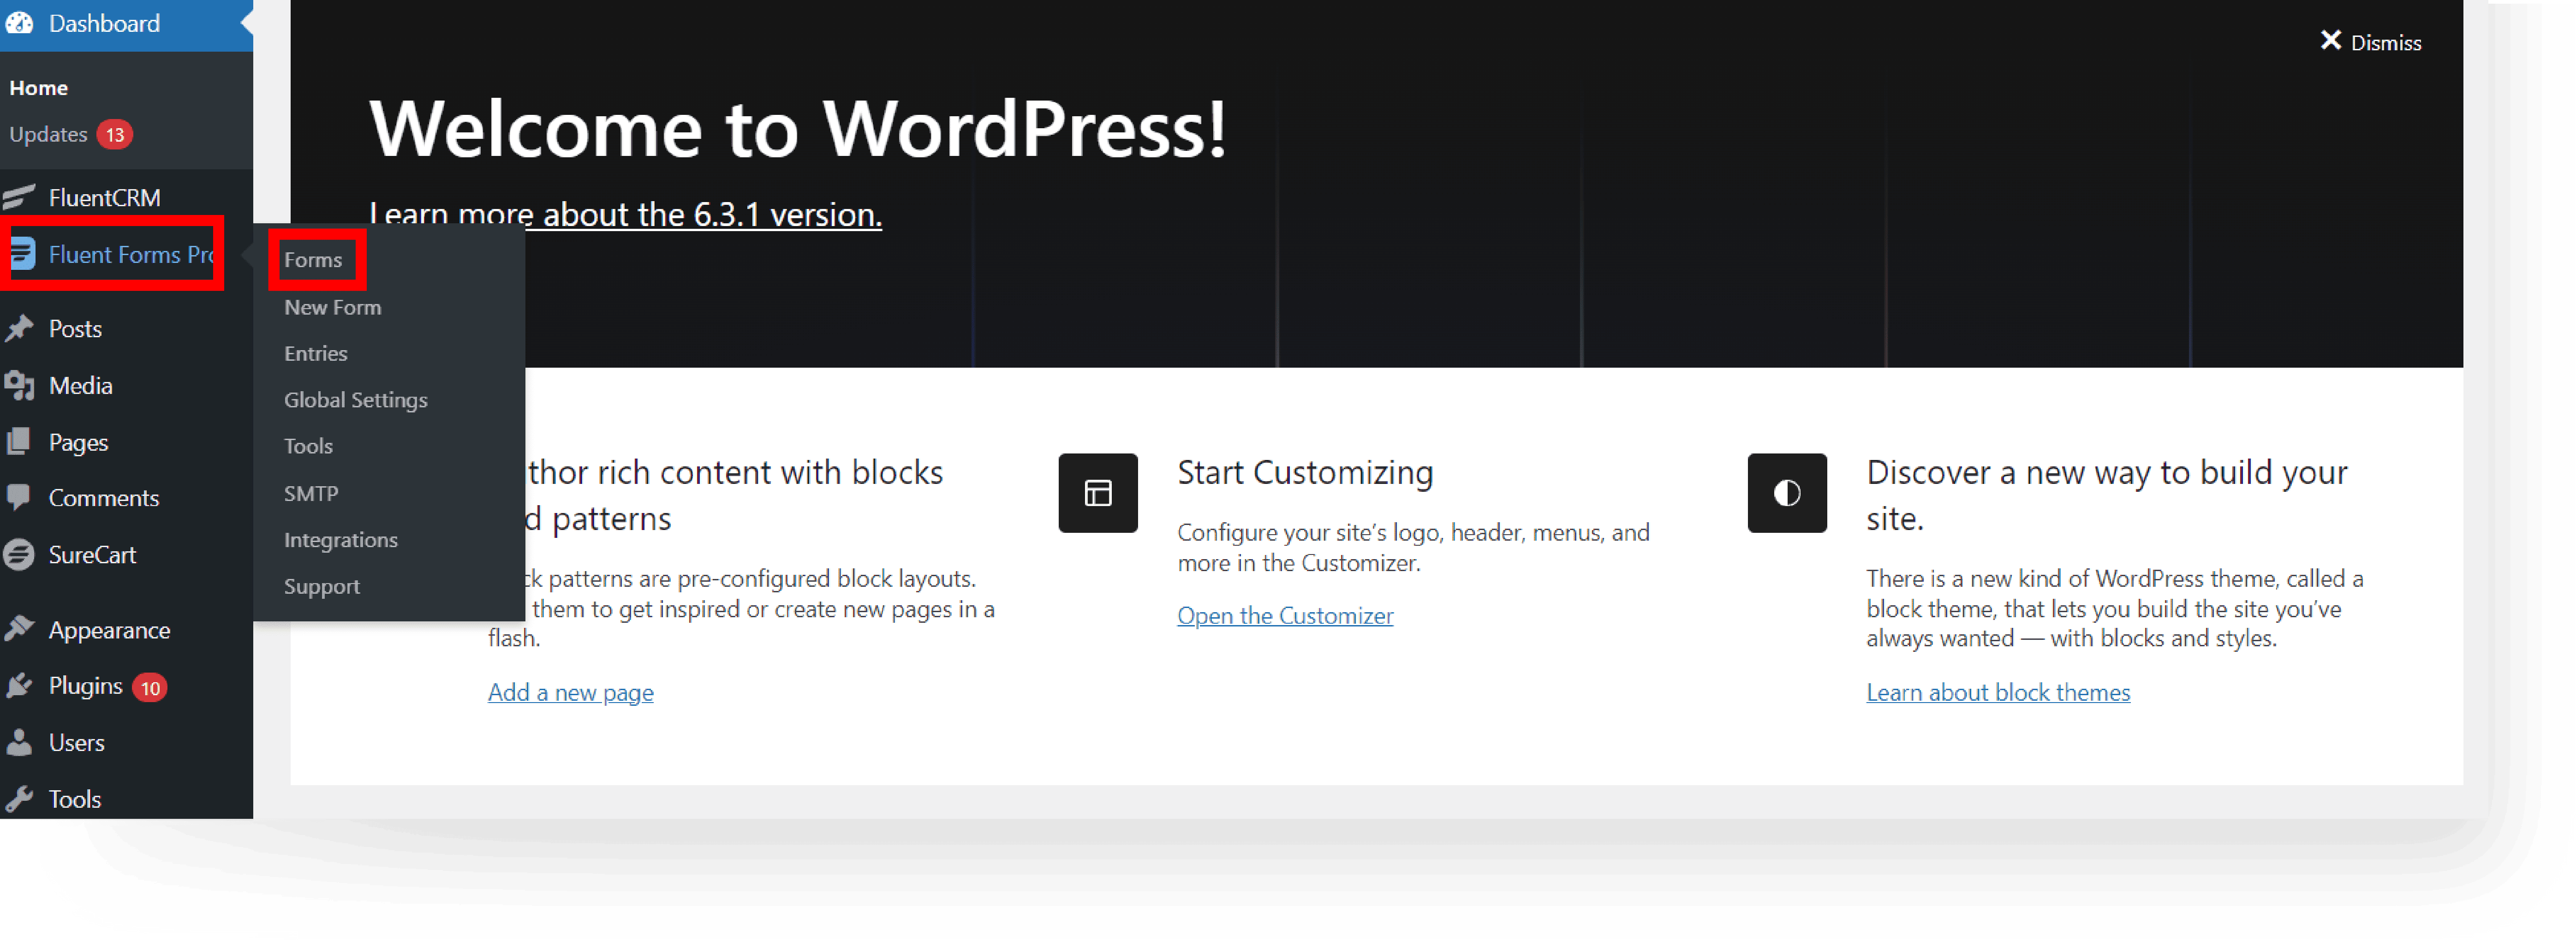
A. In your WordPress dashboard, navigate to Fluent Forms and select Forms.
B. Browse and select a form template. Click Preview to check the form that fits your project’s needs.
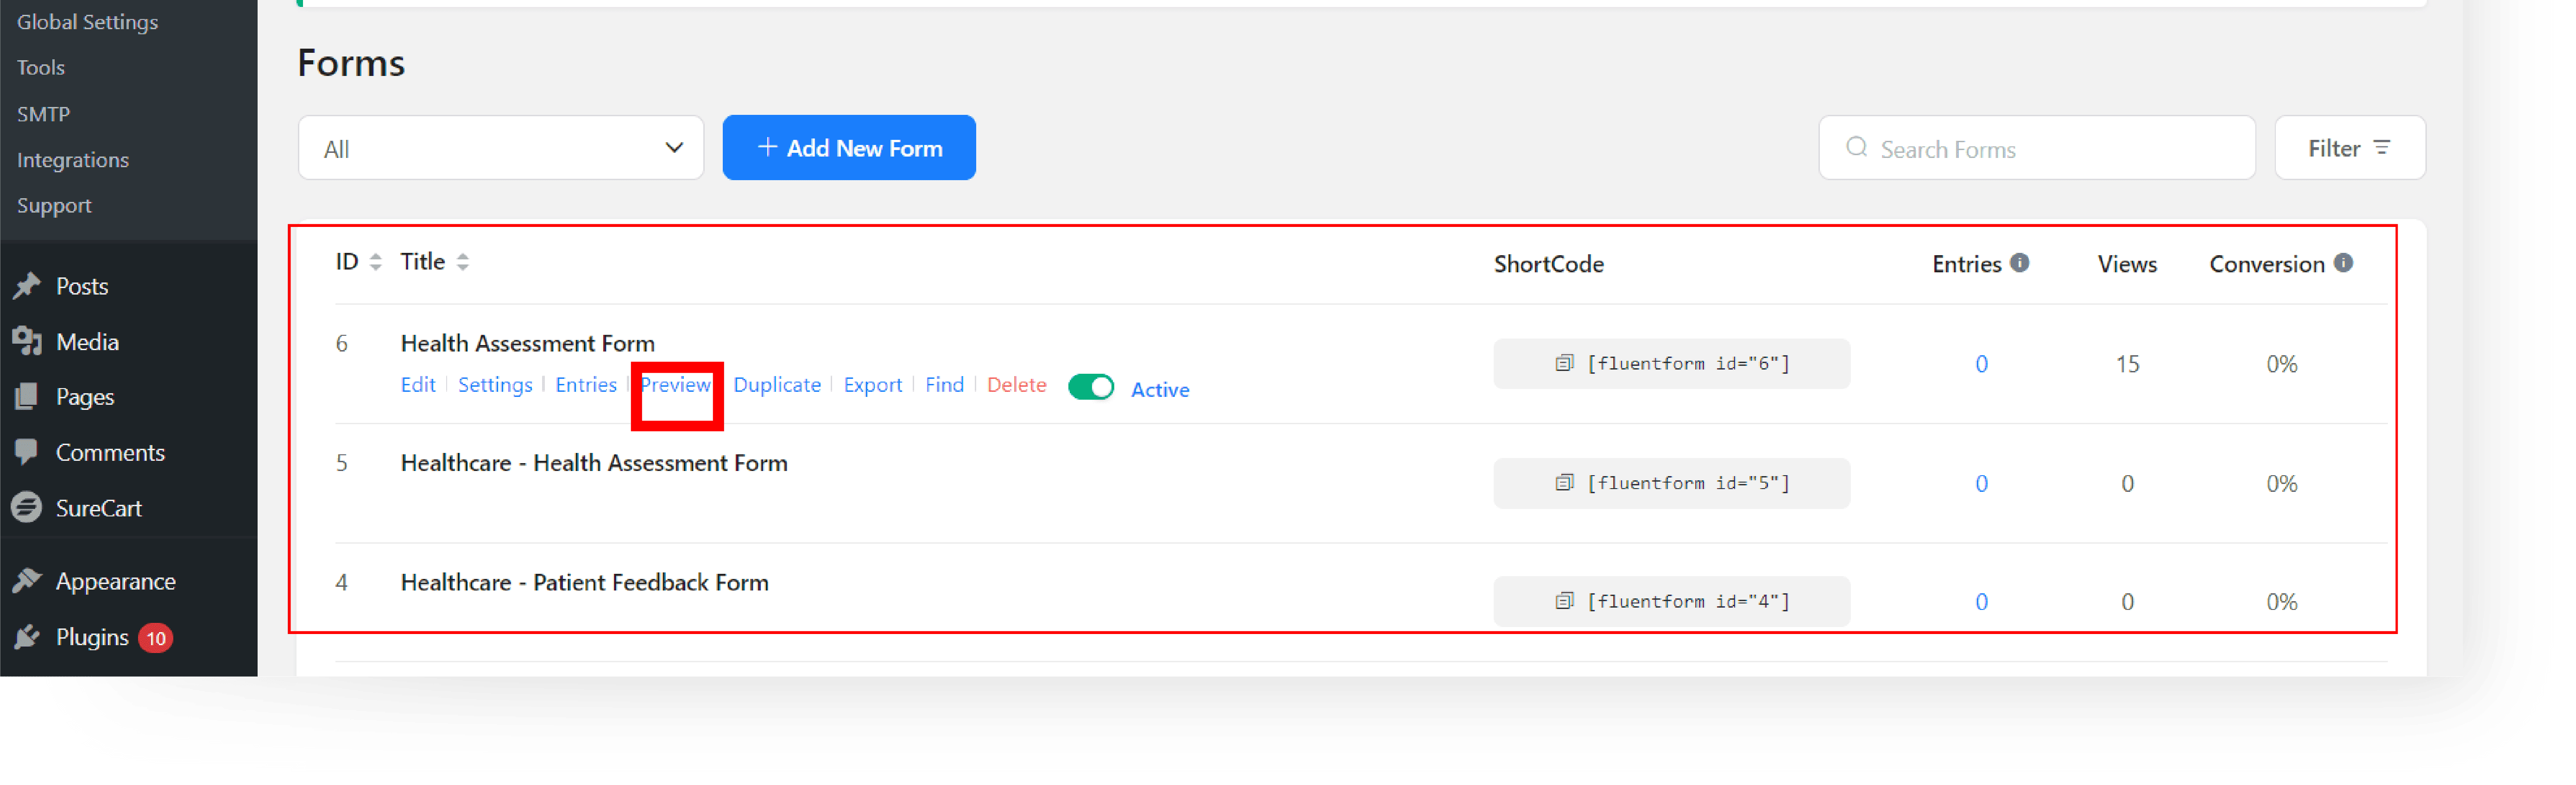
C. After previewing the forms, close the preview tab and click Edit on the Forms that you have chosen.

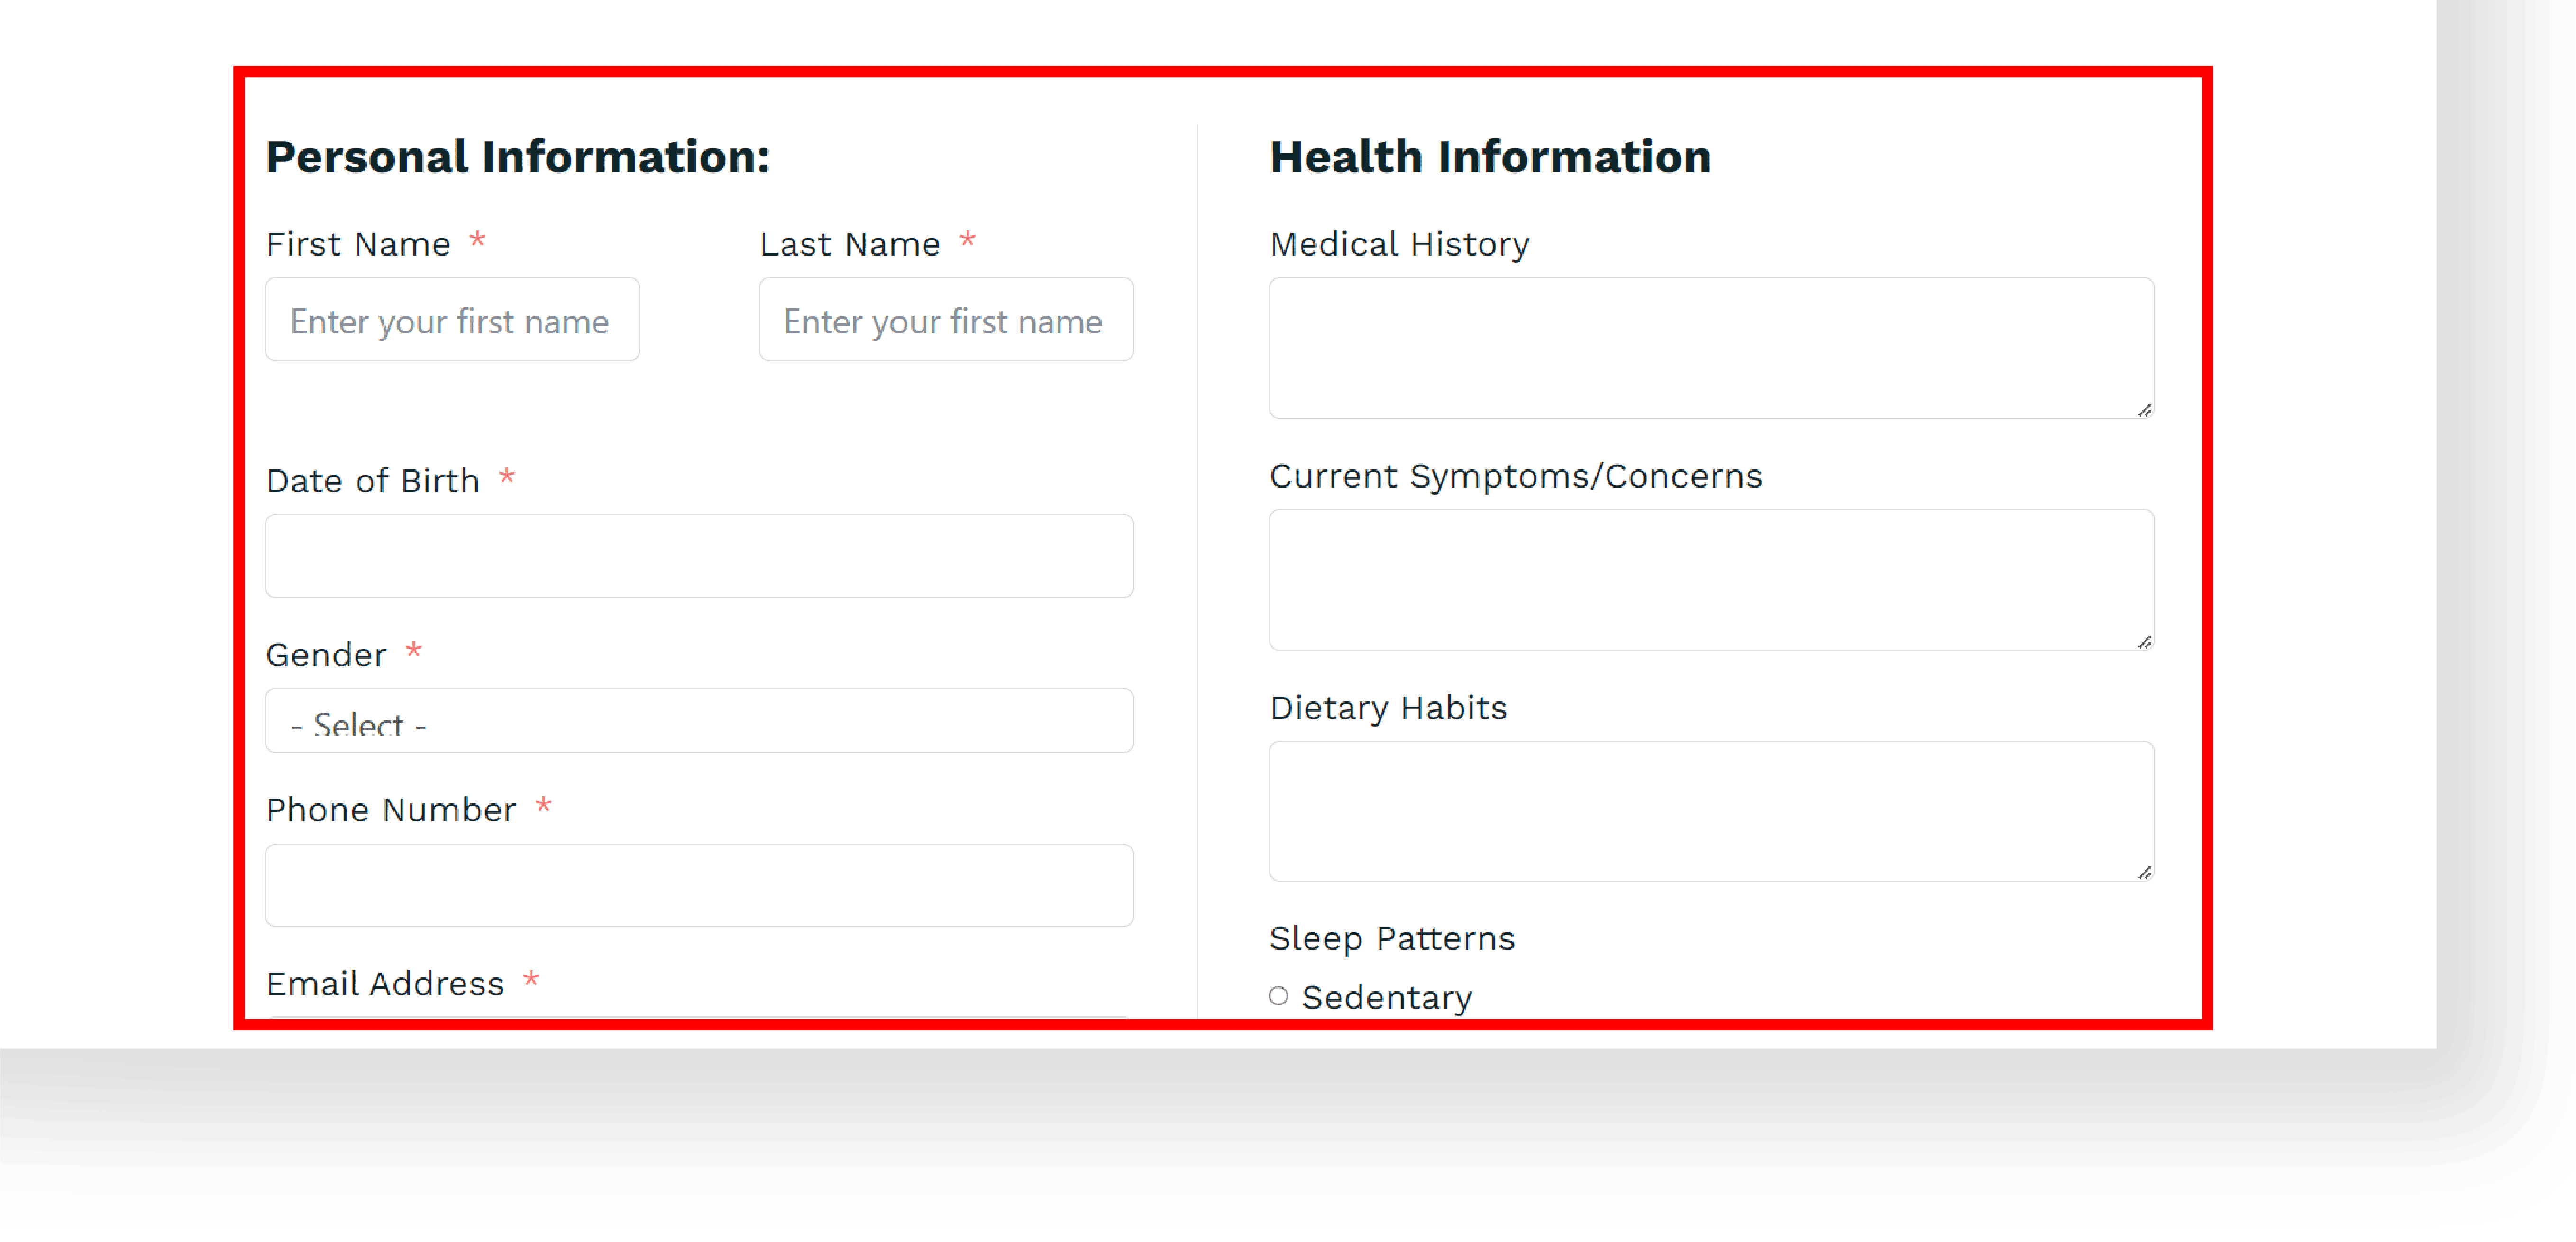
D. Explore the structure and elements of the chosen form.
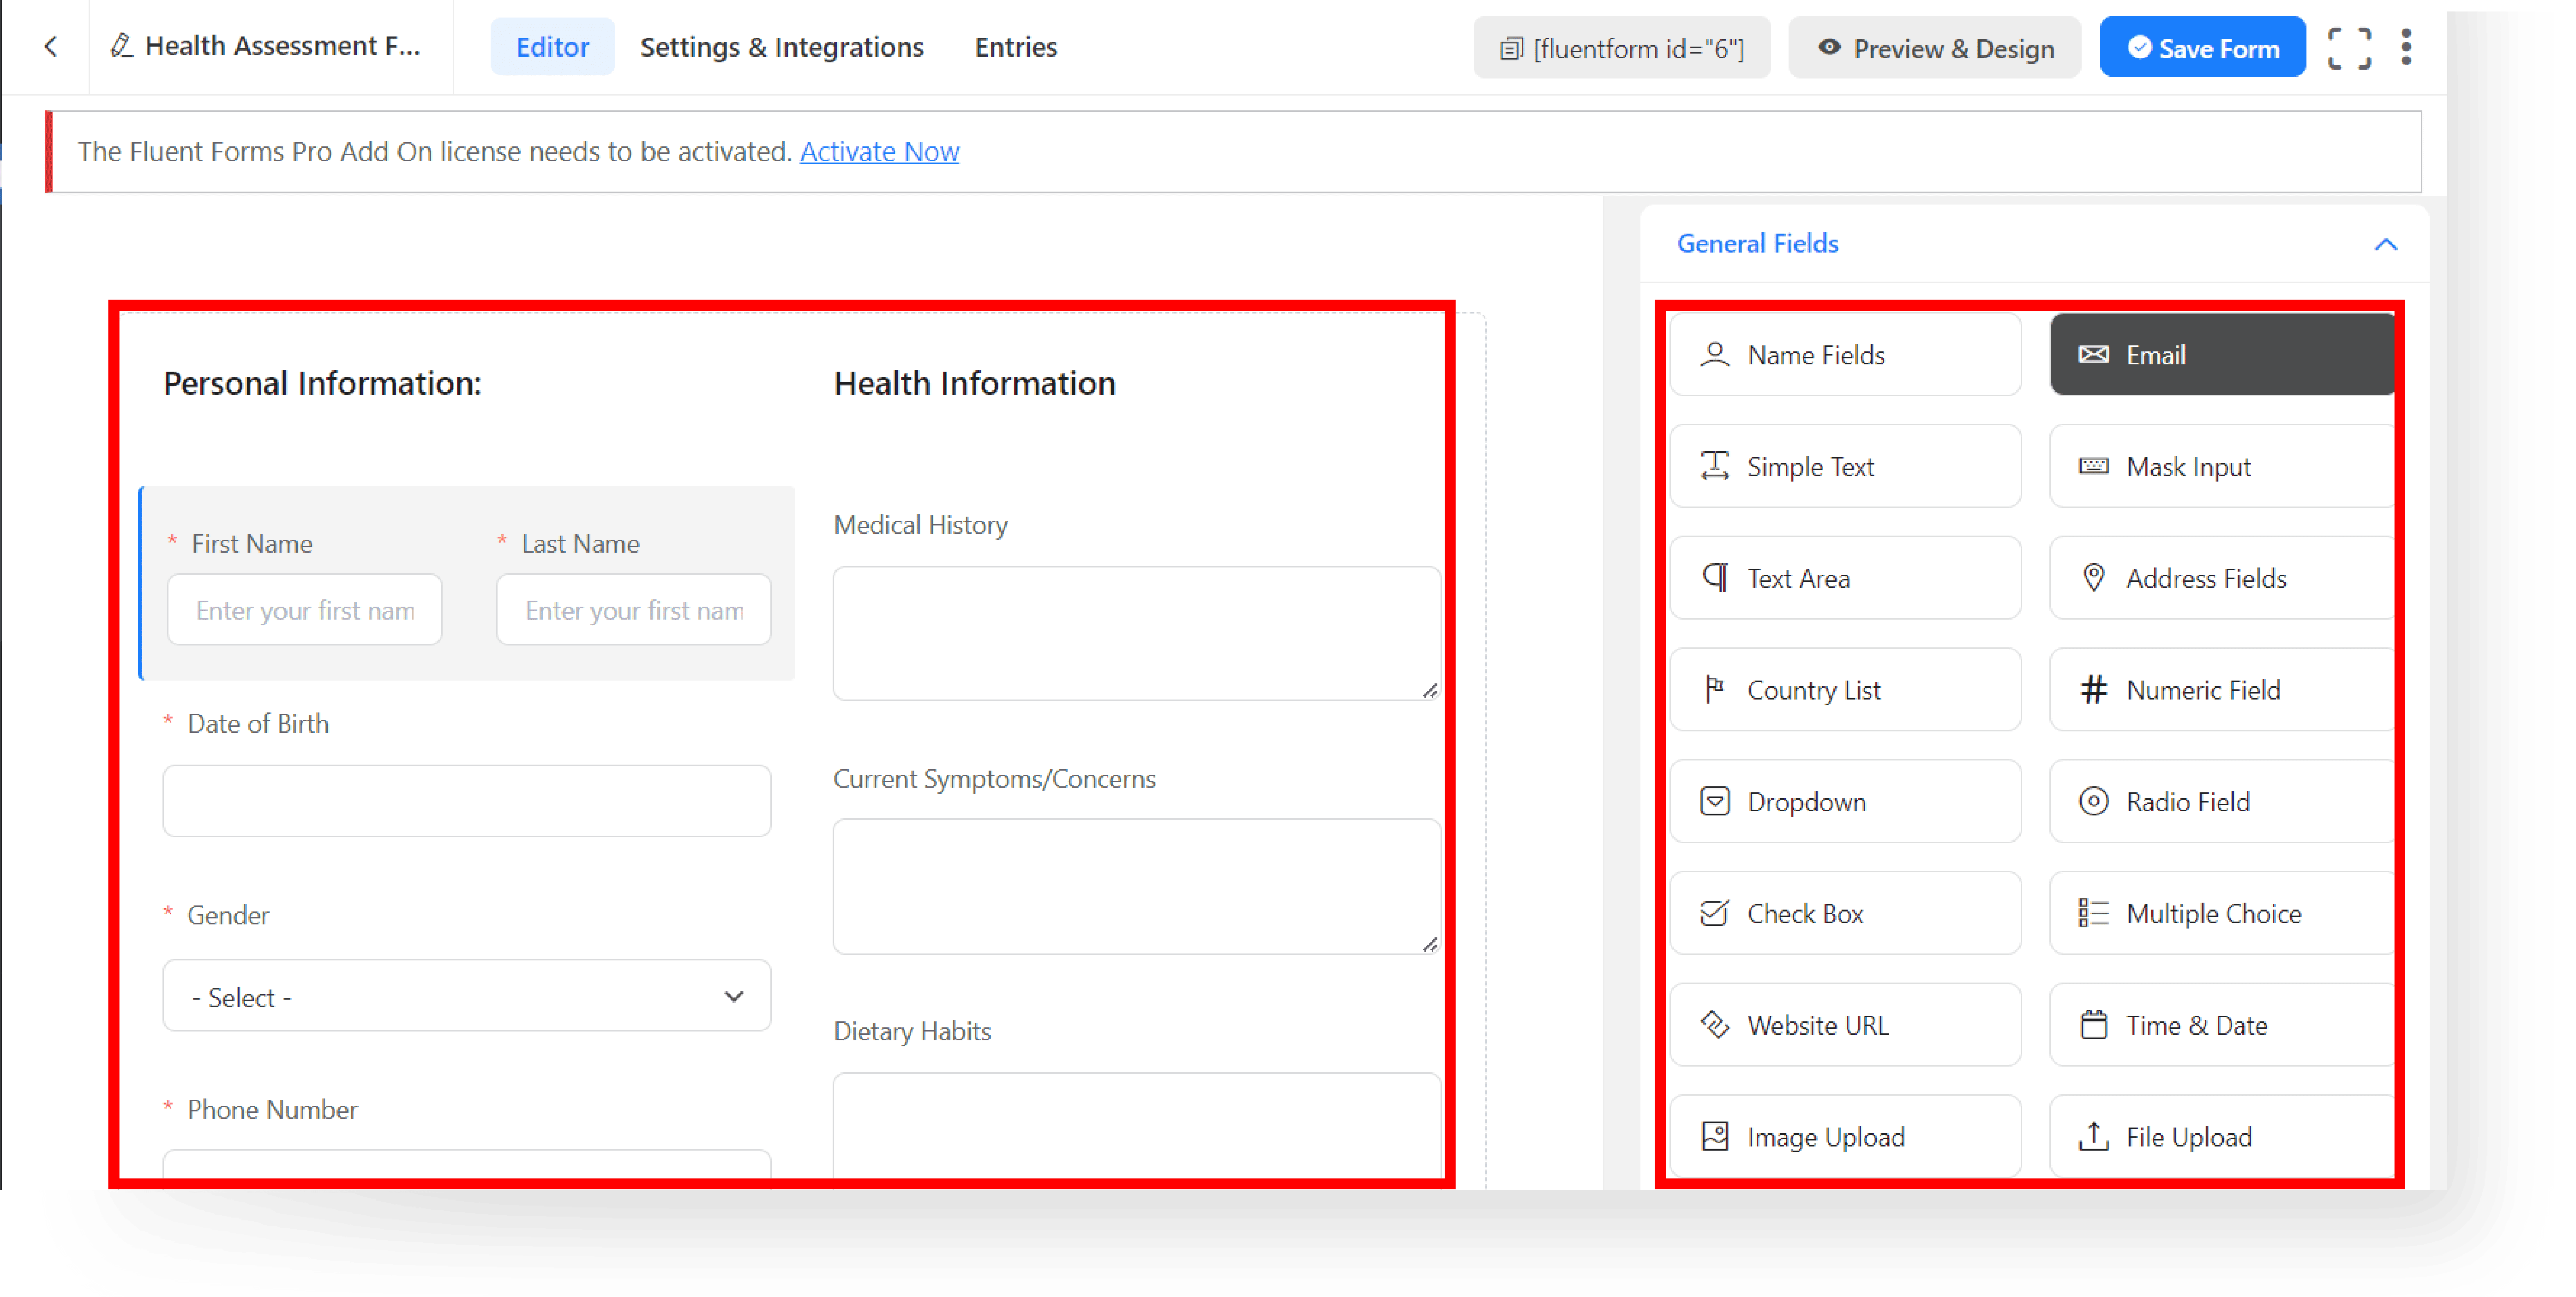
E. Identify areas for customization like text fields, buttons, or layout changes.
F. Replace default content with your own – from text to images.
G. Adjust the color and fonts to reflect your brand.
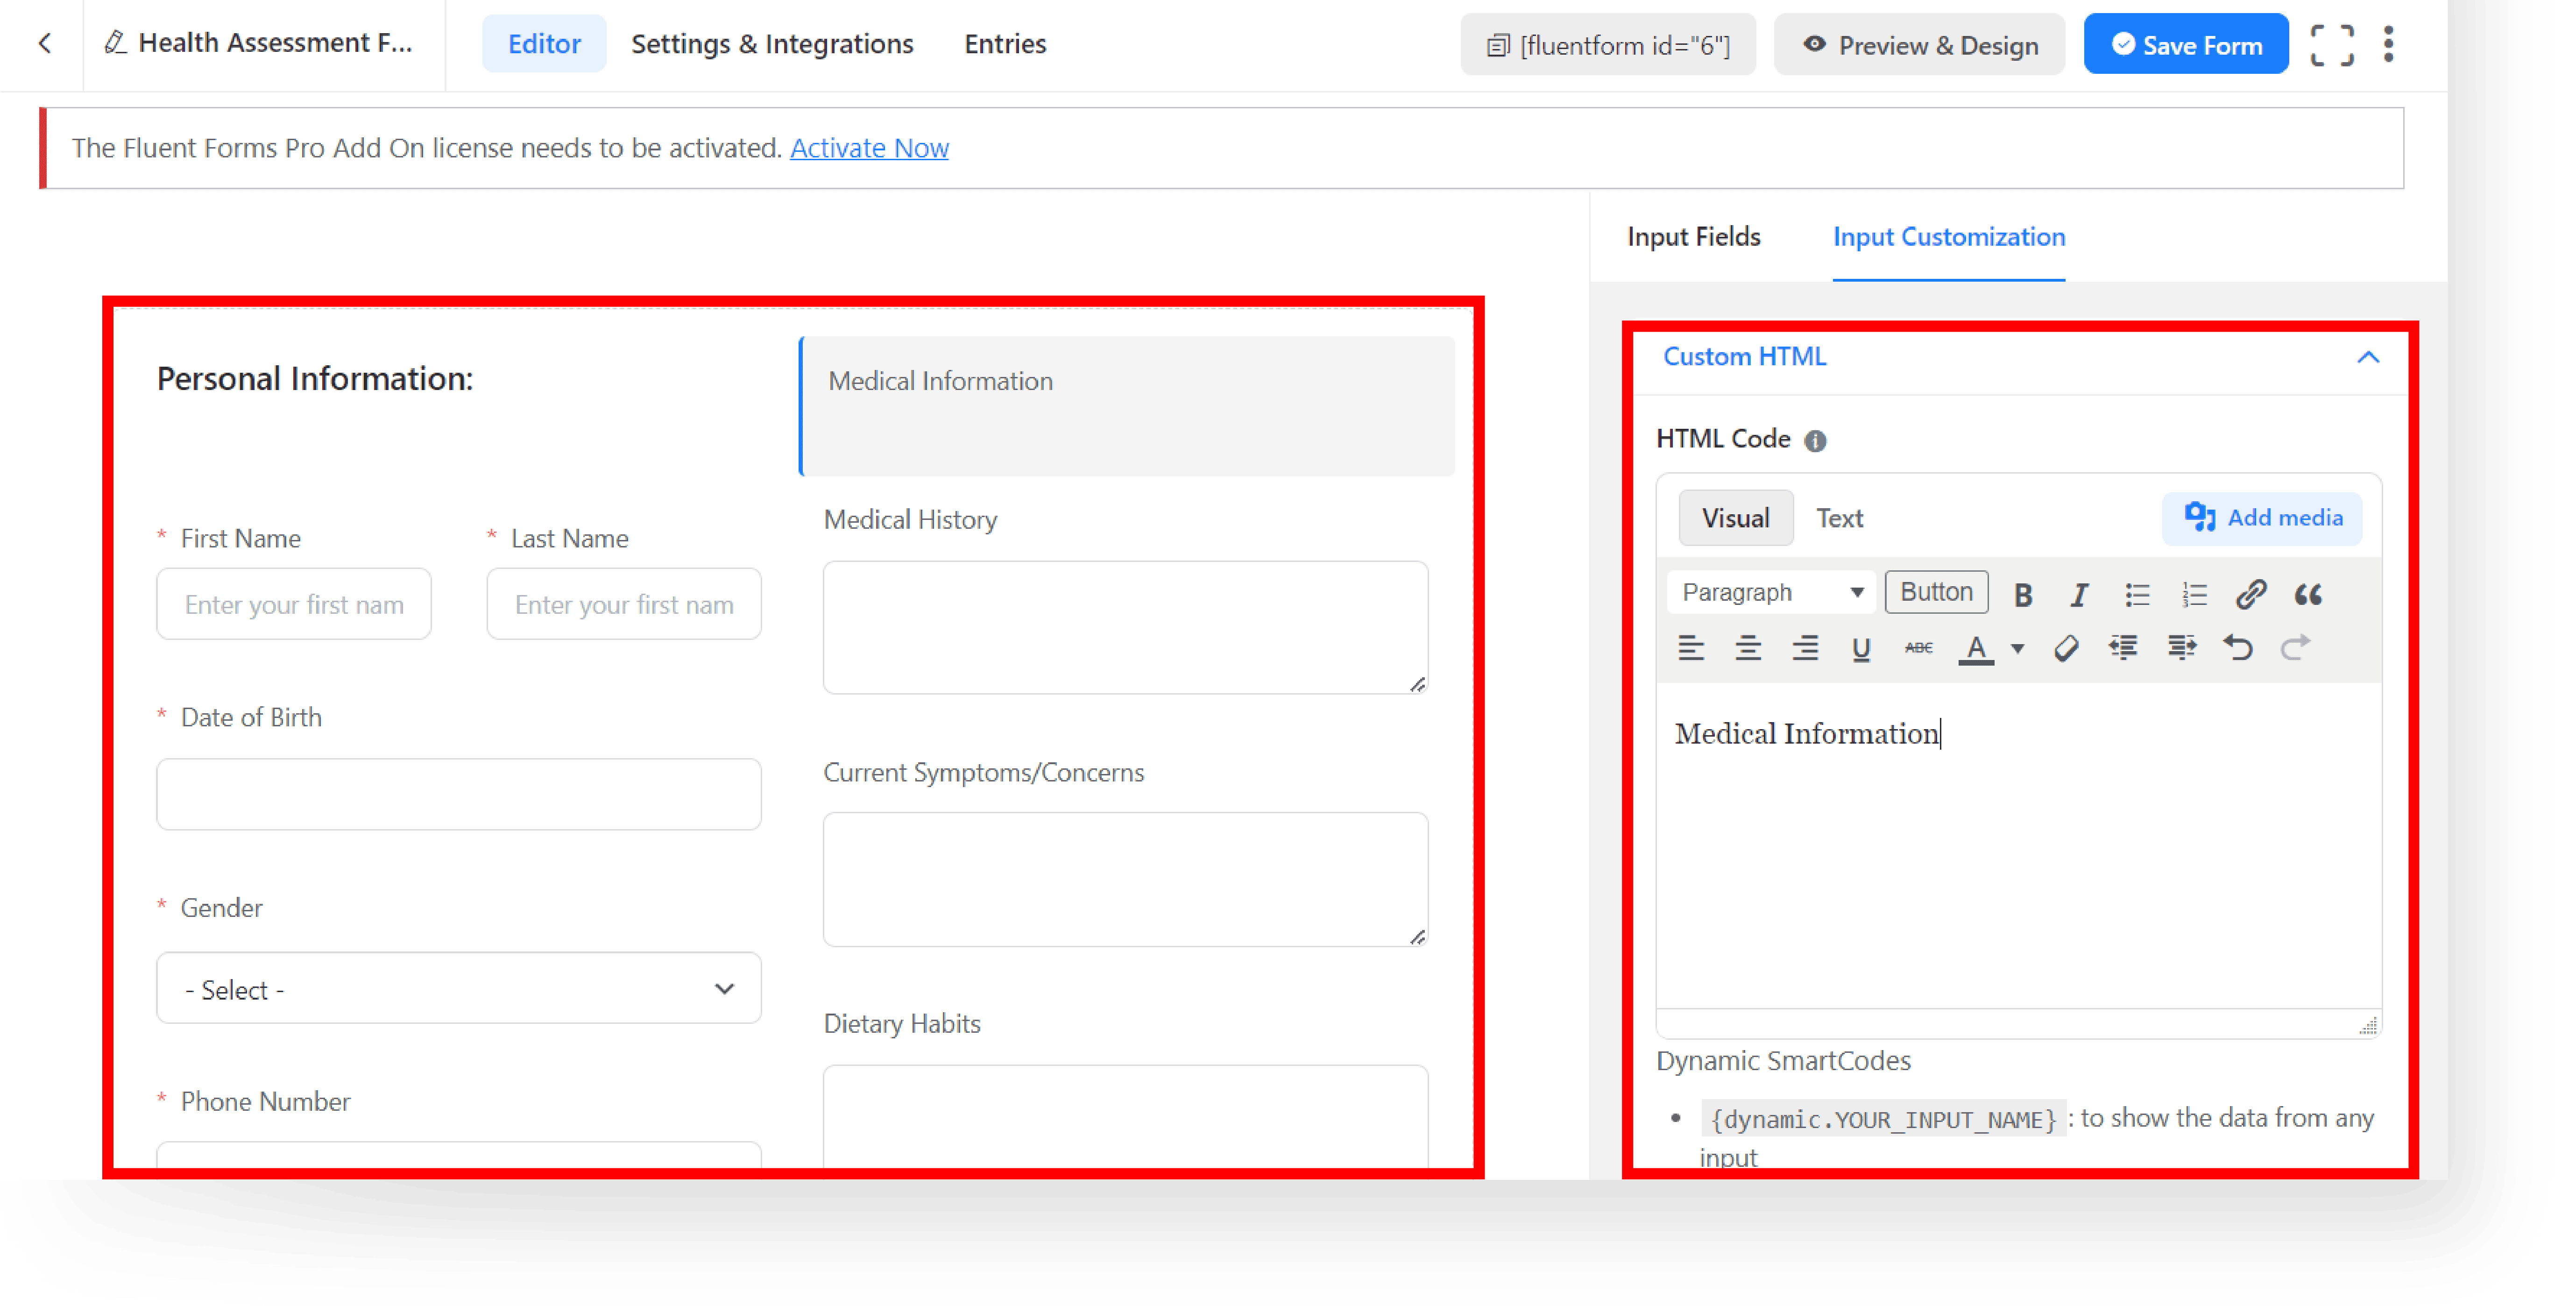
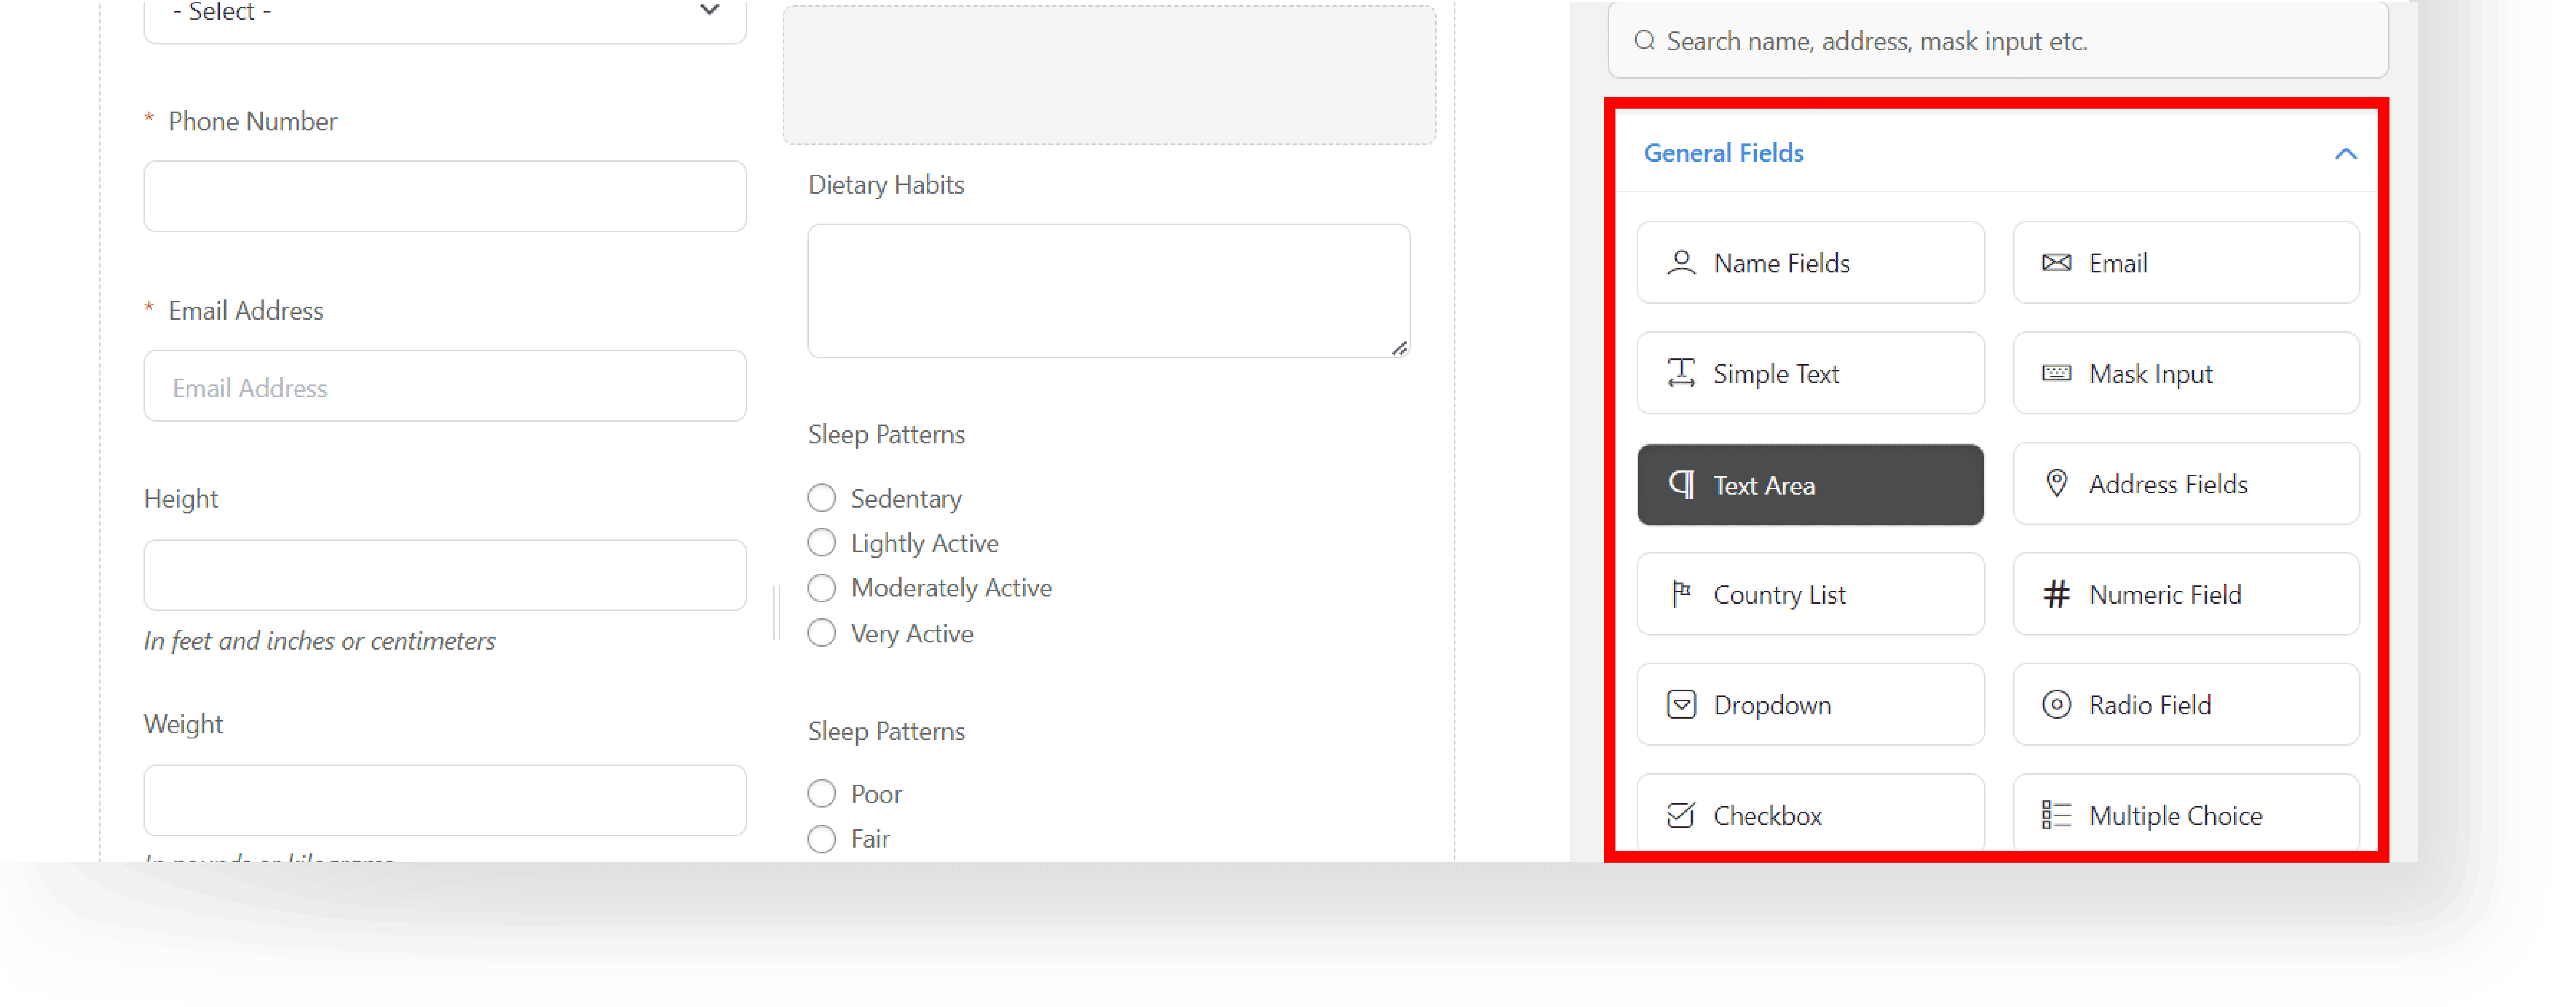
H. To add a new field, hover a field, then click the ‘+’ button in the editor to add new fields from a range of options.

Or click the input fields tab on the right side, then drag and drop the selected field.
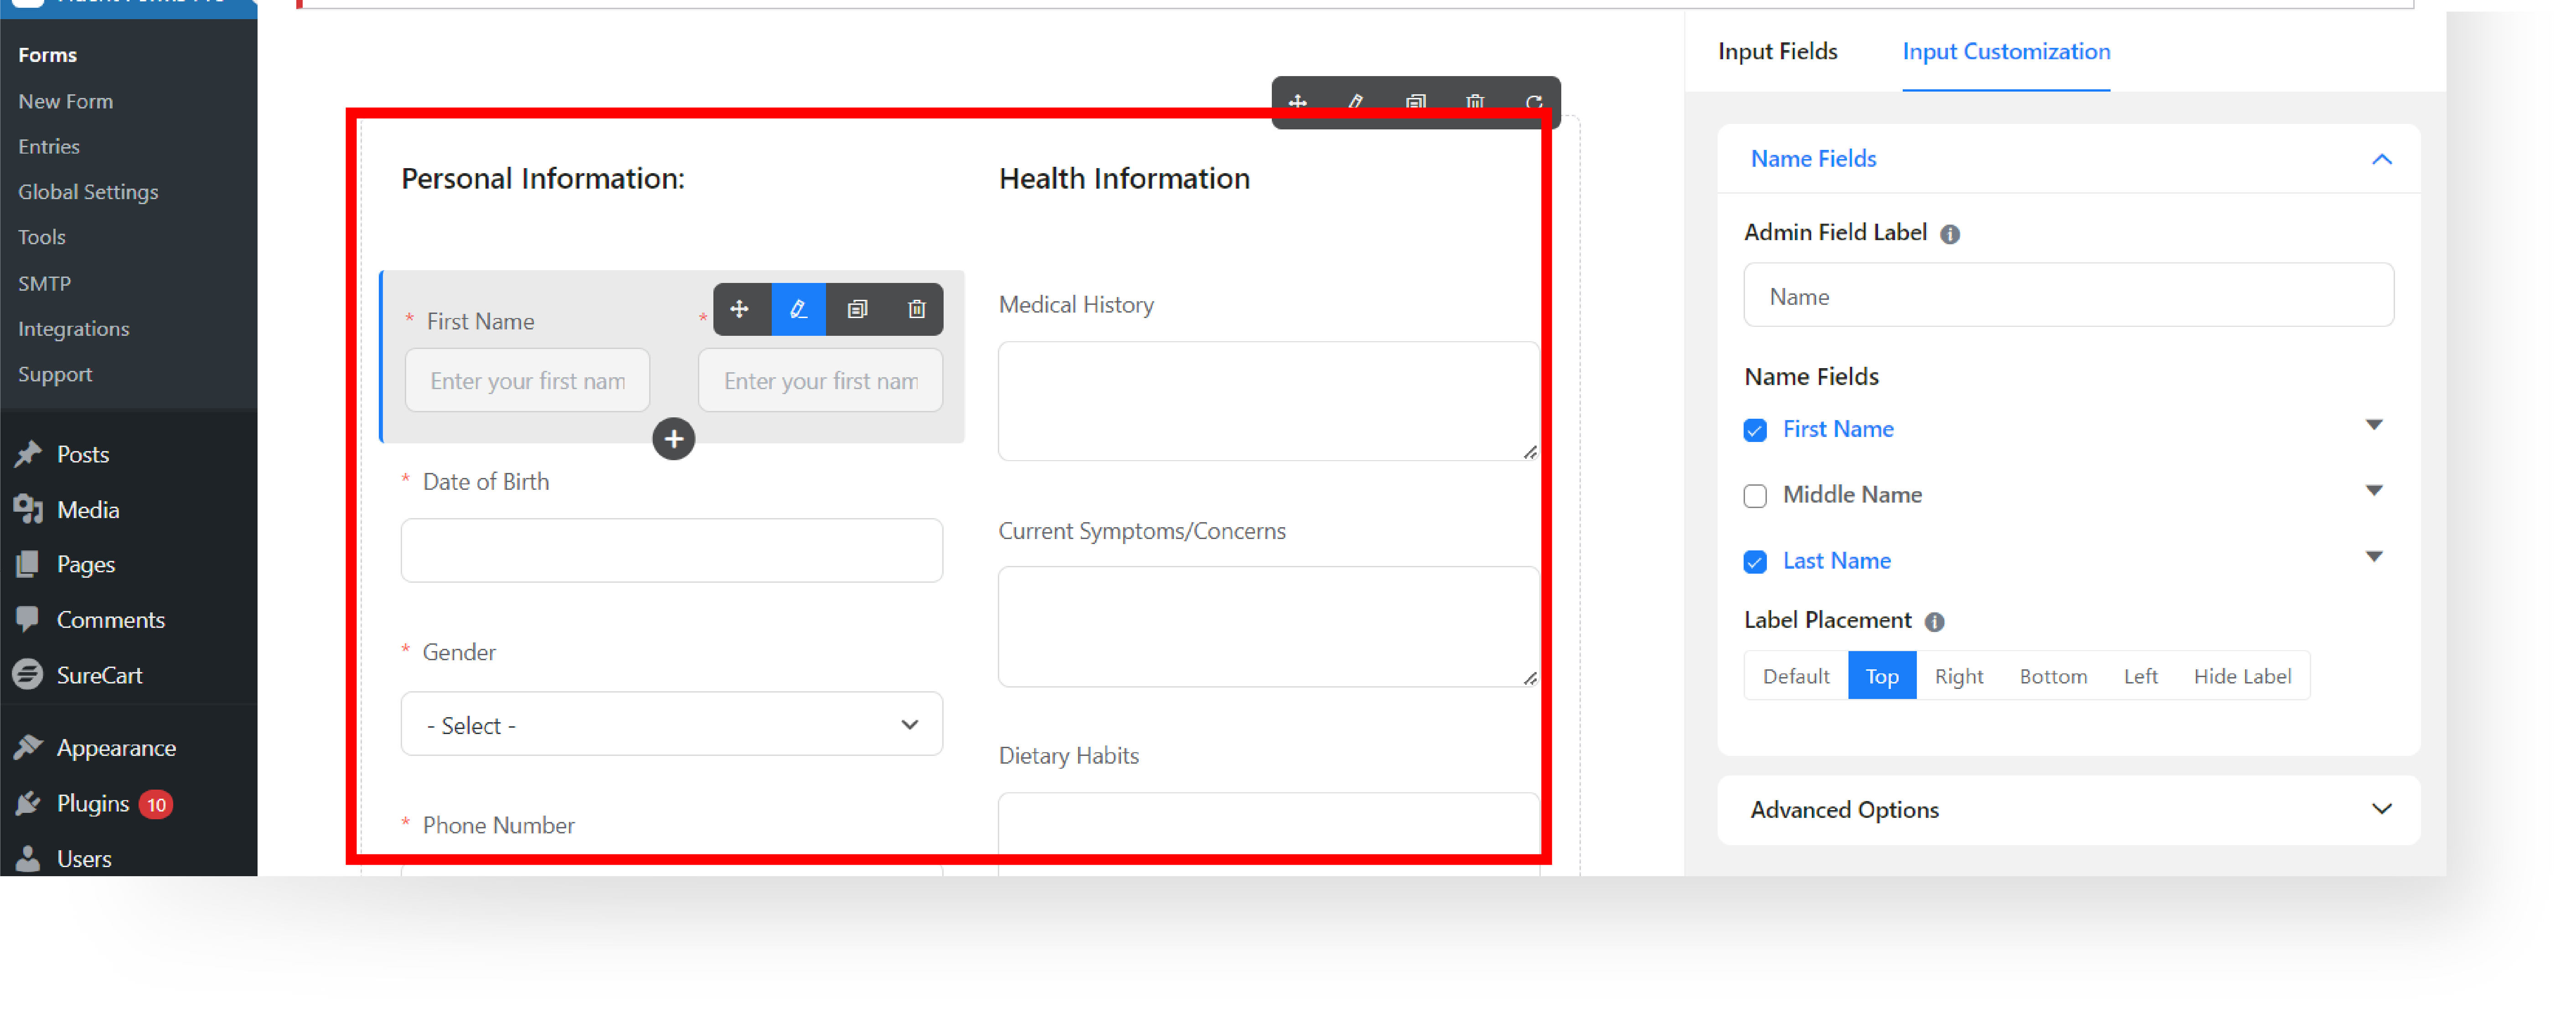
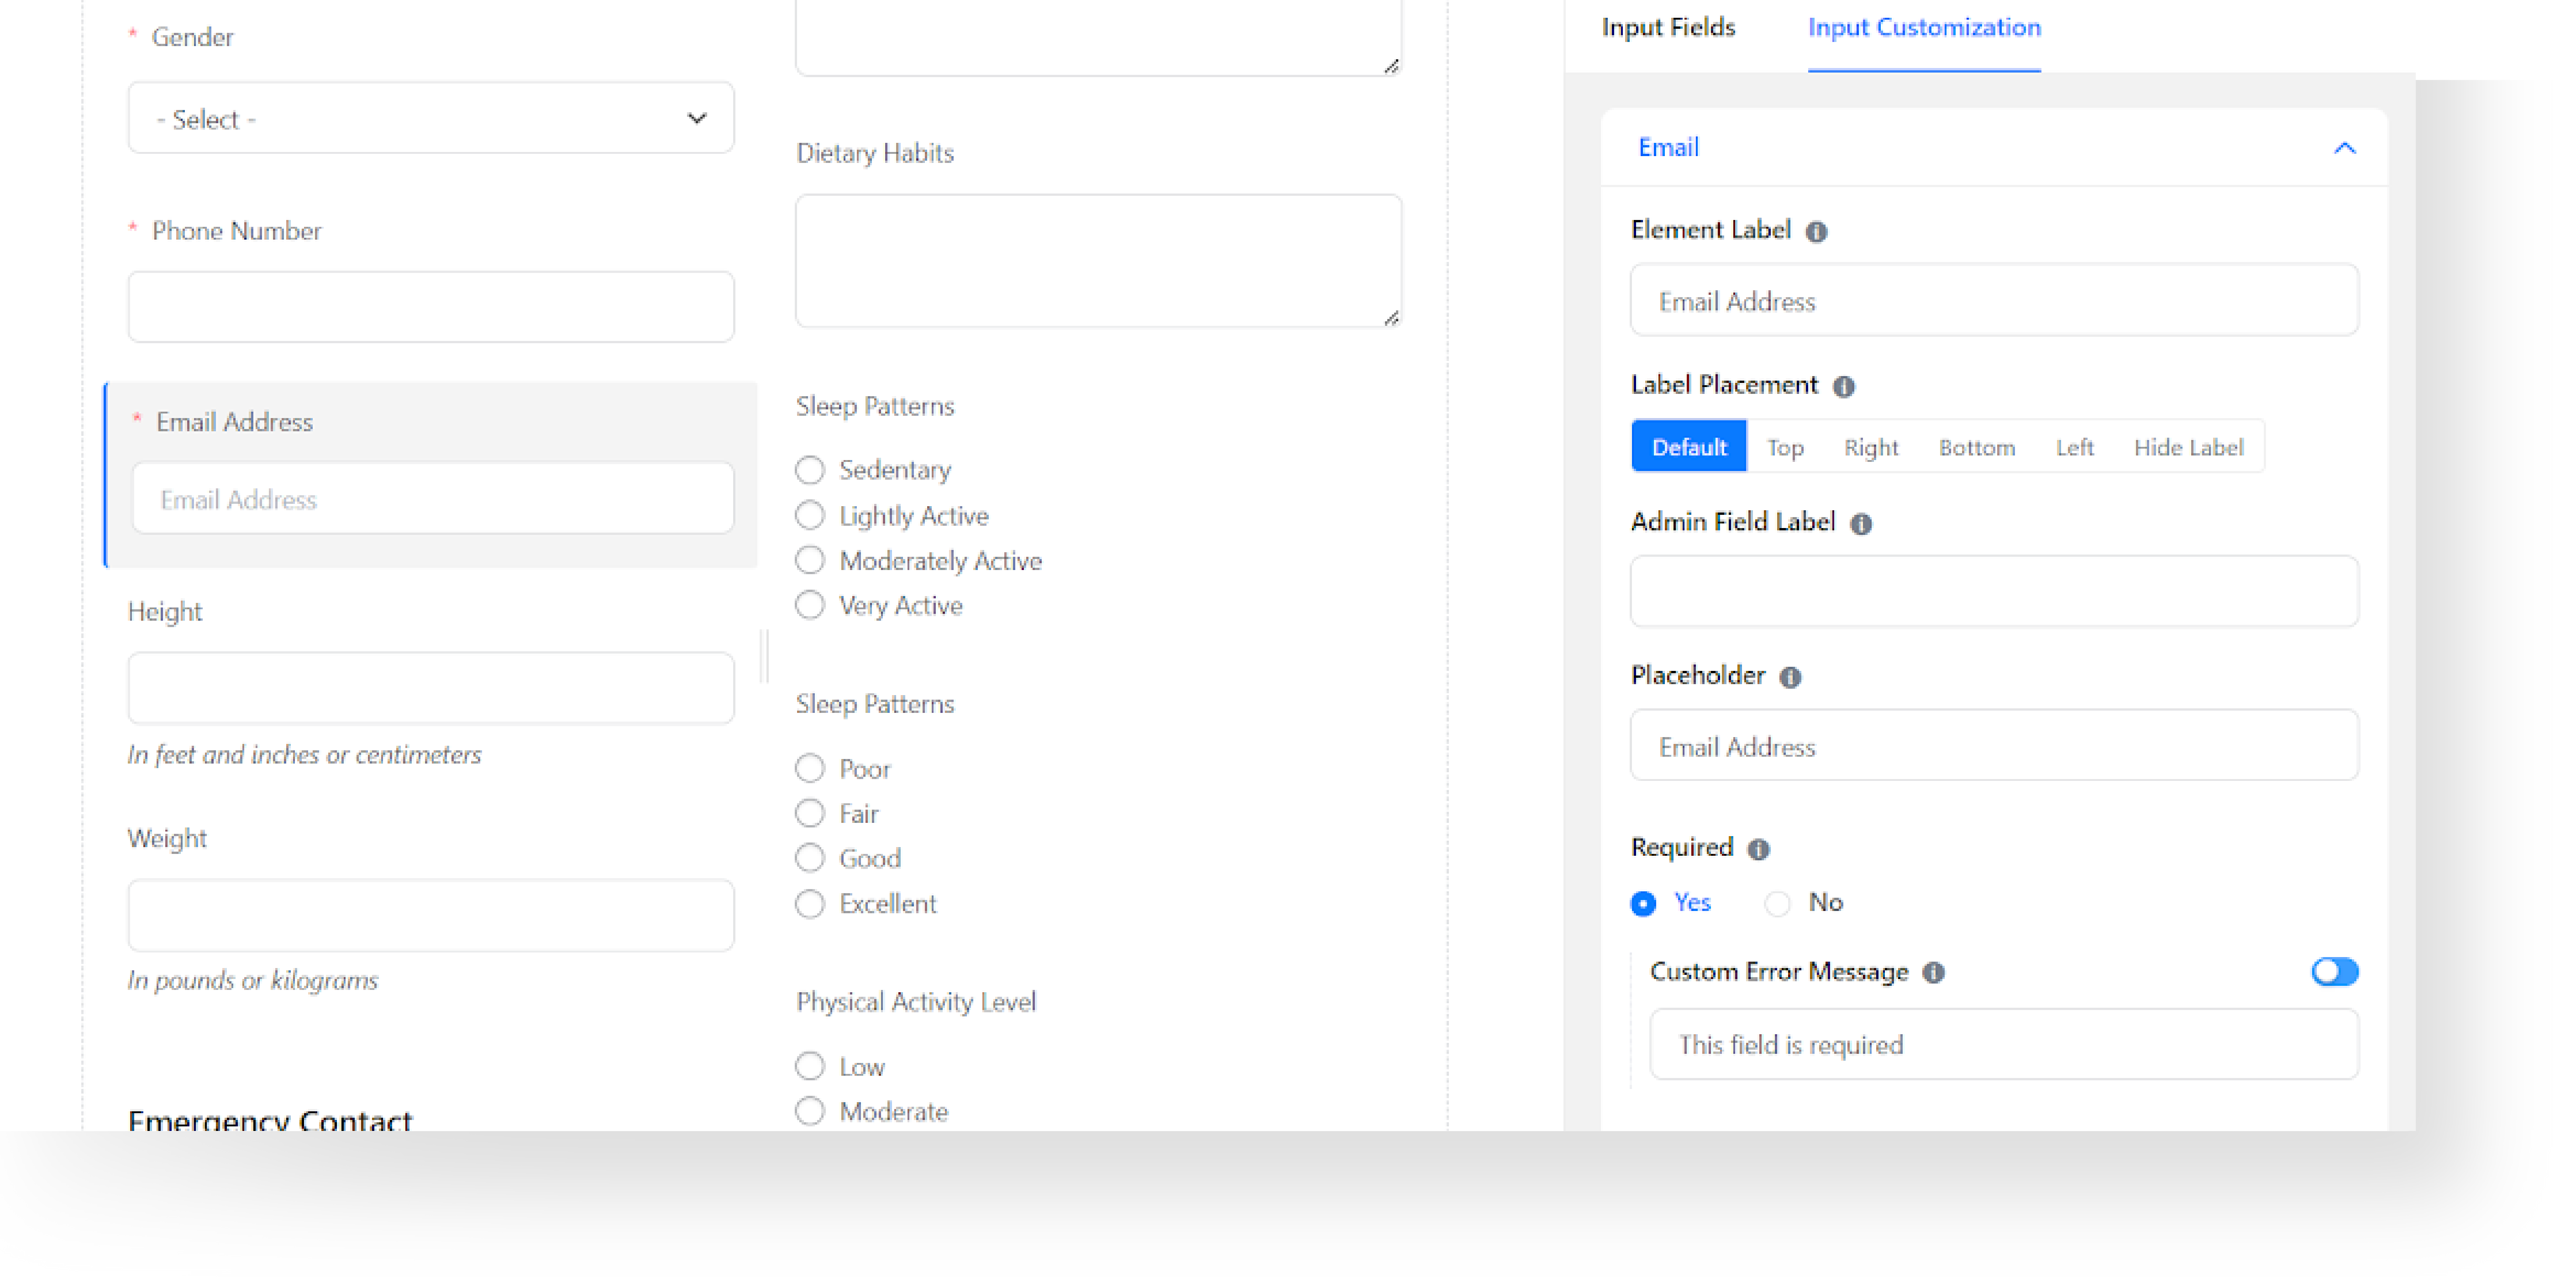
I. Rearrange fields within the form for a coherent flow and layout.
J. Tailor each fields settings for a customized look and functionality.
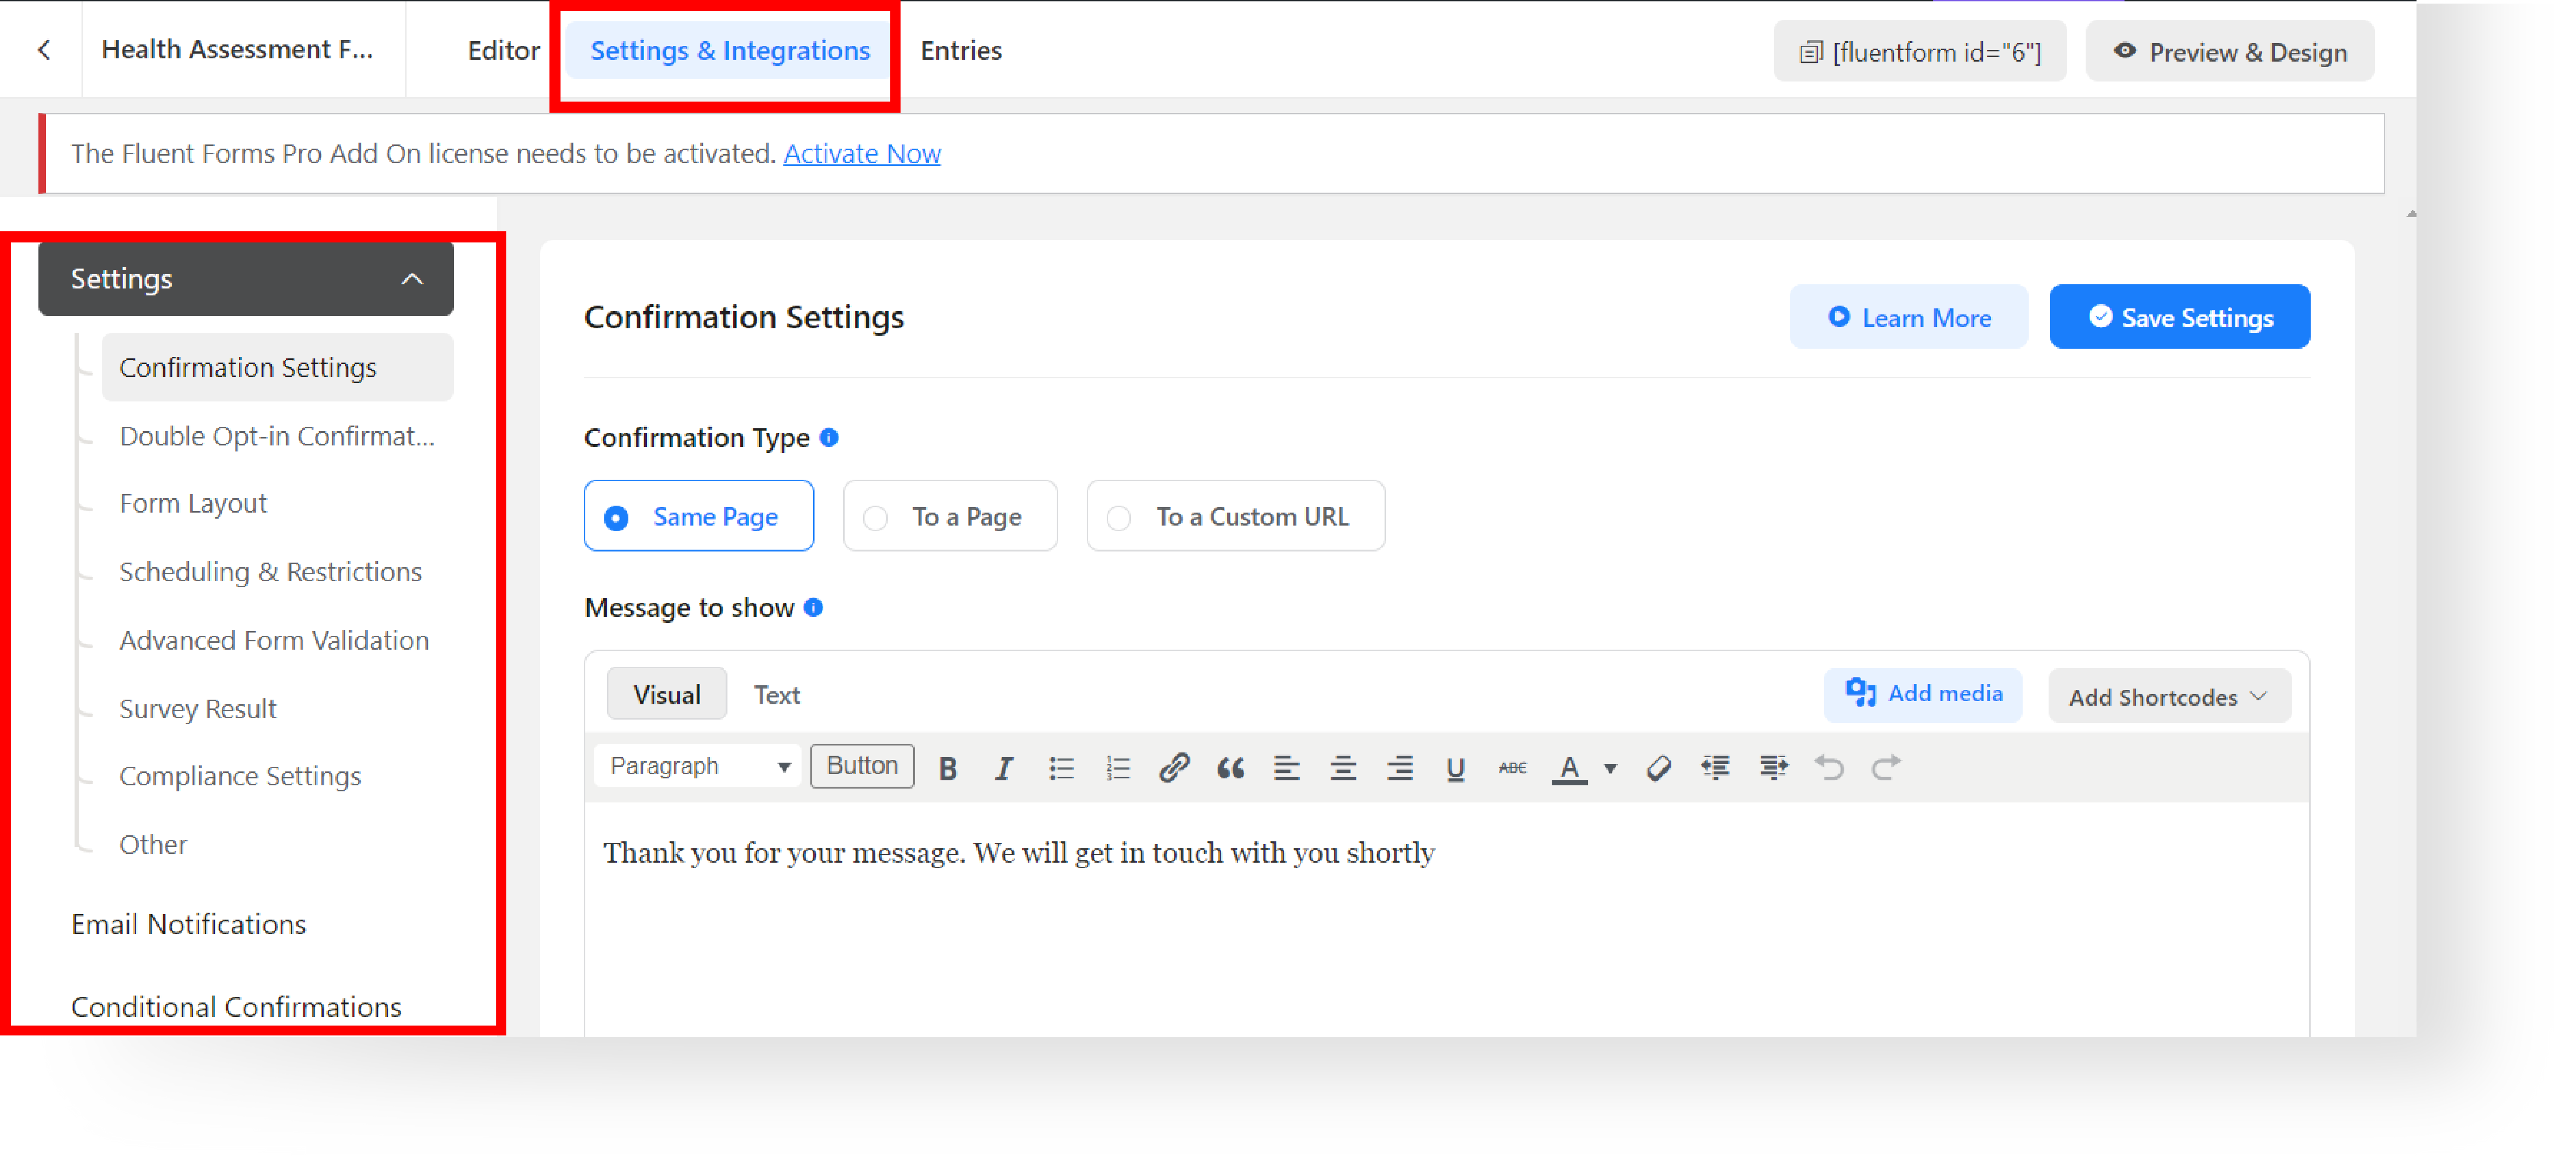
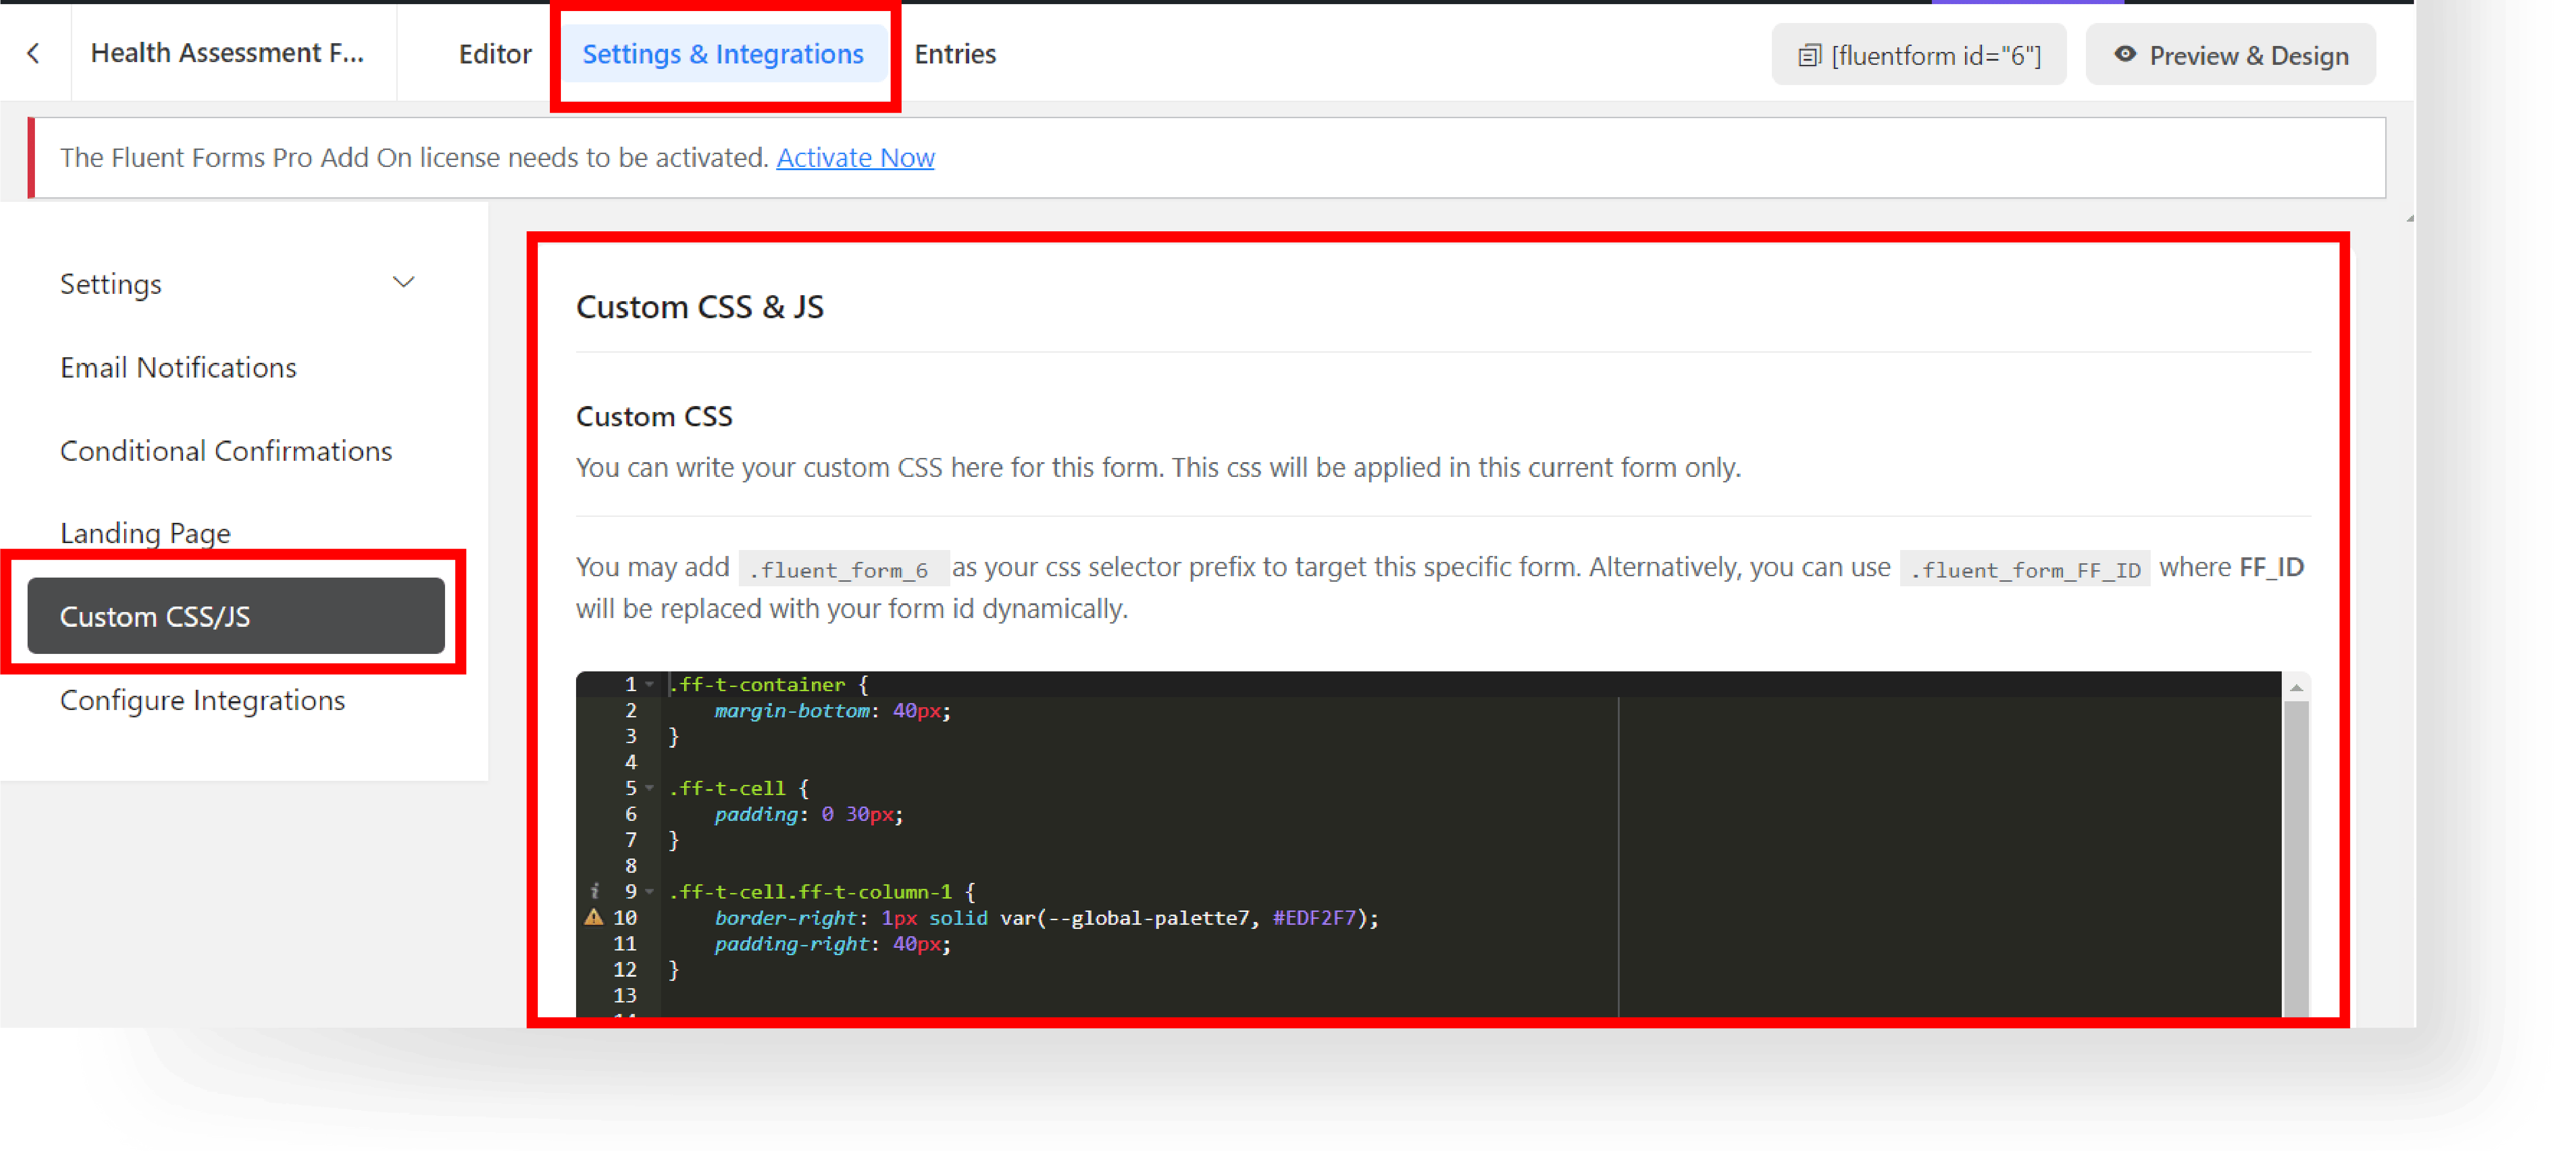
K. To Experiment with the advanced features click “Save Form”. Go to Settings & Integrations.
L. Use Fluent Forms‘ advanced tools for added functionality and engagement.
M. You can edit the responsive controls and add a custom CSS. After adding CSS and JS click “Save CSS and JS” at the bottom
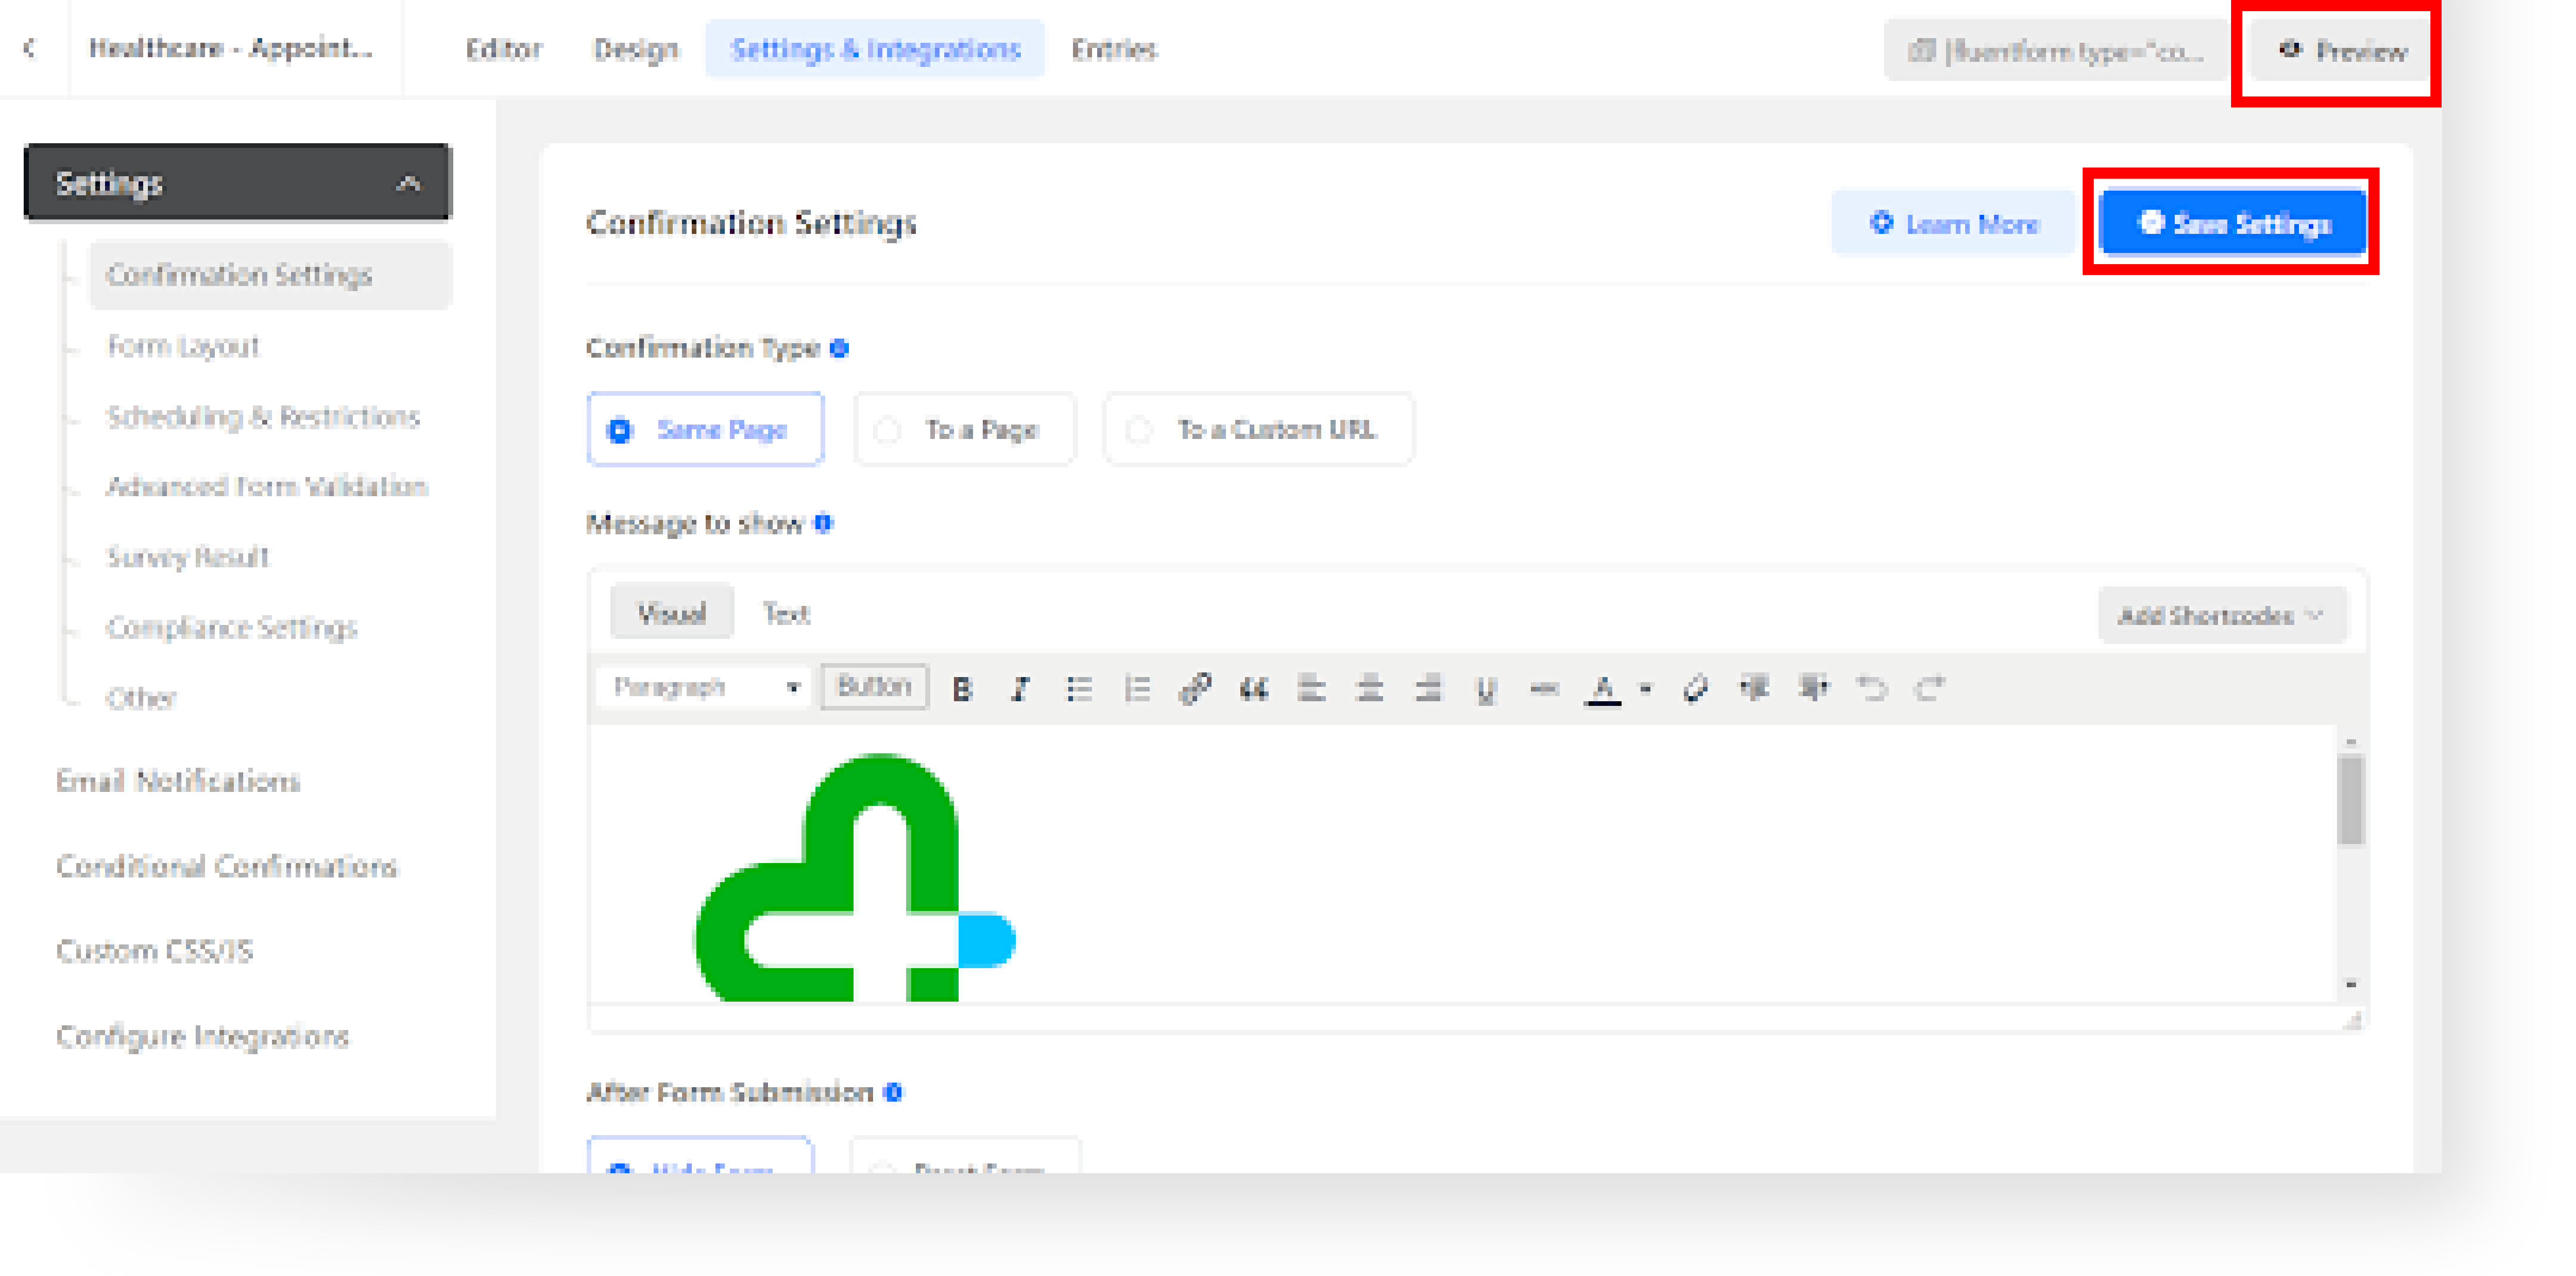
N. Regularly Preview your form to see the changes.
O. Once satisfied, close the preview tab and click “Save Settings” to apply the changes you’ve made.
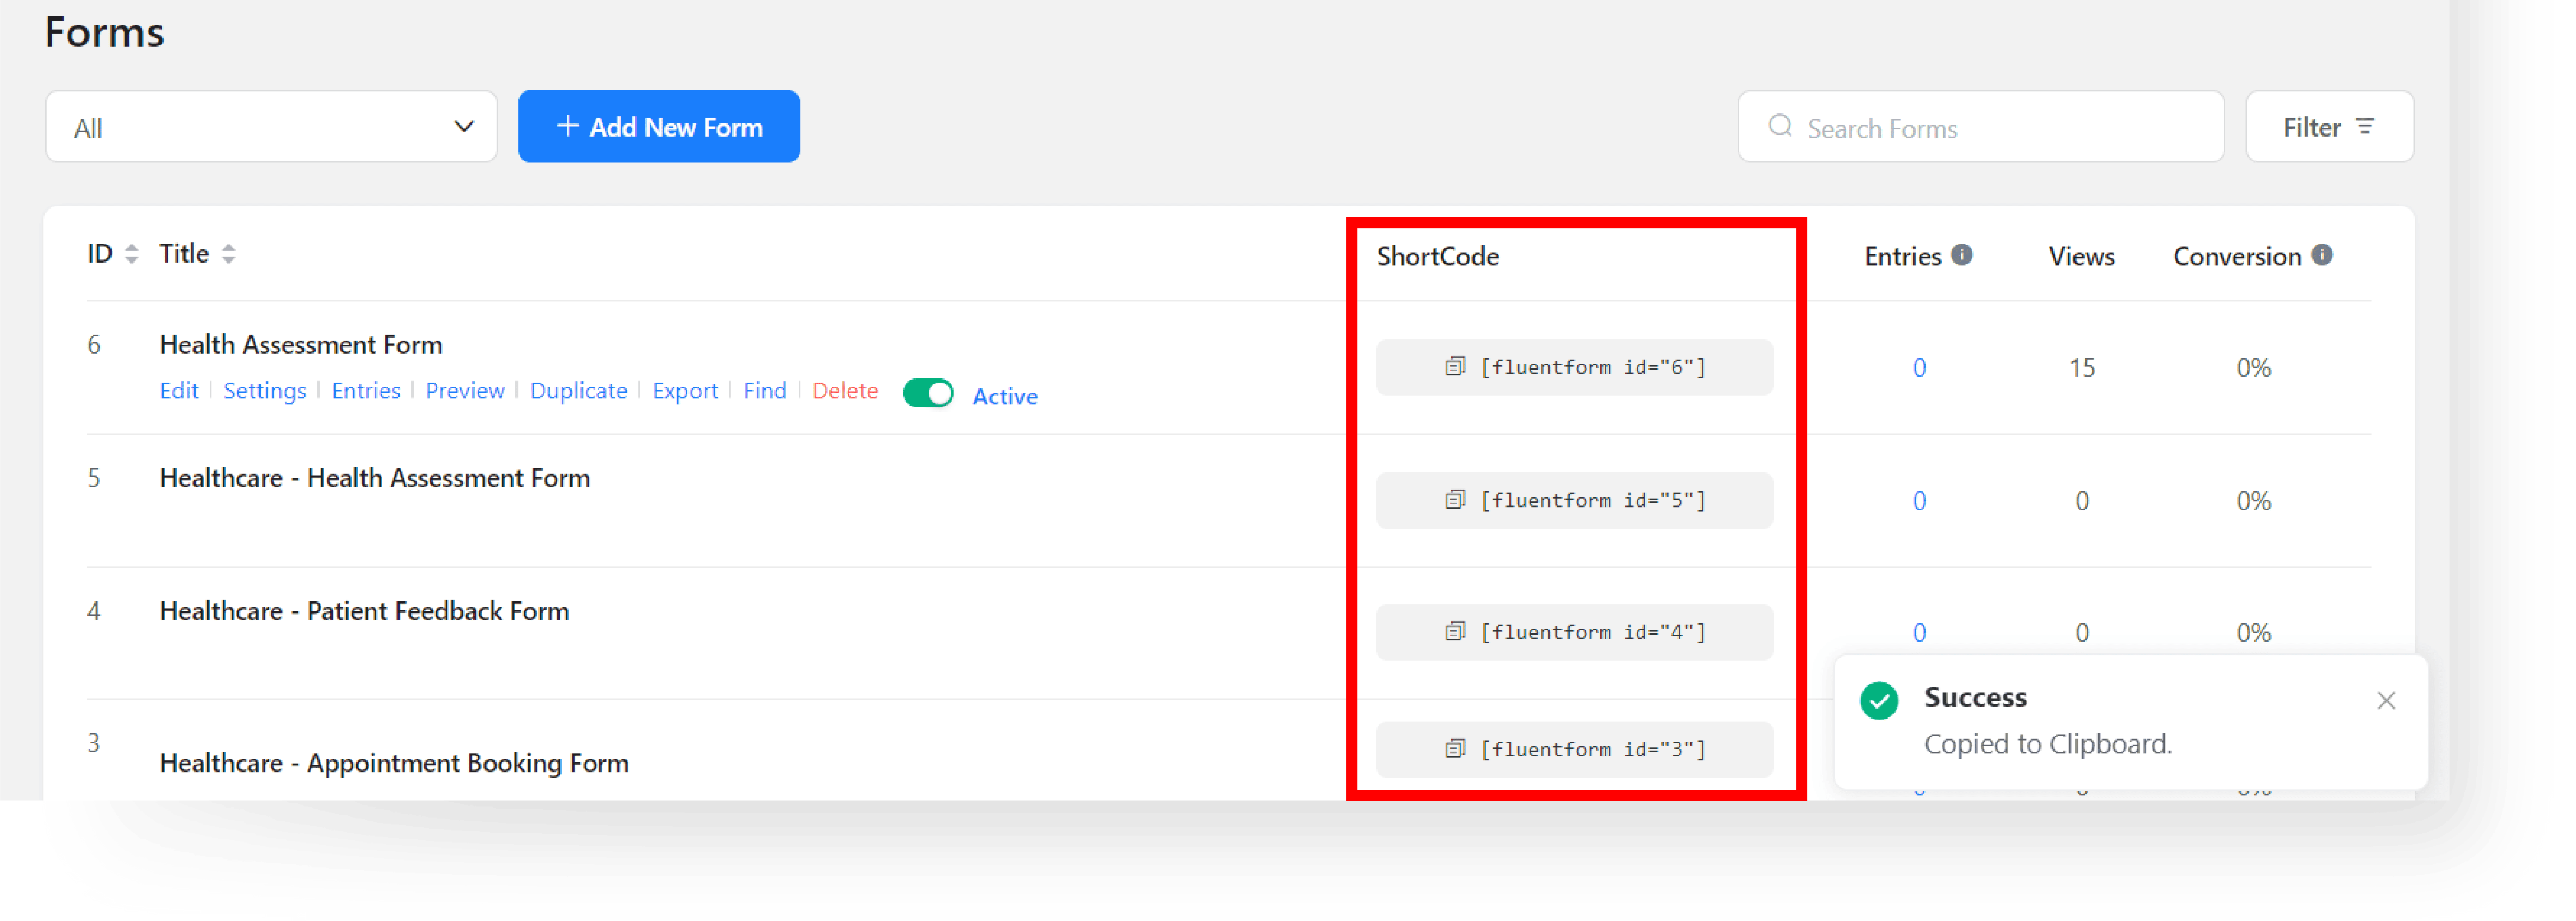
P. Go back to the Fluent Forms → Forms, copy the Fluent Forms shortcode, and add it to the post/page.
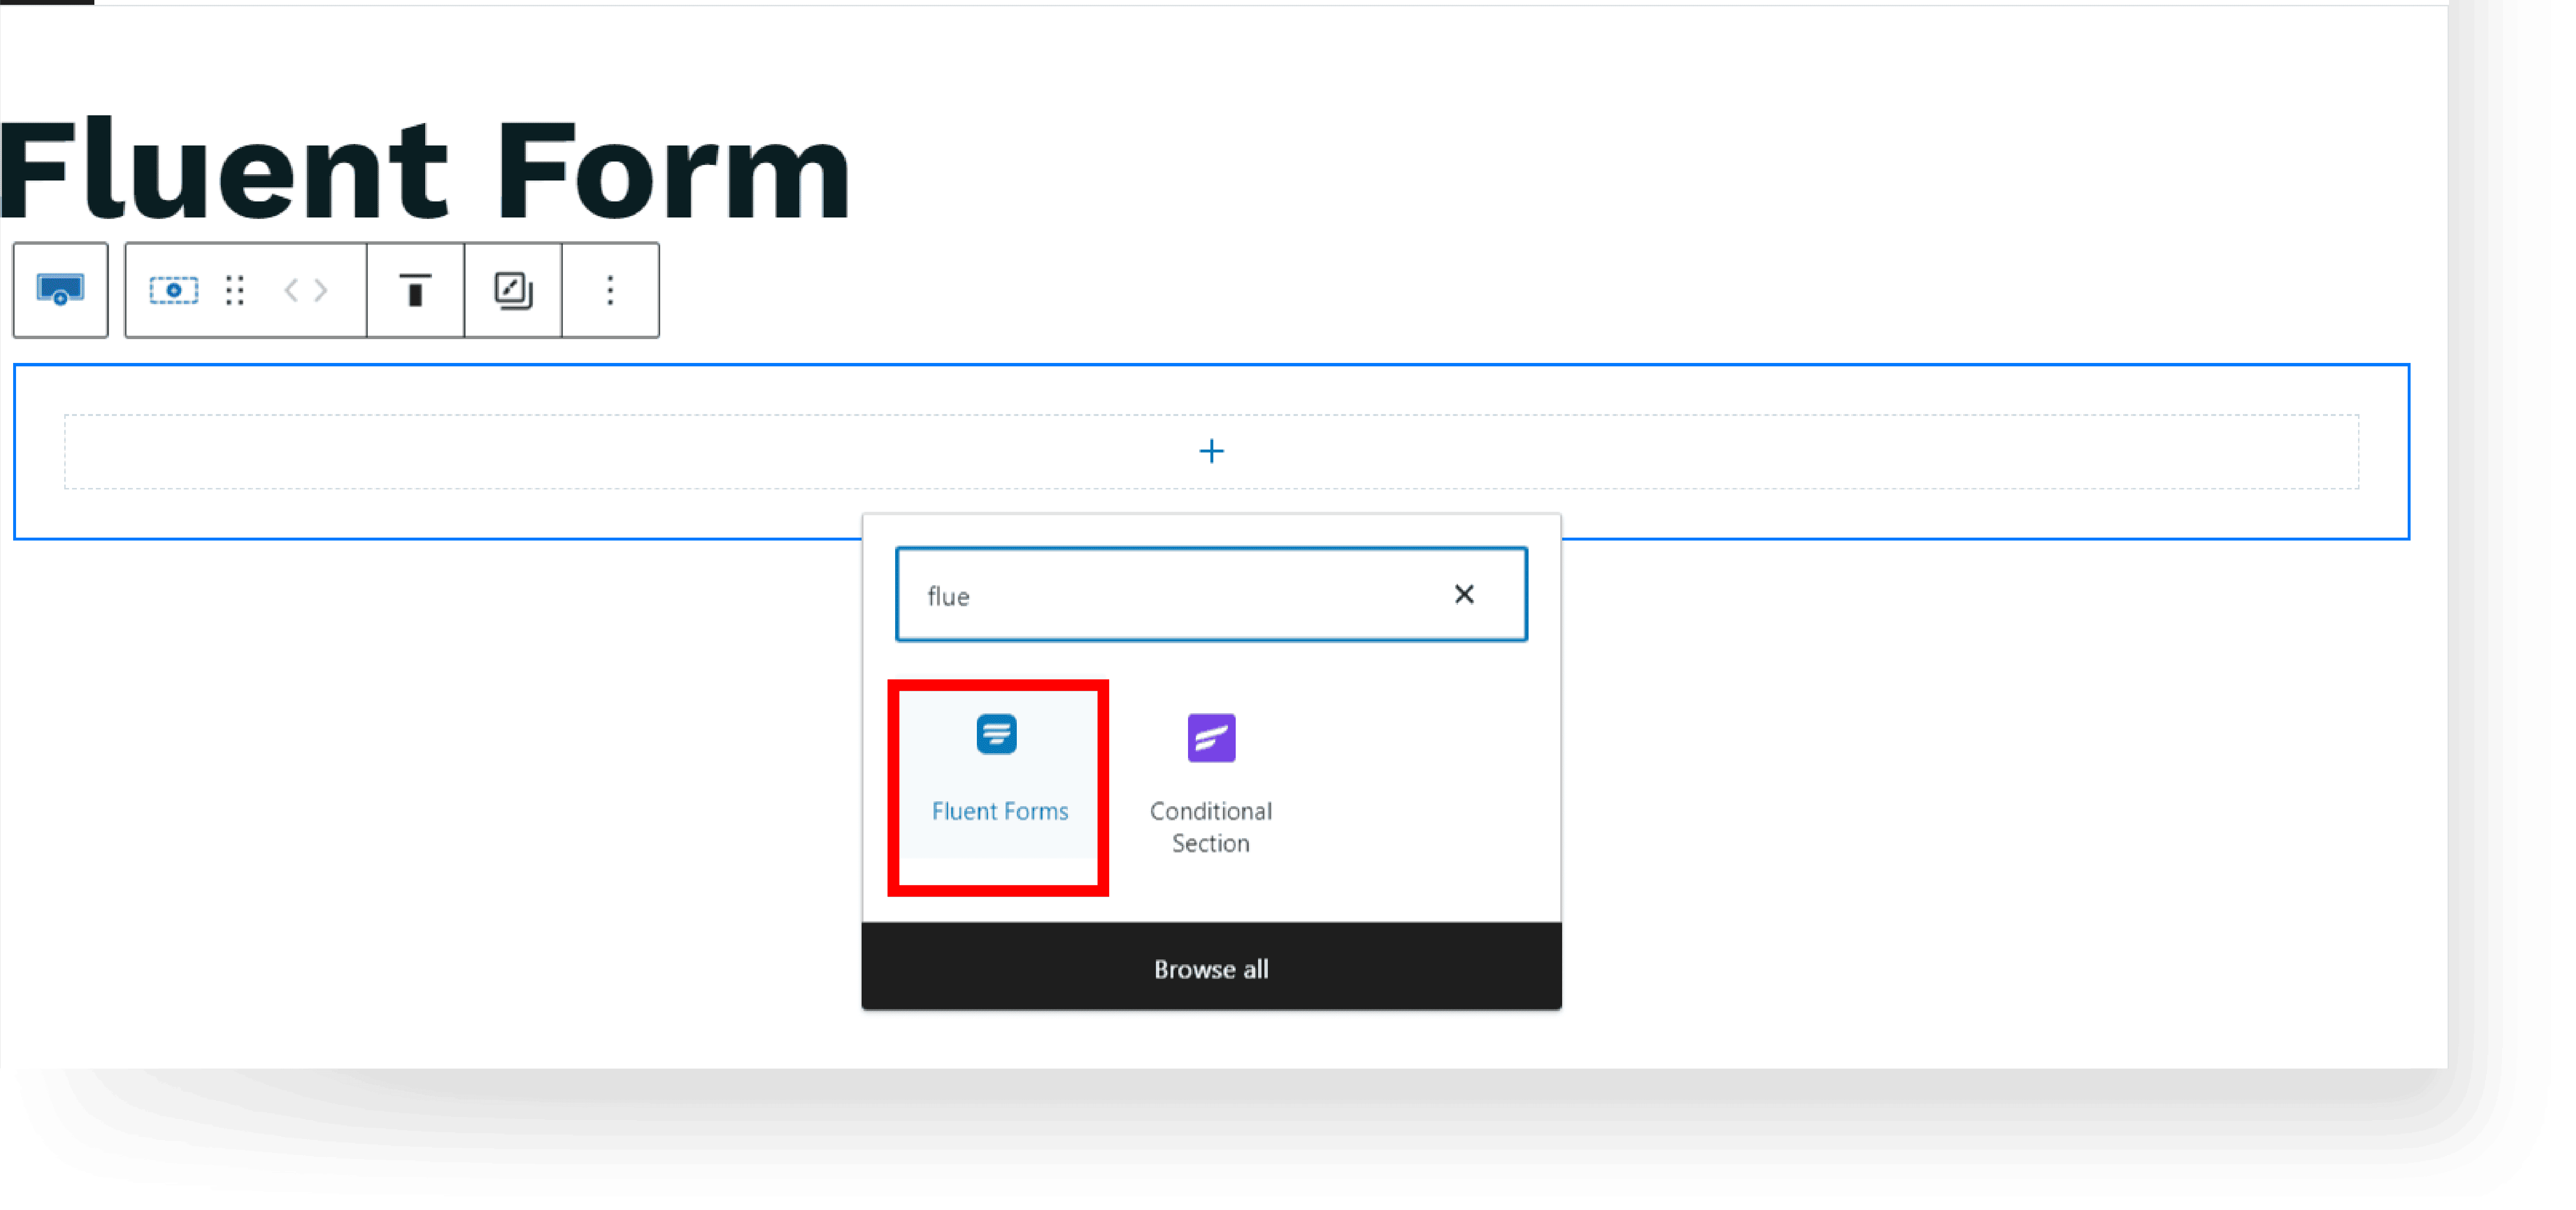
Or by using the Fluent Forms block and choosing the desired form to be added to the post/page.
Q. After adding the form, click Publish/Update, and View the page/post to test the form.
R. Test the form to ensure it works as intended and provides a smooth user experience.
Step 3: Customize Email Templates #
A. In your WordPress dashboard, navigate to FluentCRM → Contacts.
B. To add a new contact, click + Add Contact button.
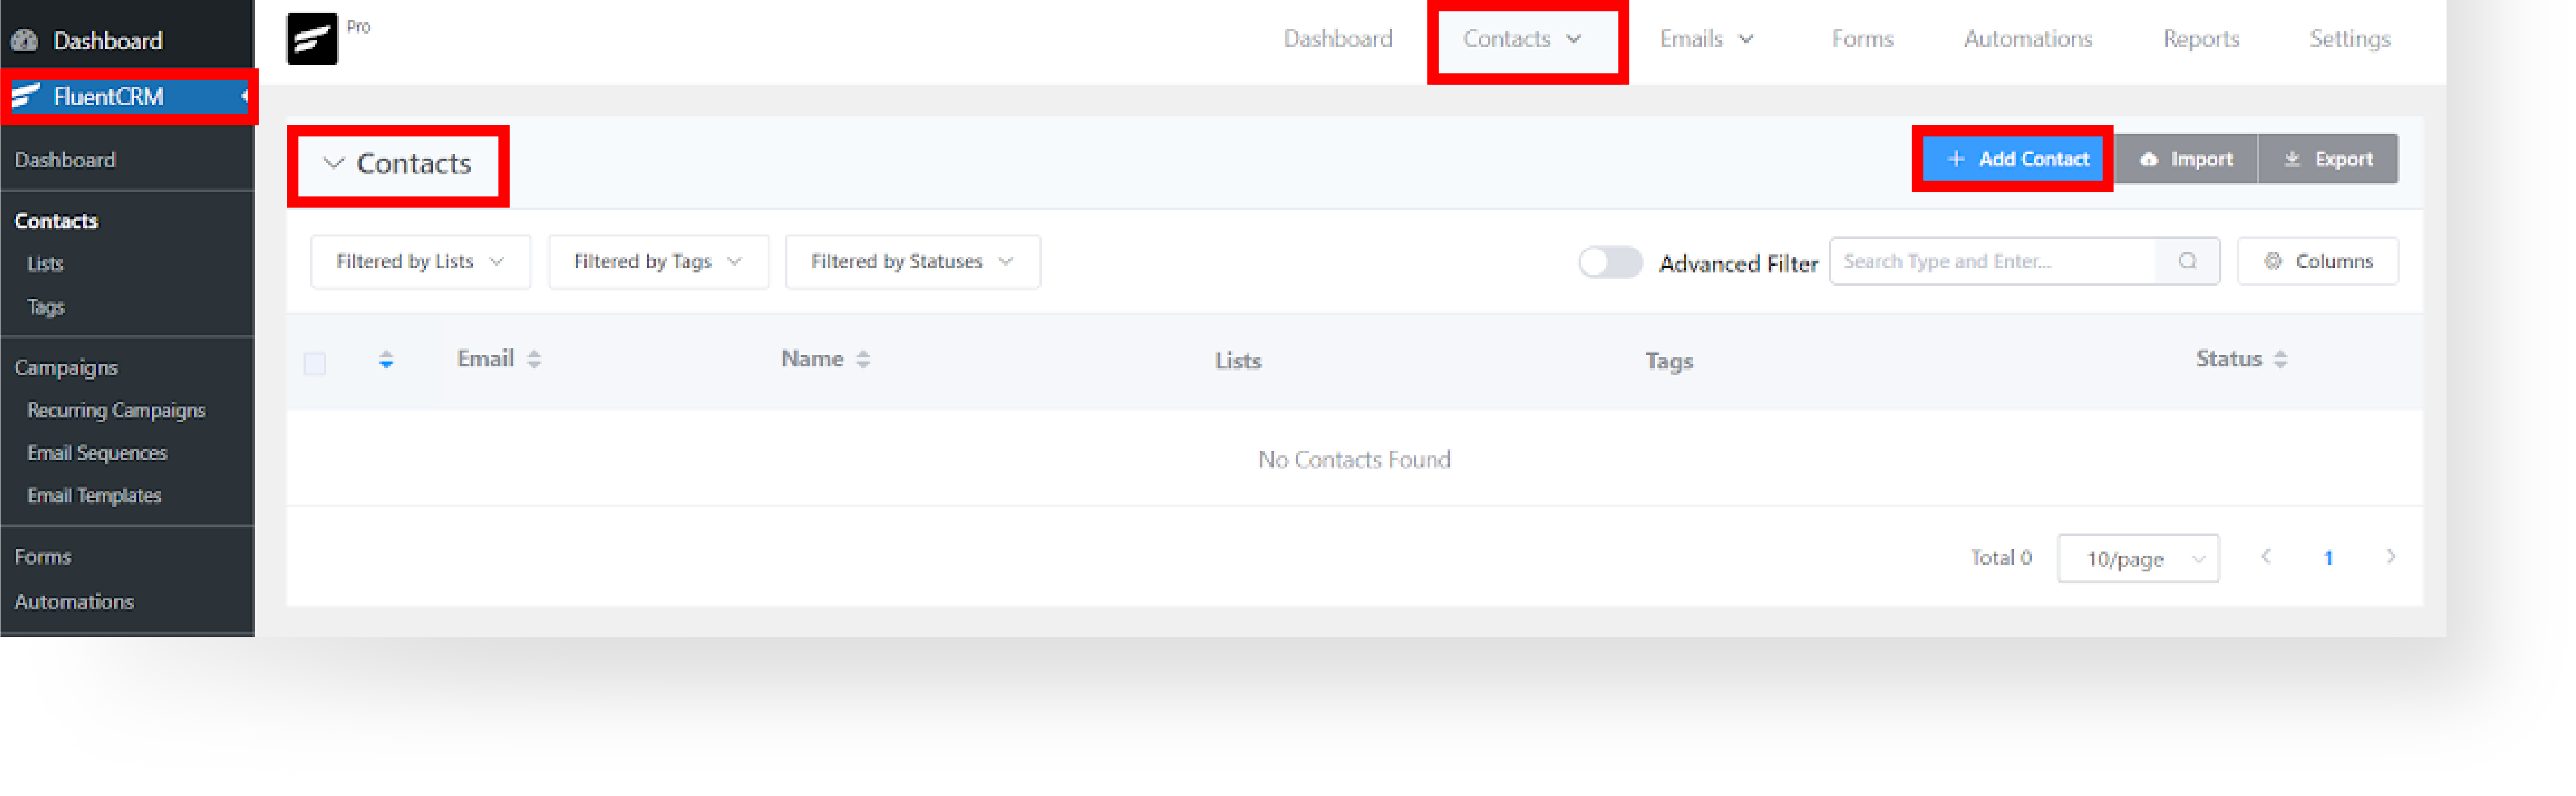
C. Insert the following information in the fields, then click Create Contact.
D. After adding a contact, you can use this to test the Email Templates.
E. Navigate to FluentCRM → Email Templates.
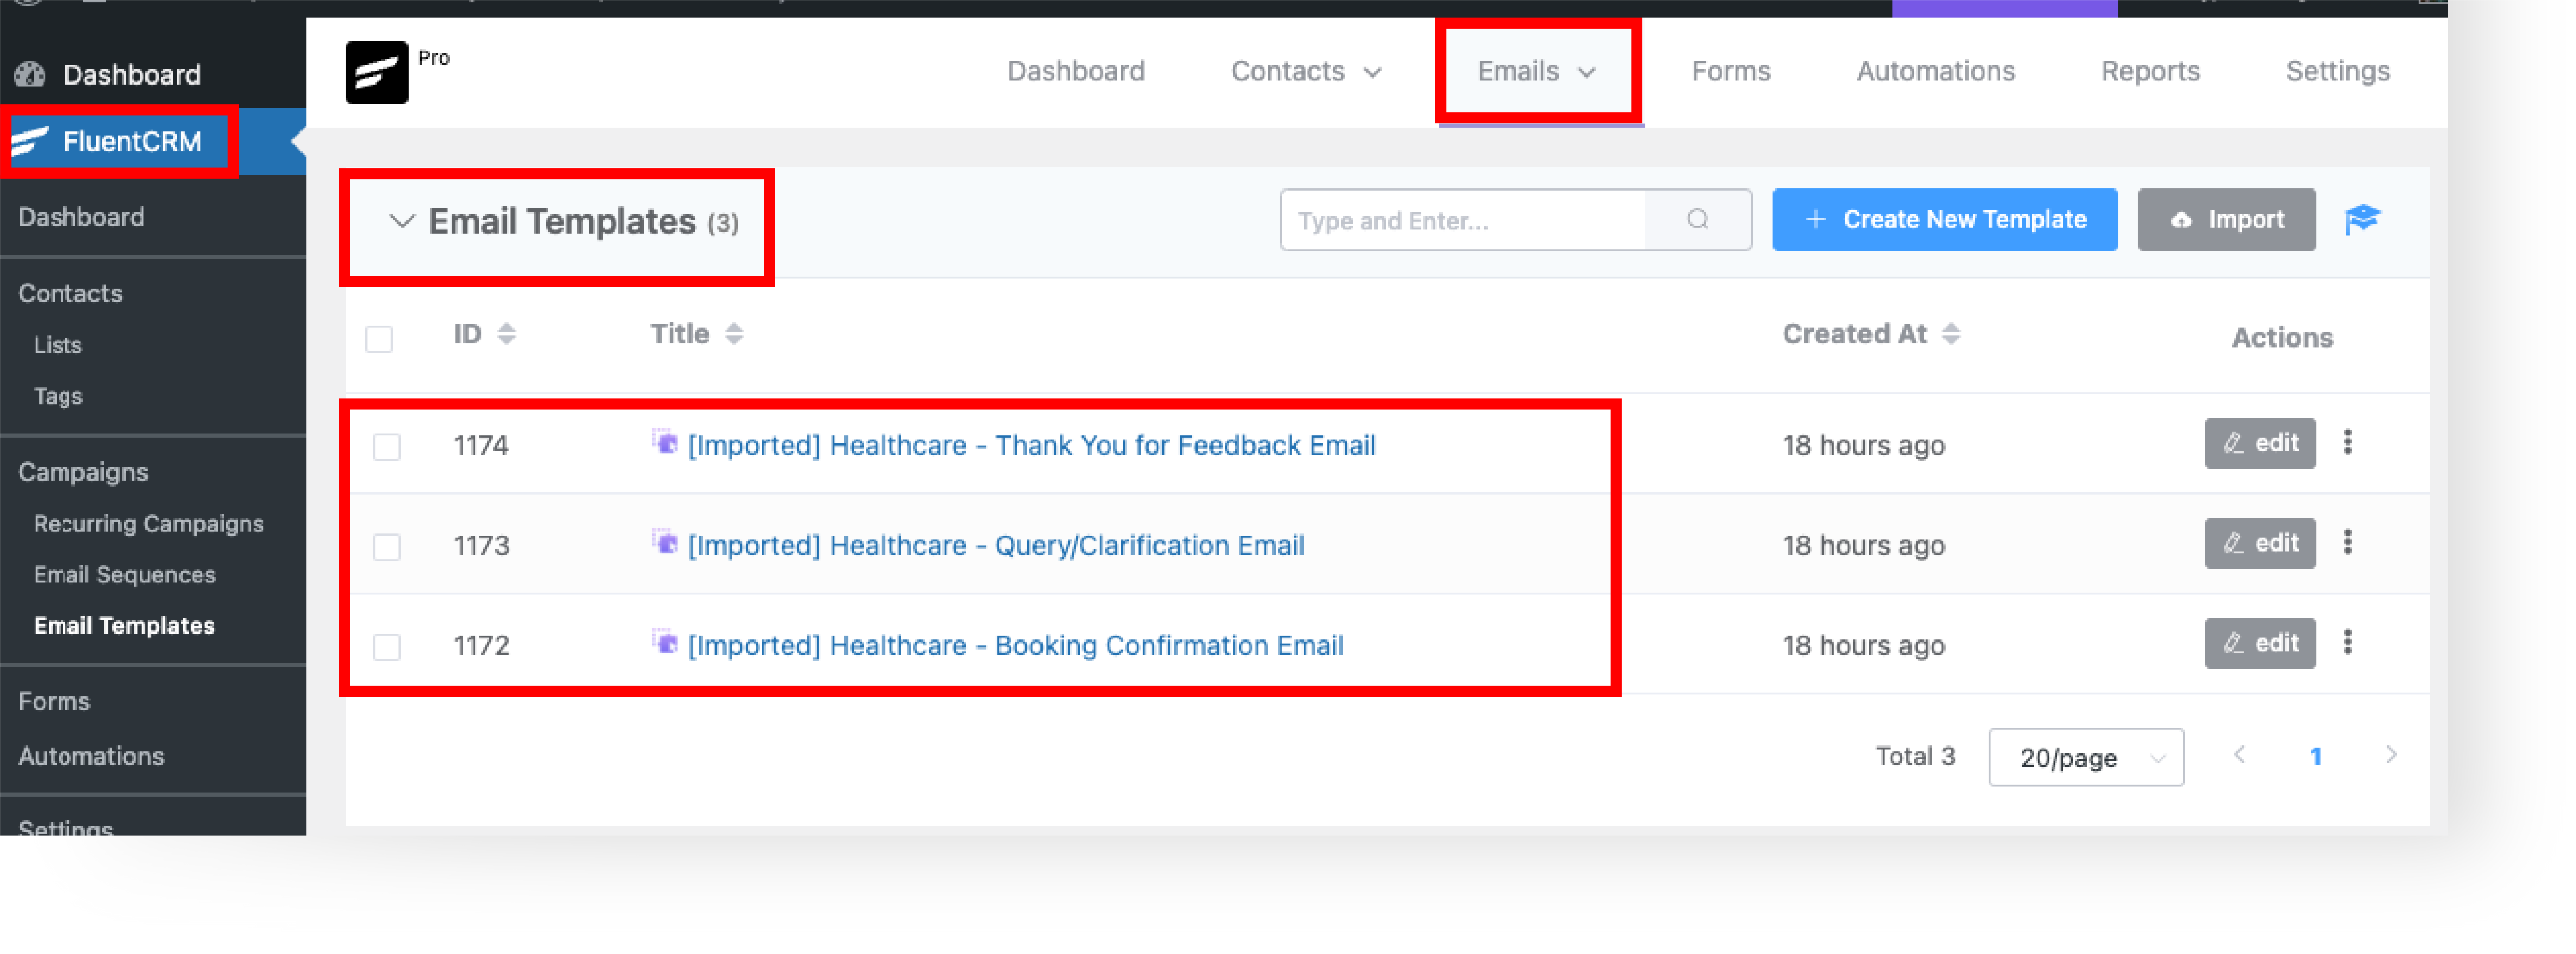
F. Select a template that aligns with your campaign goals, and click Edit.

G. Explore the structure and elements of the chosen template.
H. Identify areas for customization like text fields, buttons, or layout changes.
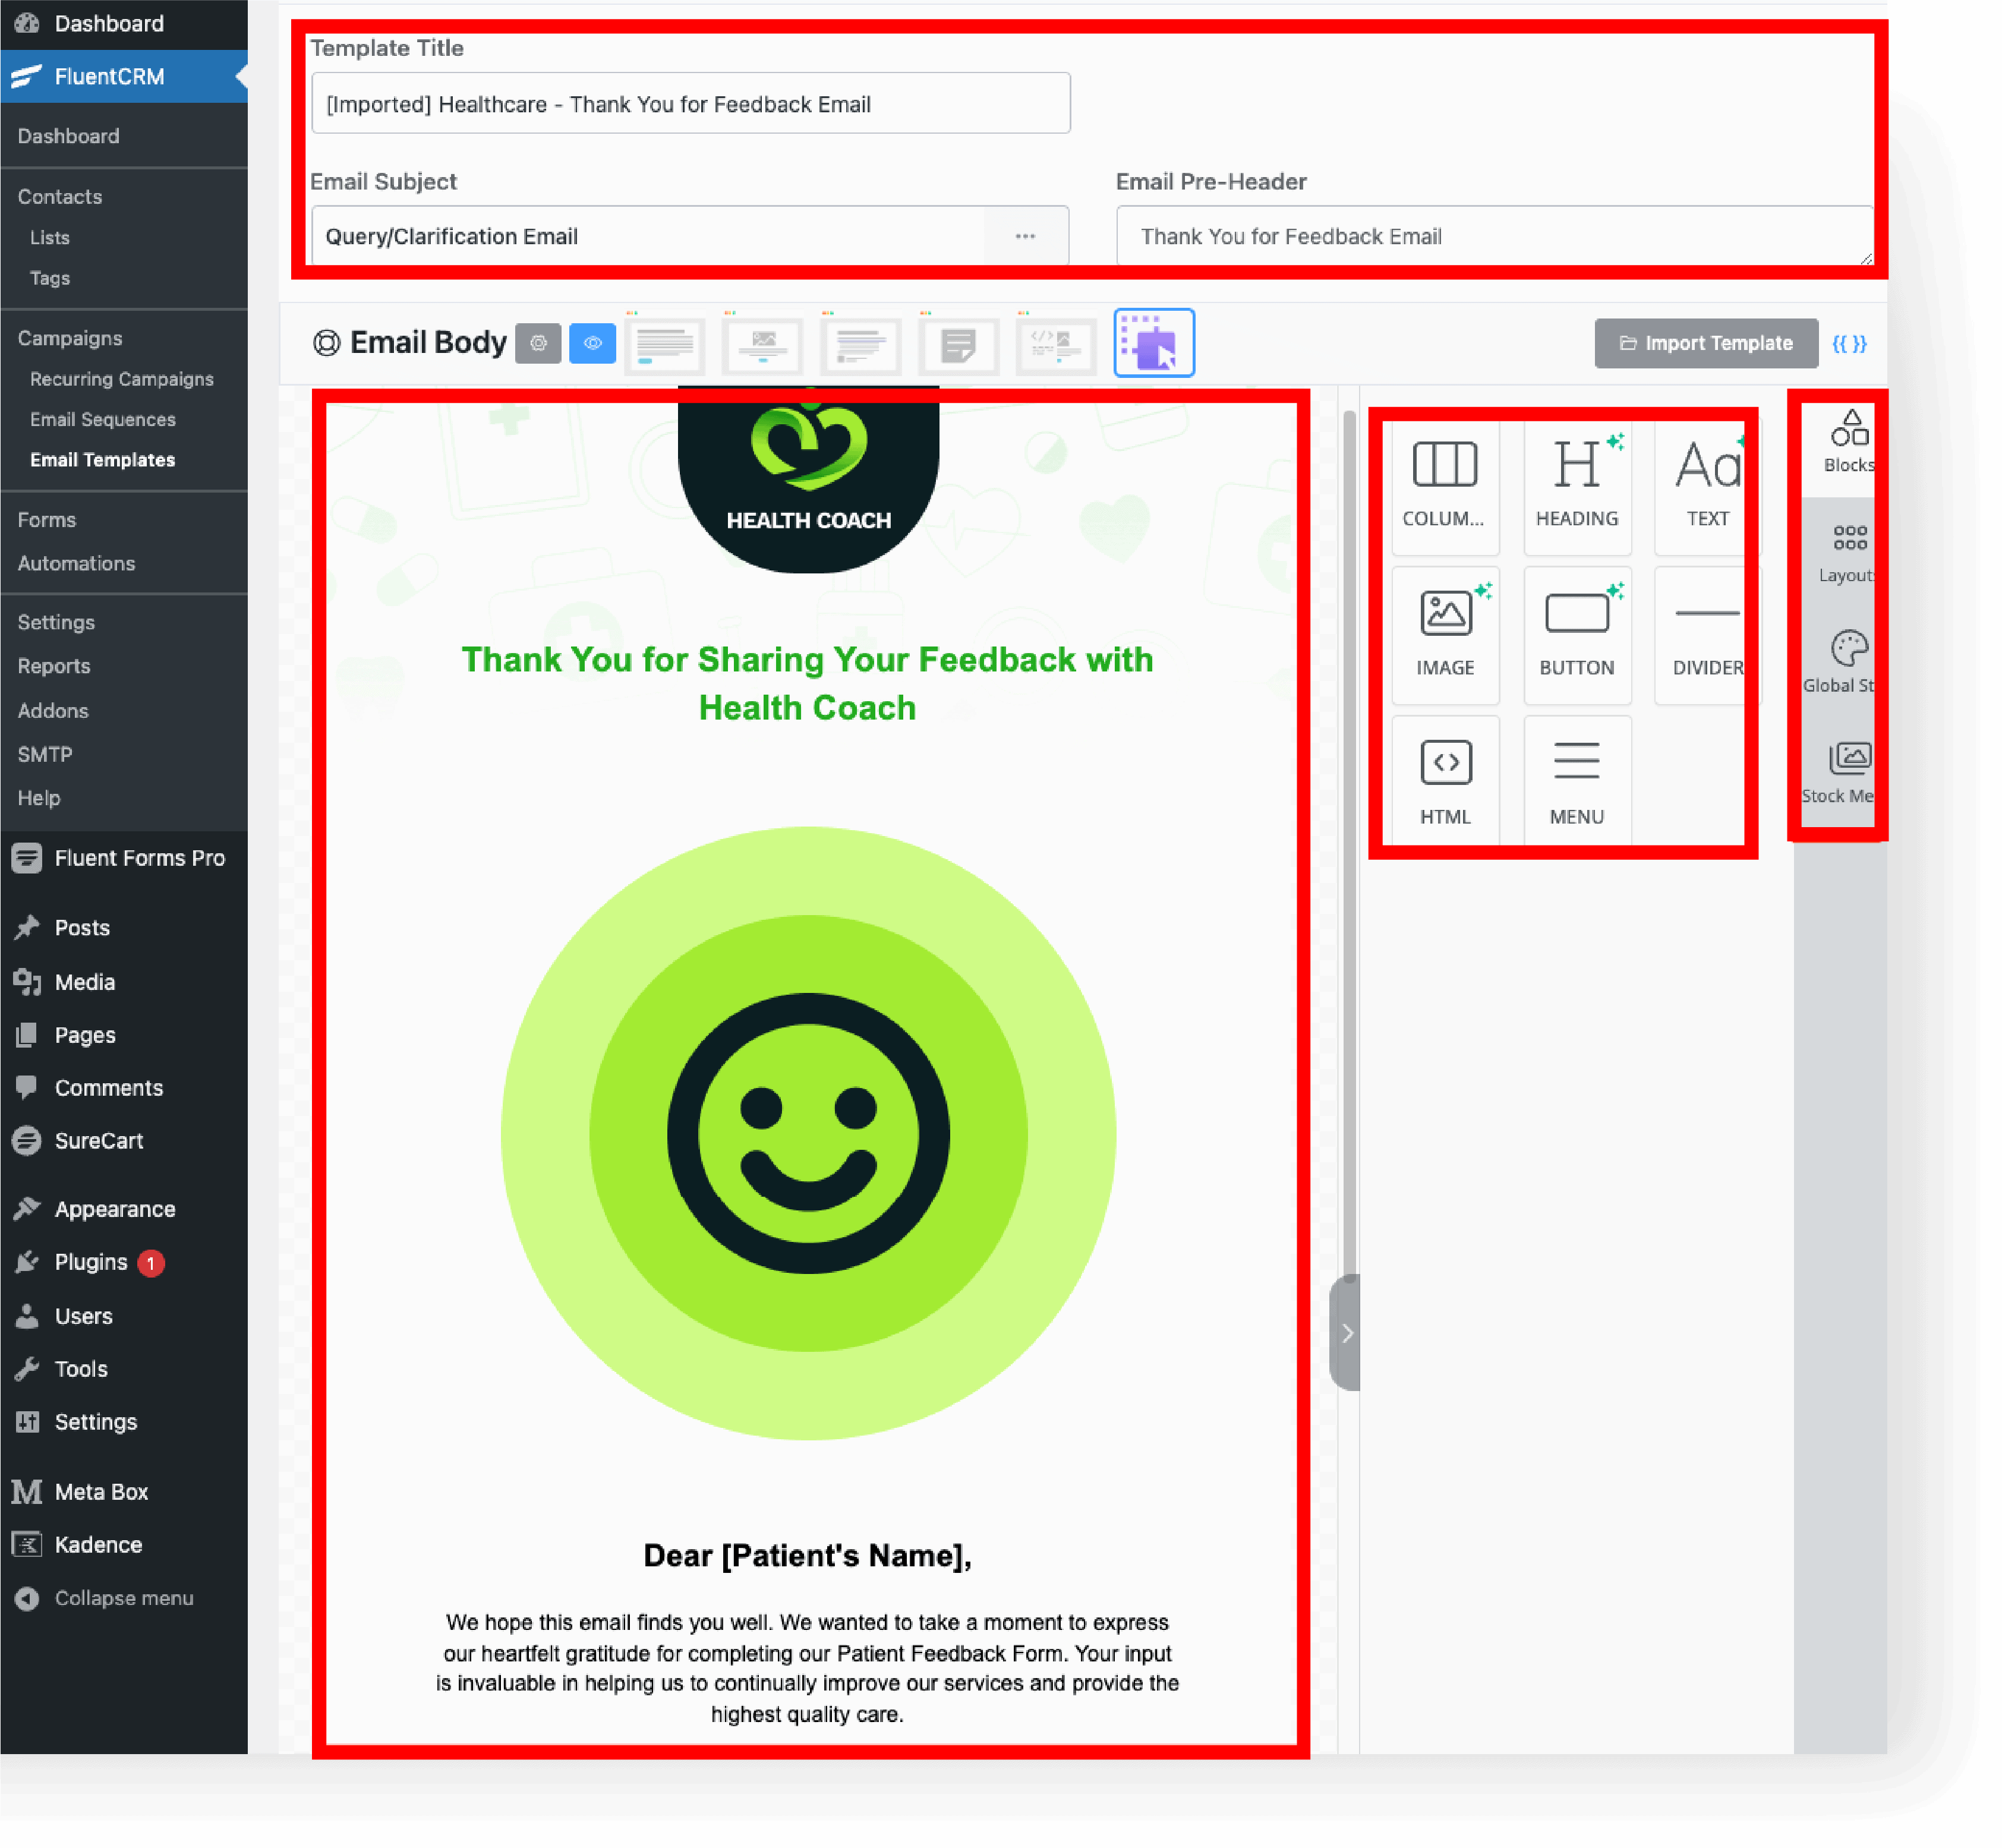
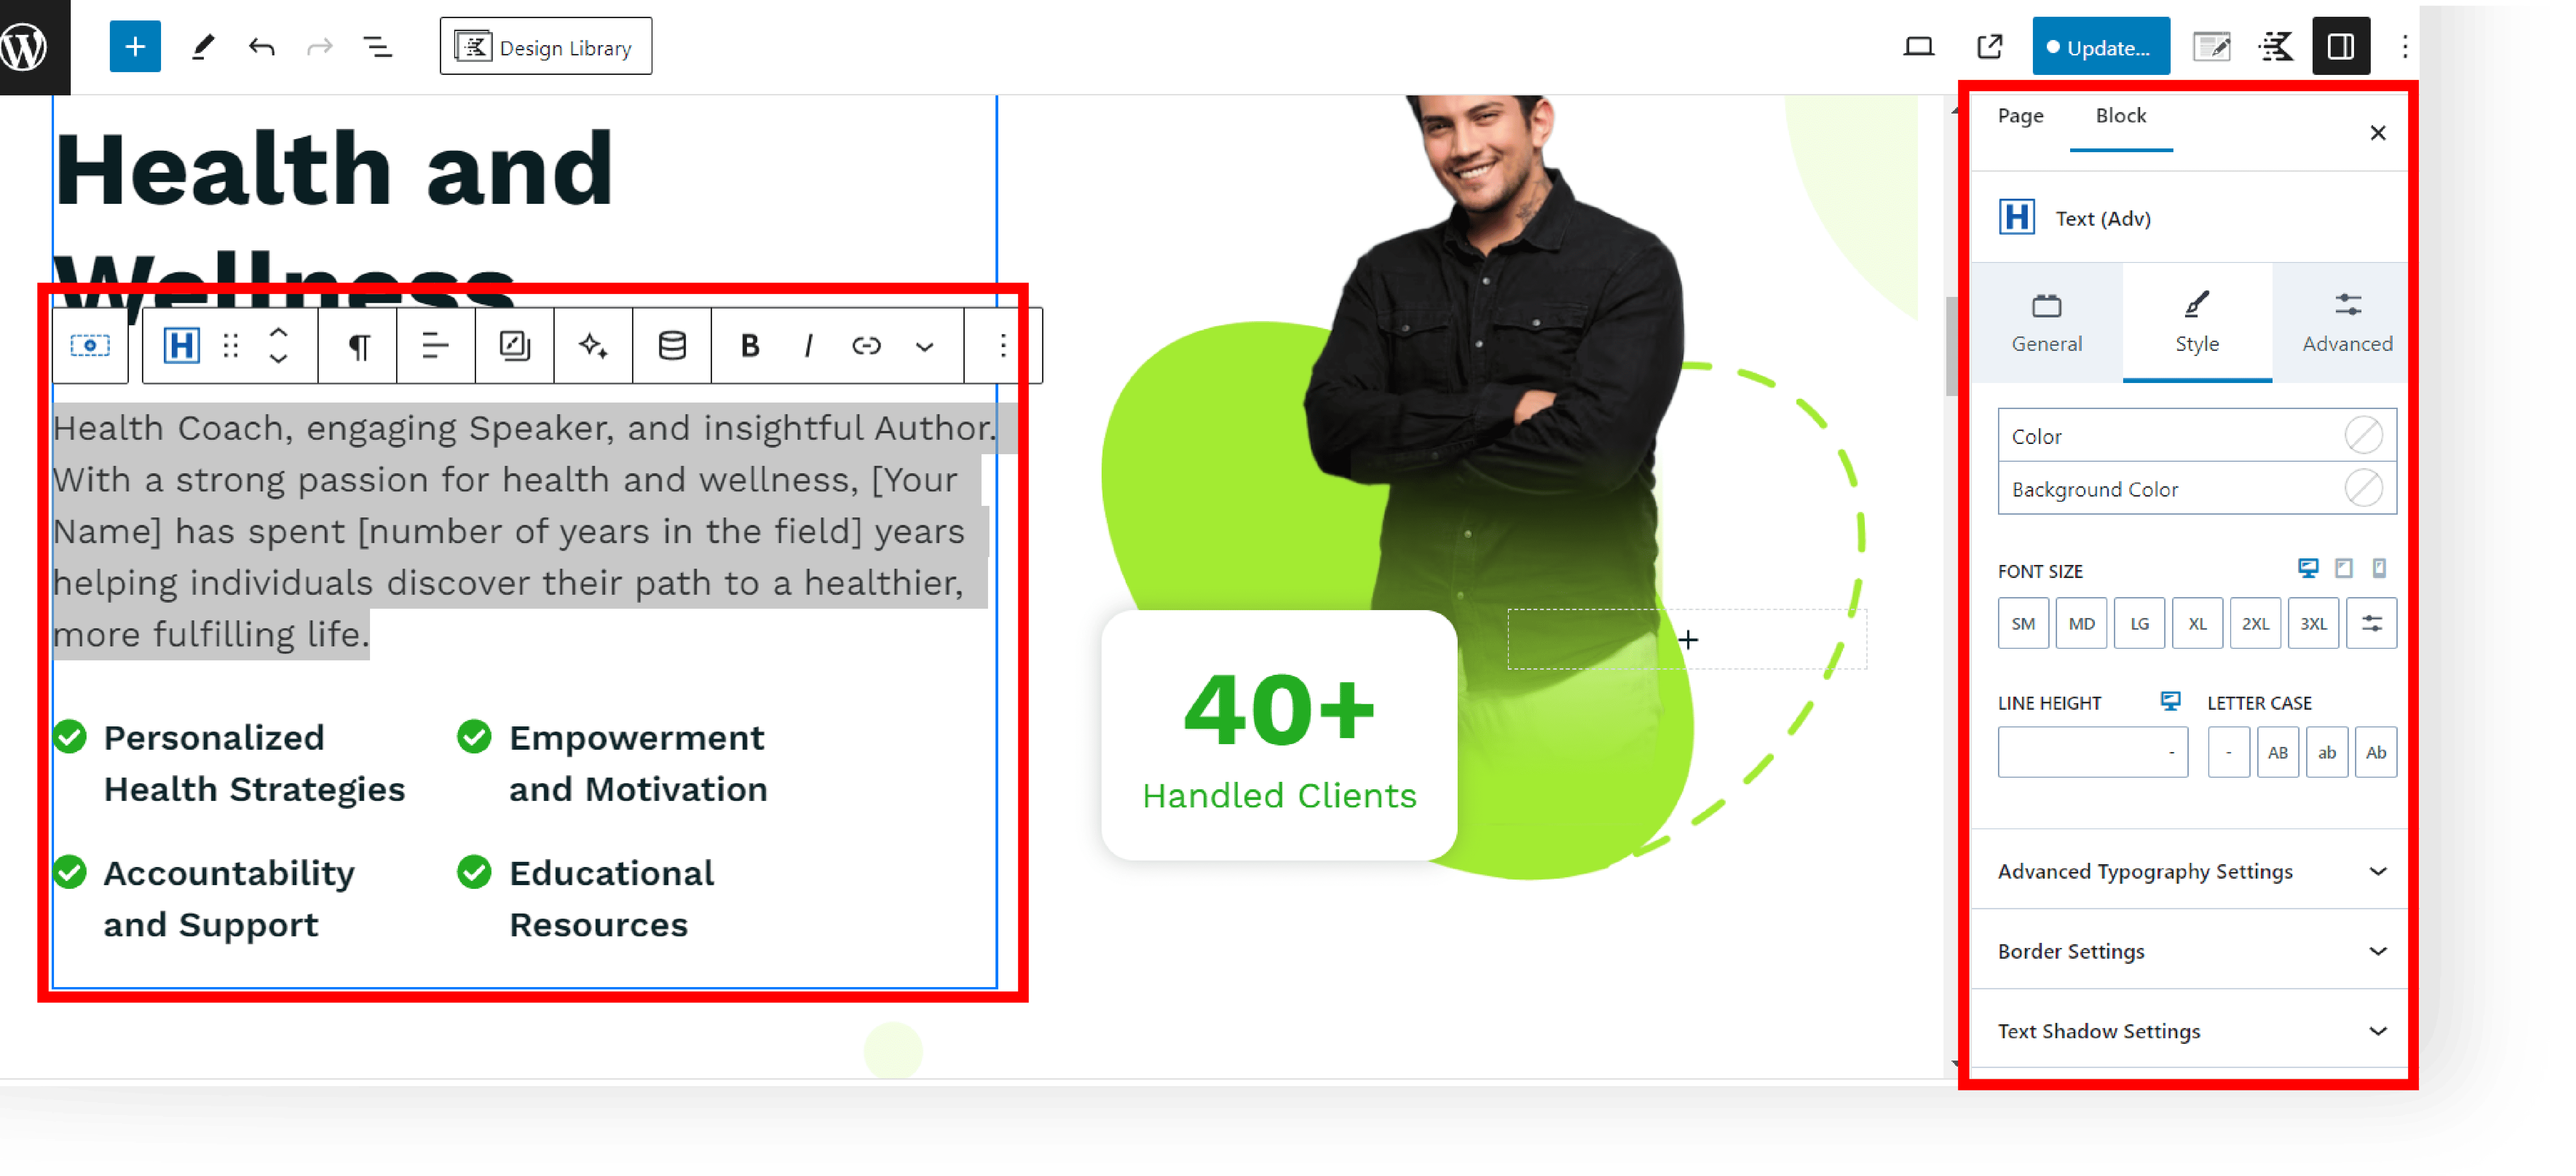
I. Replace default content with your own – from text to images.
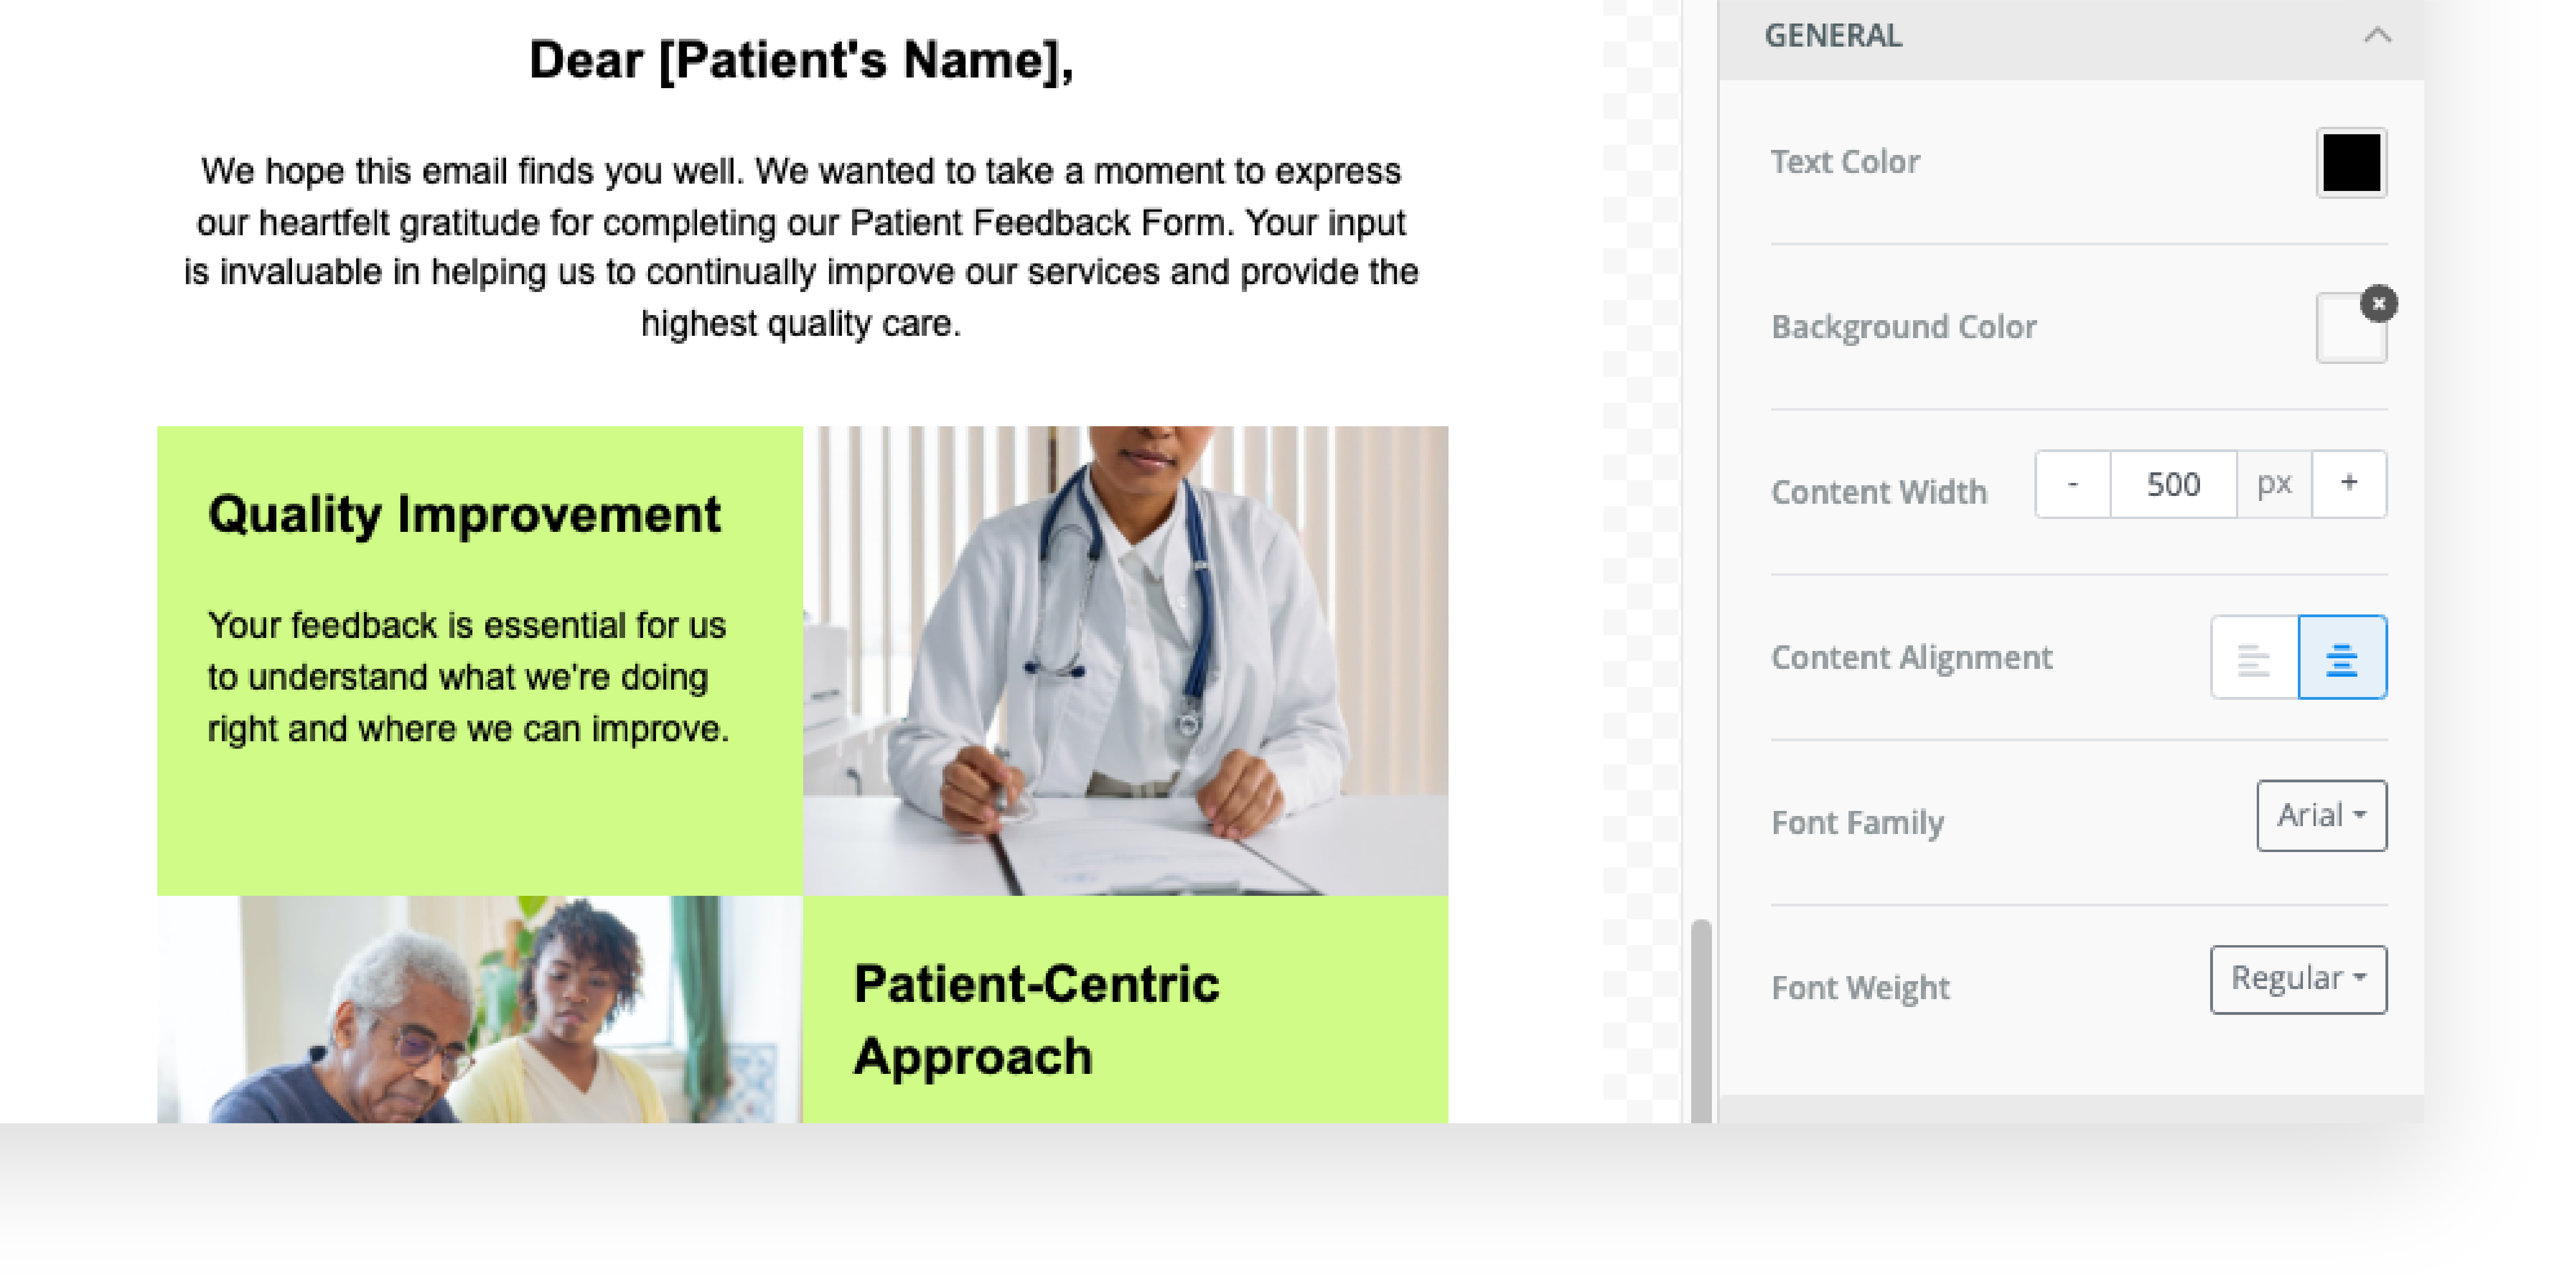
J. Adjust visual elements like color and fonts to reflect your brand.
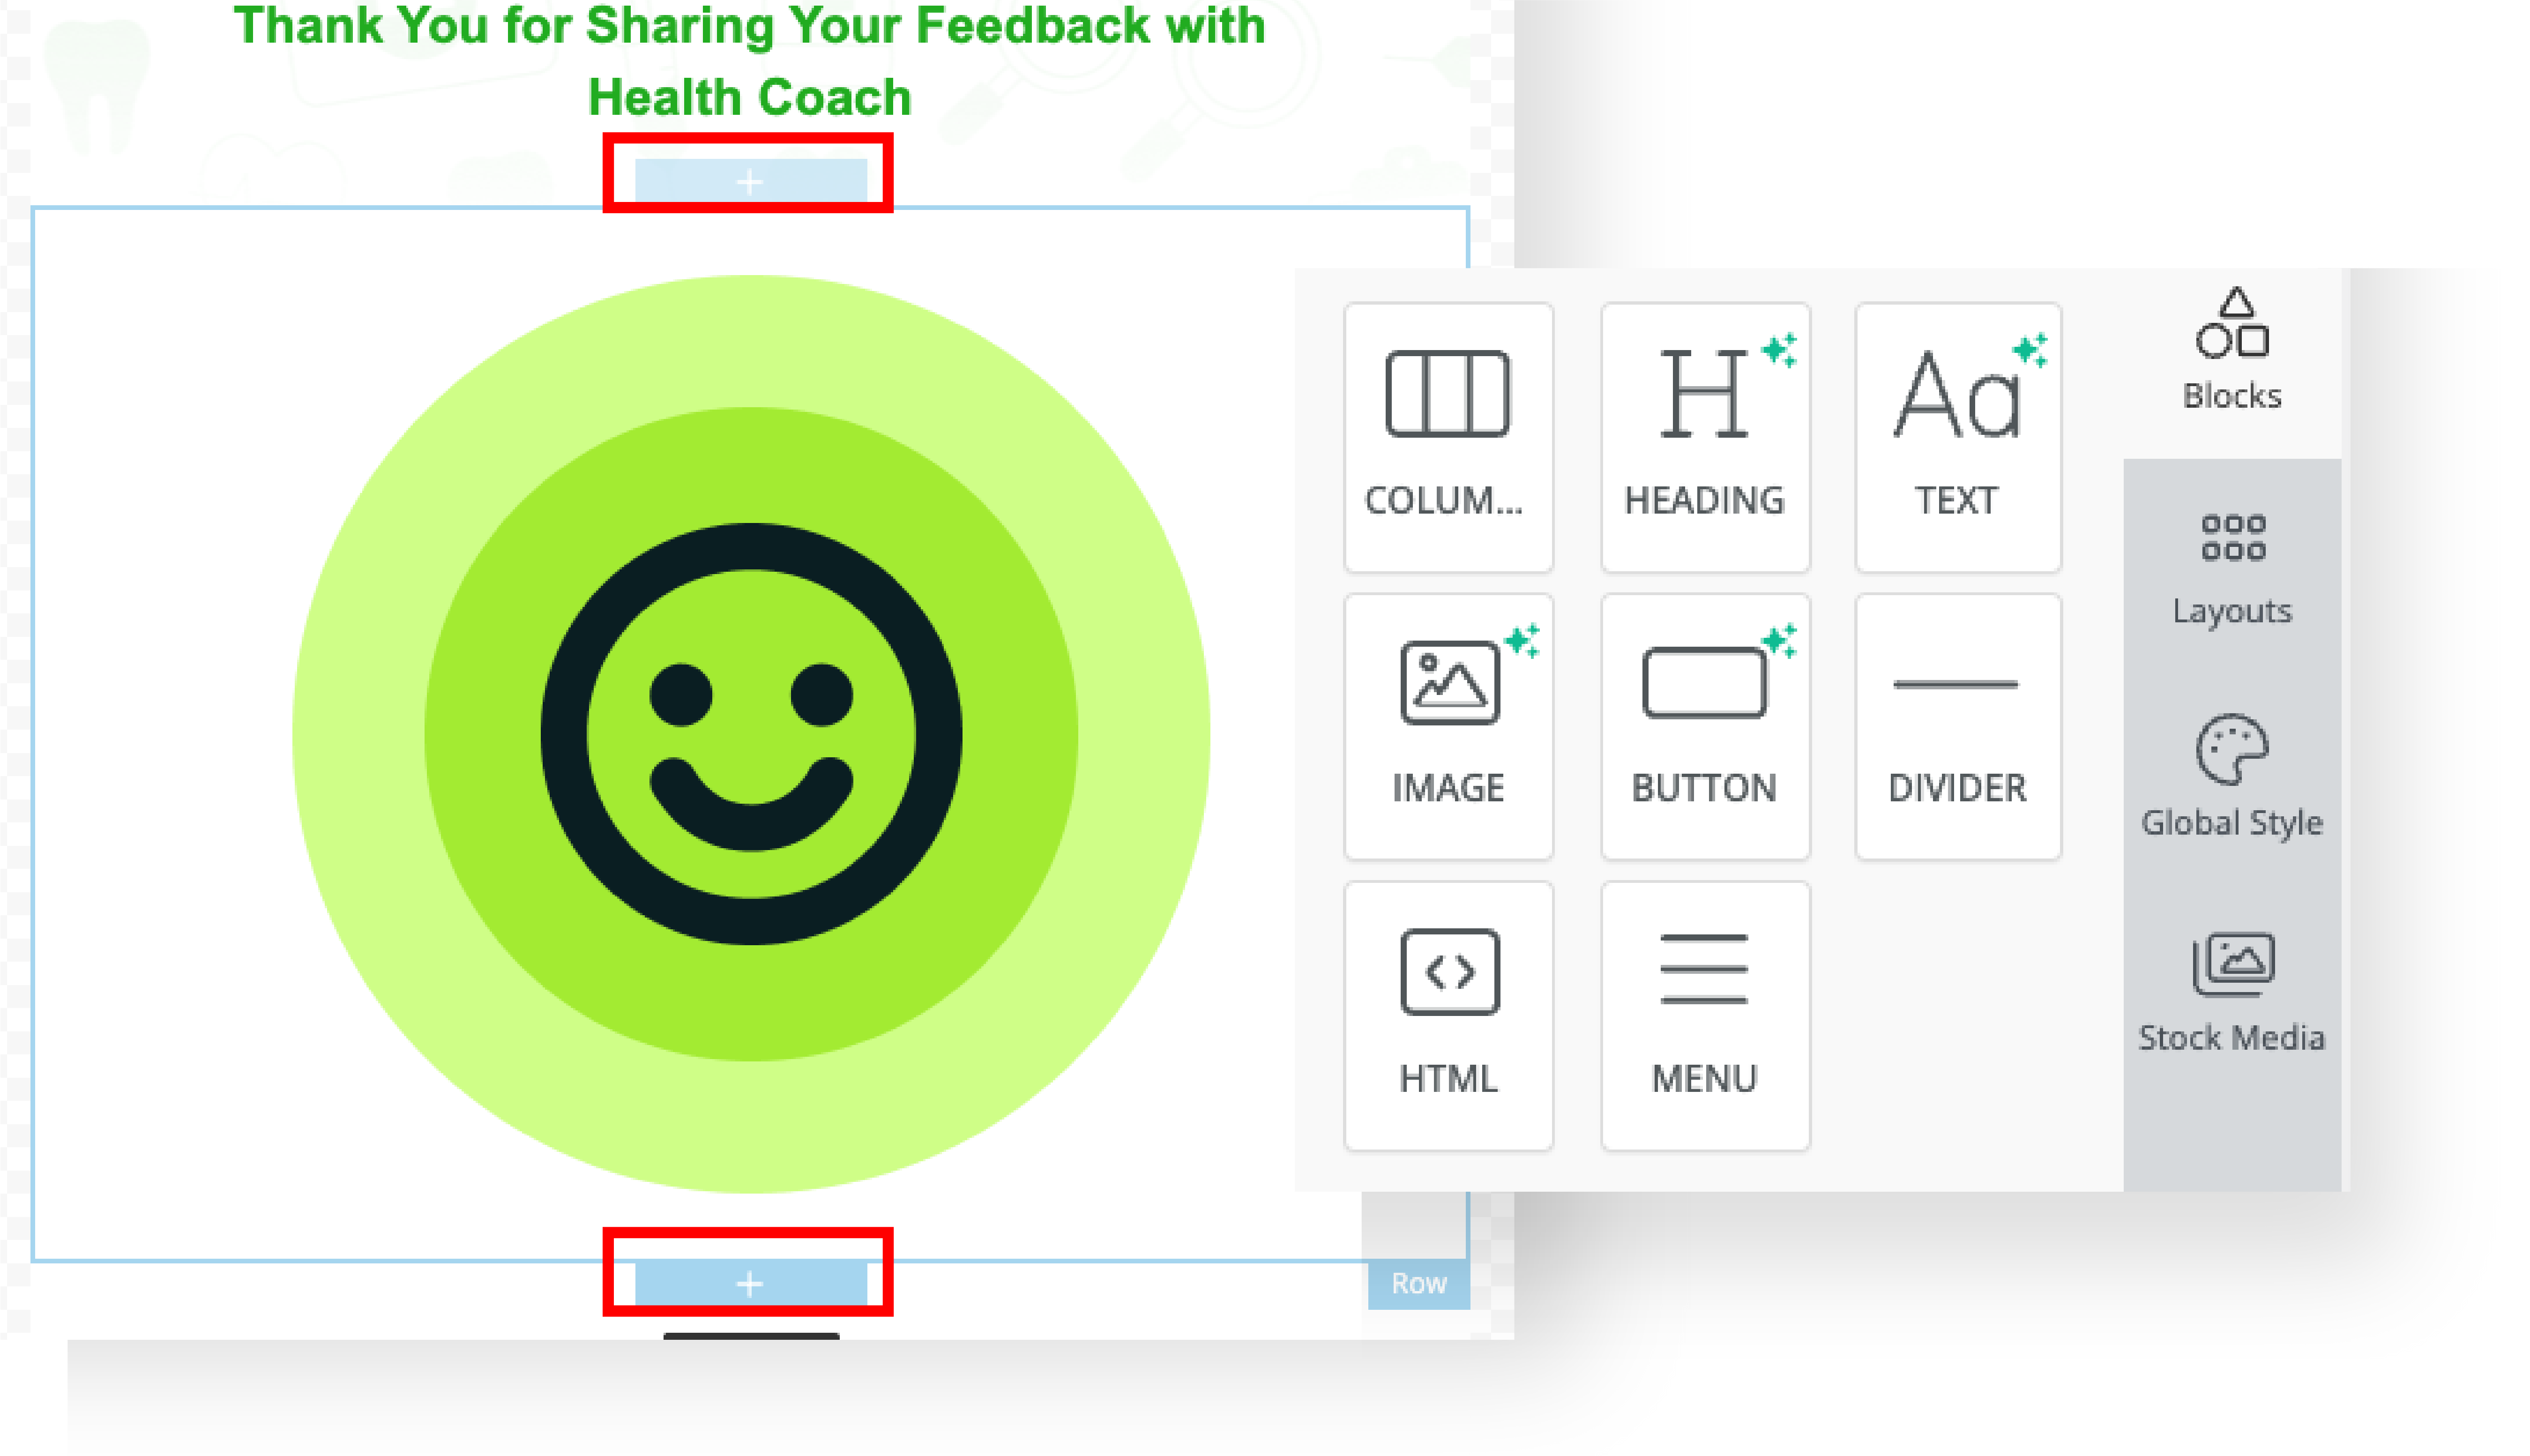
K. Click a row element and click the ‘+’ button above or below in the editor to add new row. Then drag and drop the selected field.
L. Rearrange elements within the email for a coherent flow and layout.
M. Tailor each element’s settings for a customized look and functionality.
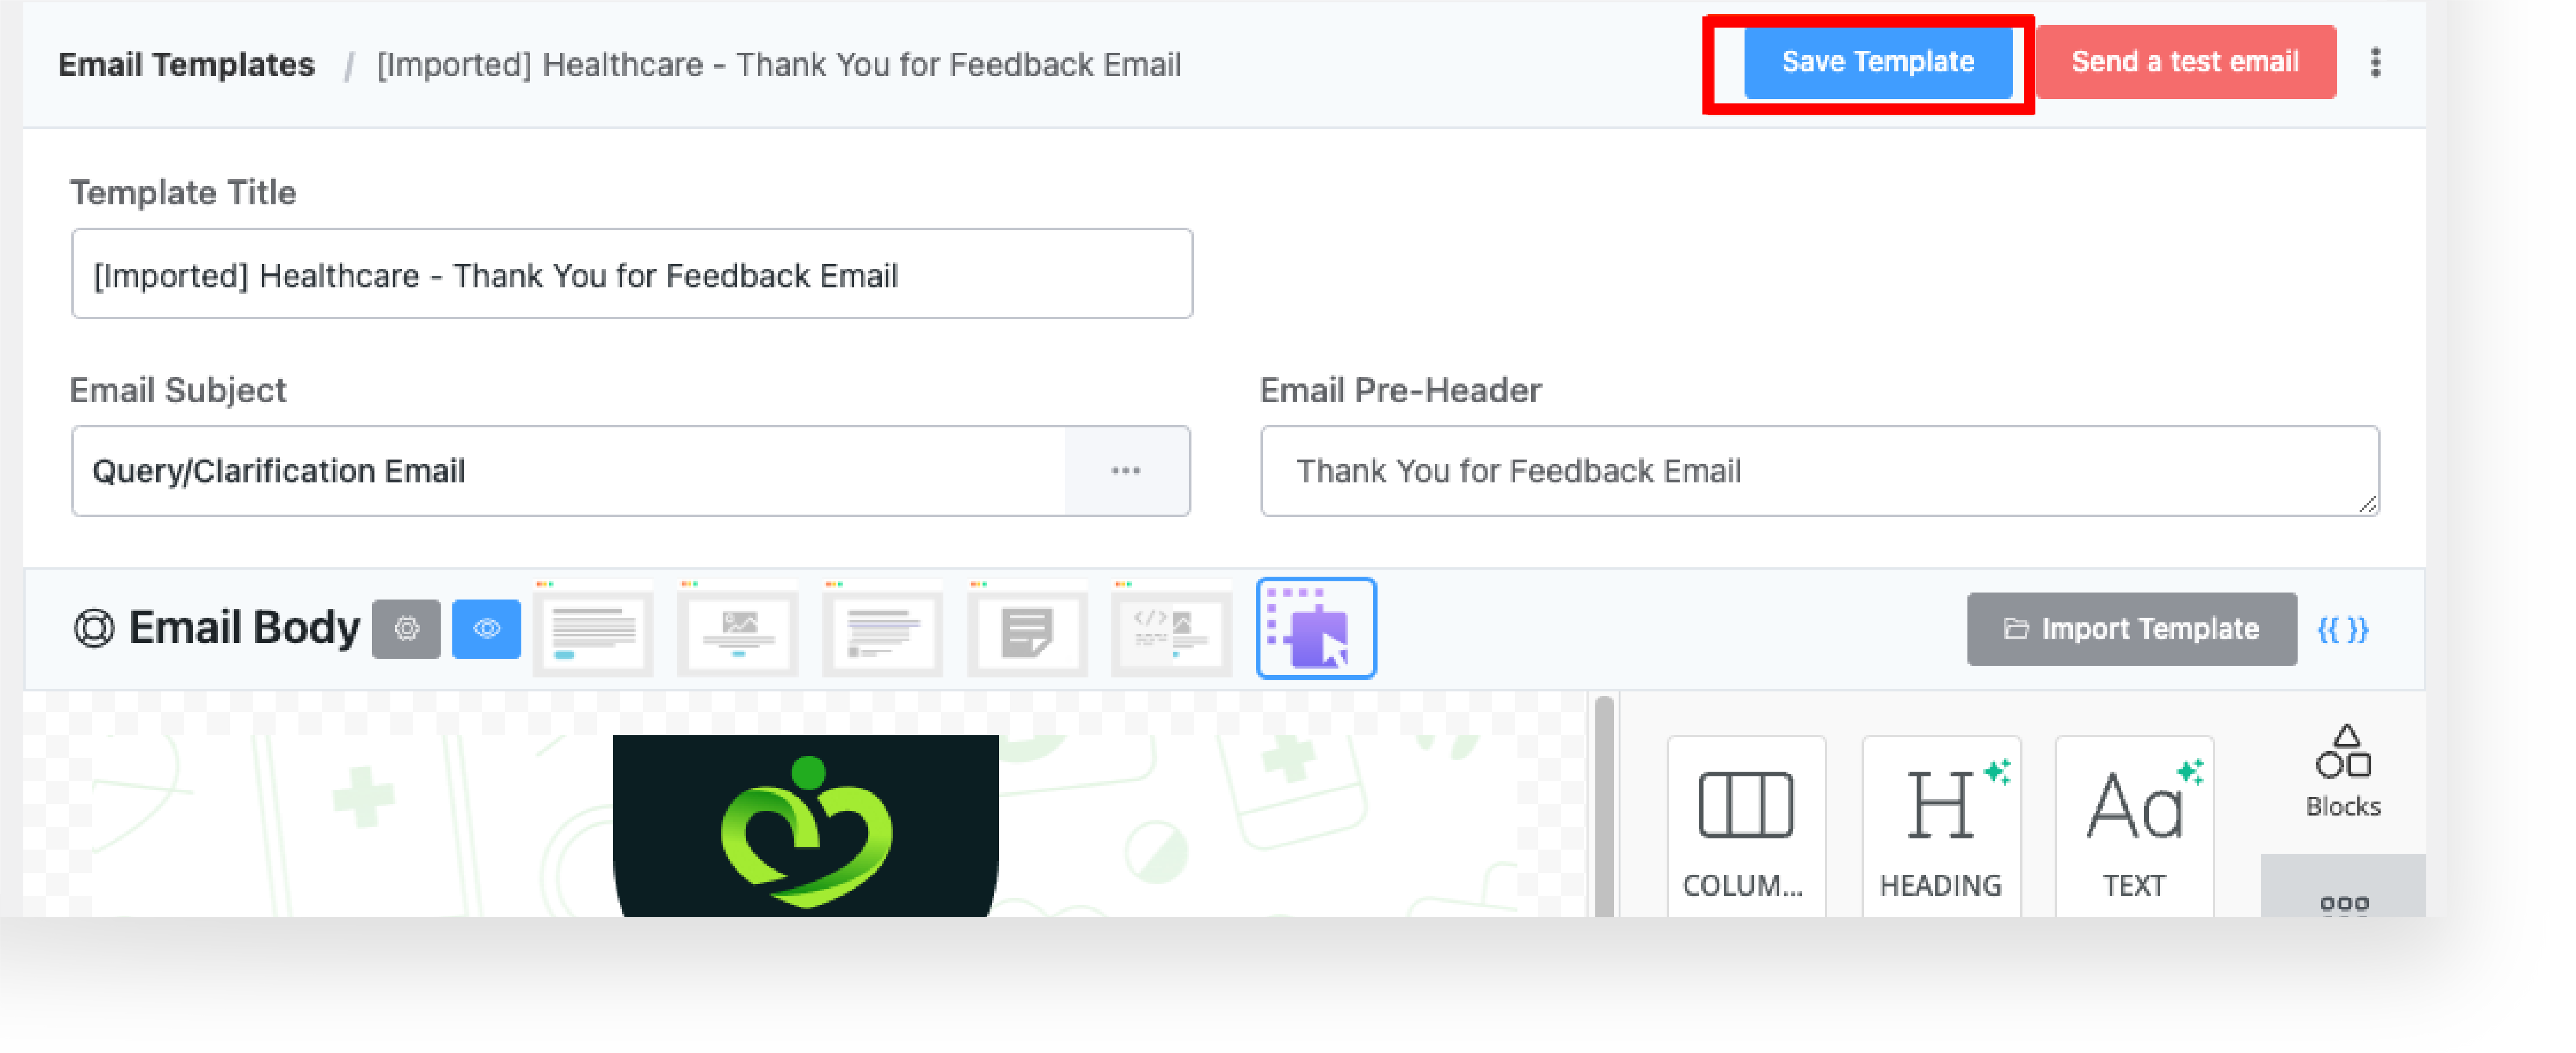
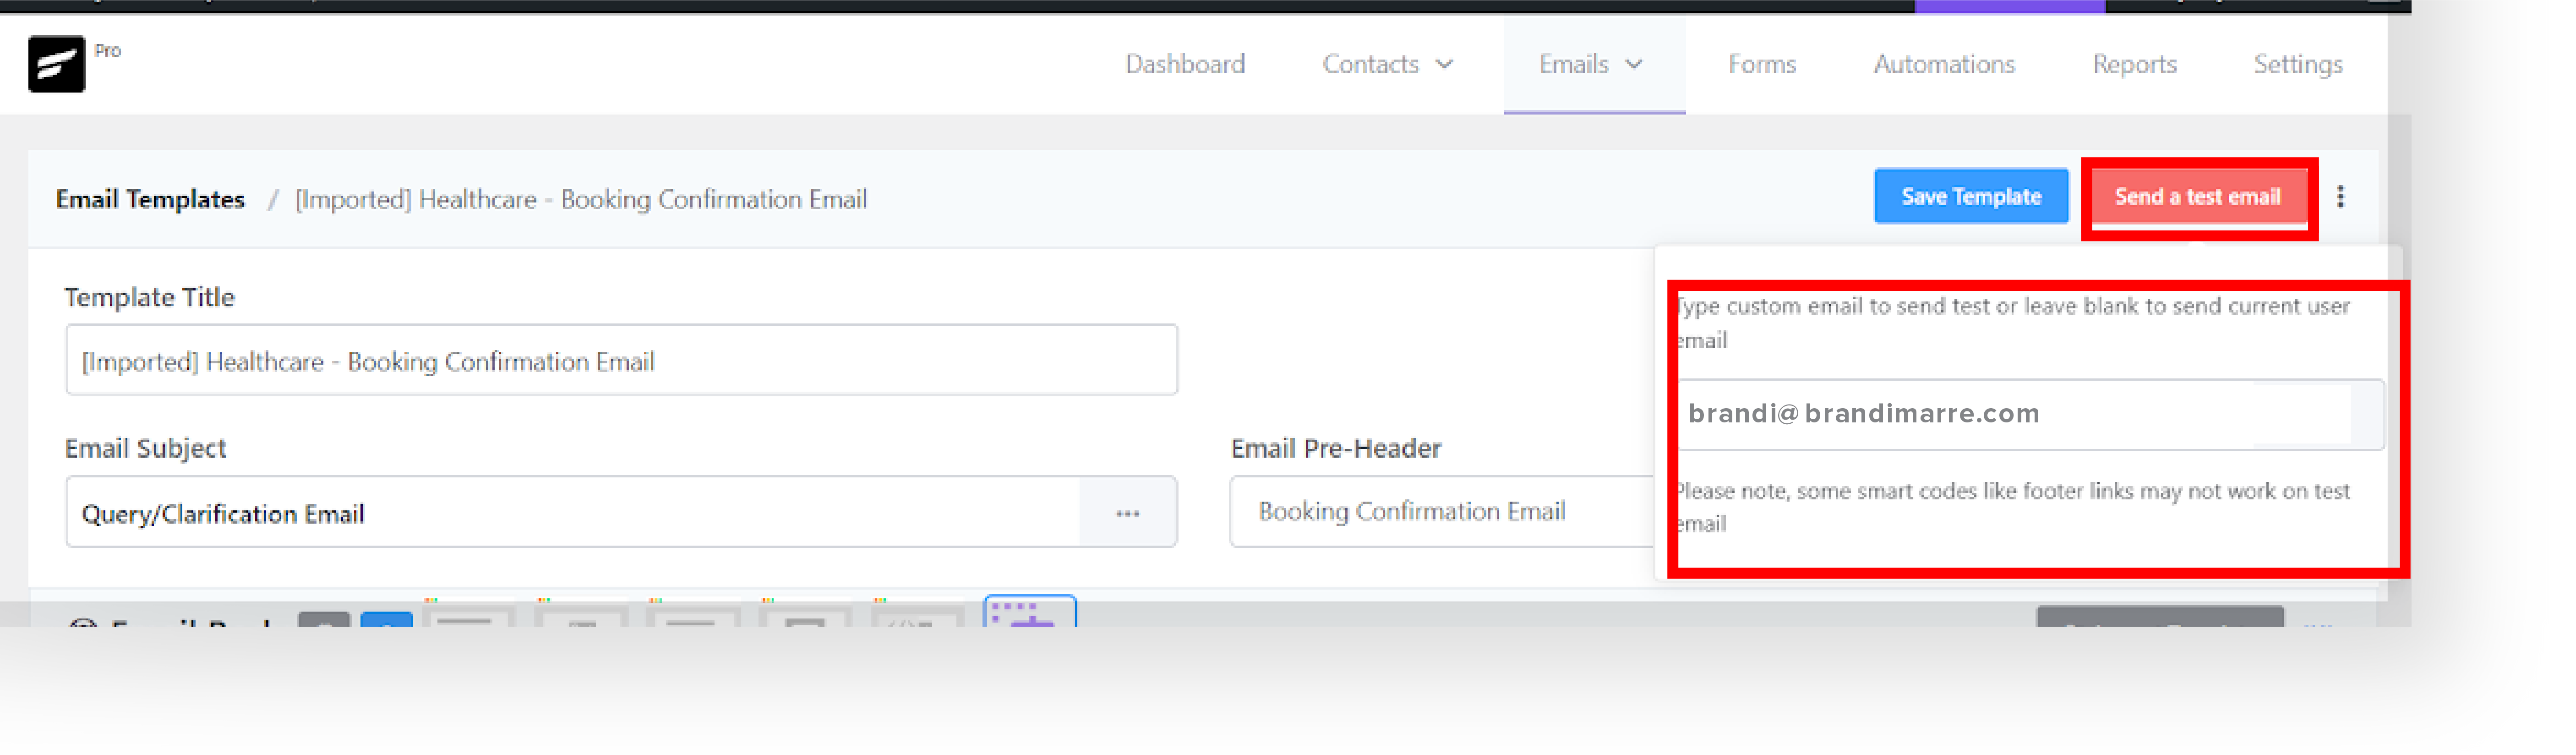
N. Regularly click the “Save Template” button on your email to update the changes and make your email live.
O. Once satisfied with your customized email, click the Send a test email button and insert your email. after successfully submitting check your email.
Step 4: Ensuring Responsiveness and Accessibility #
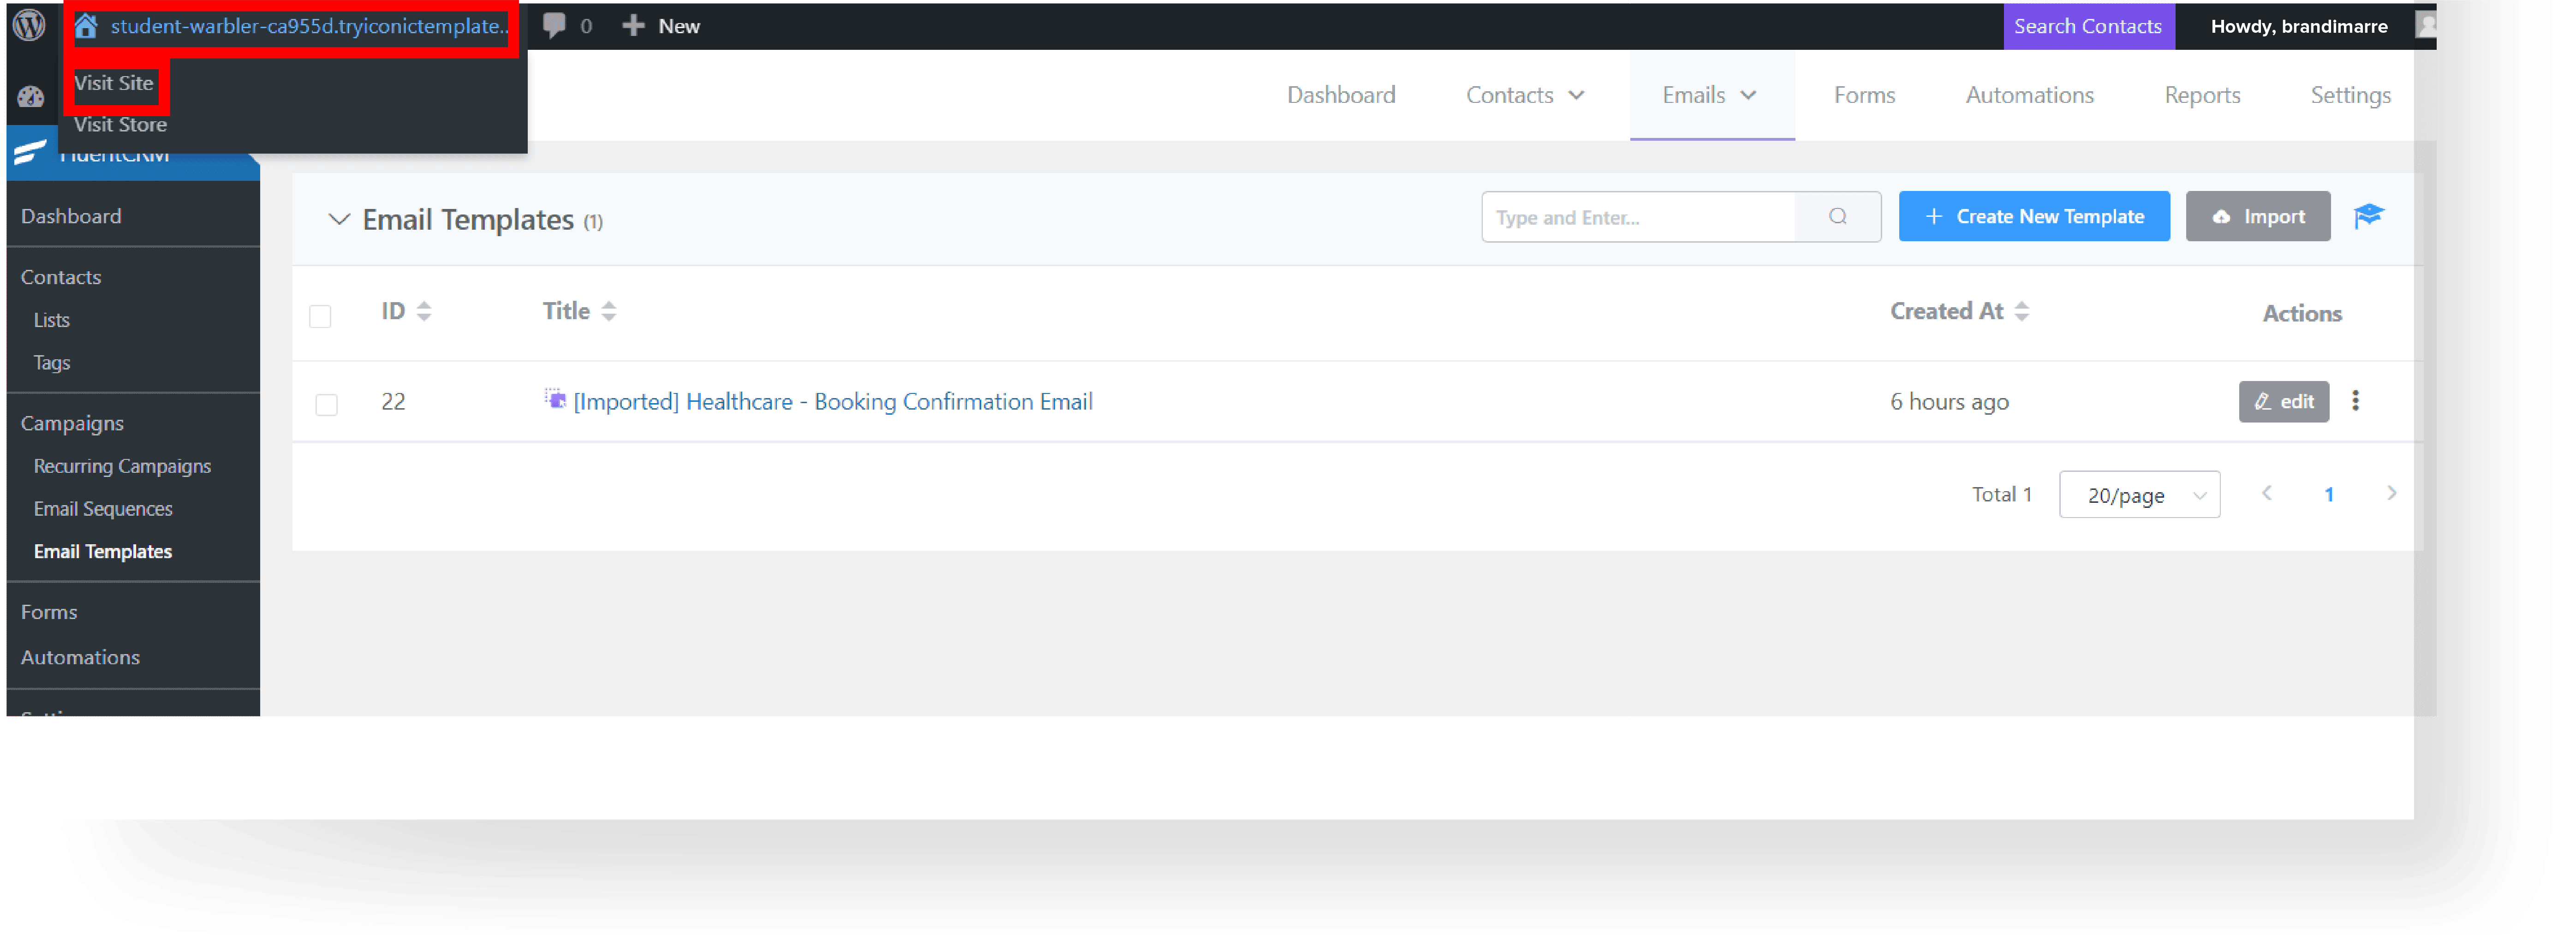
A. After customizing the theme setting, form template, and email template. Go back to WordPress Dashboard, hover at the top toolbar, and click Visit Site.
B. Check your chosen theme and customized elements are responsive and accessible across all devices.
C. Ensure compliance with accessibility standards to make your site user-friendly for a wider audience, including those with disabilities.

Step 5: Previewing and Final Adjustments #
A. Make necessary adjustments to design, content, and functionality by going to WordPress Dashboard and edit pages, post or theme settings until you achieve your desired outcome.
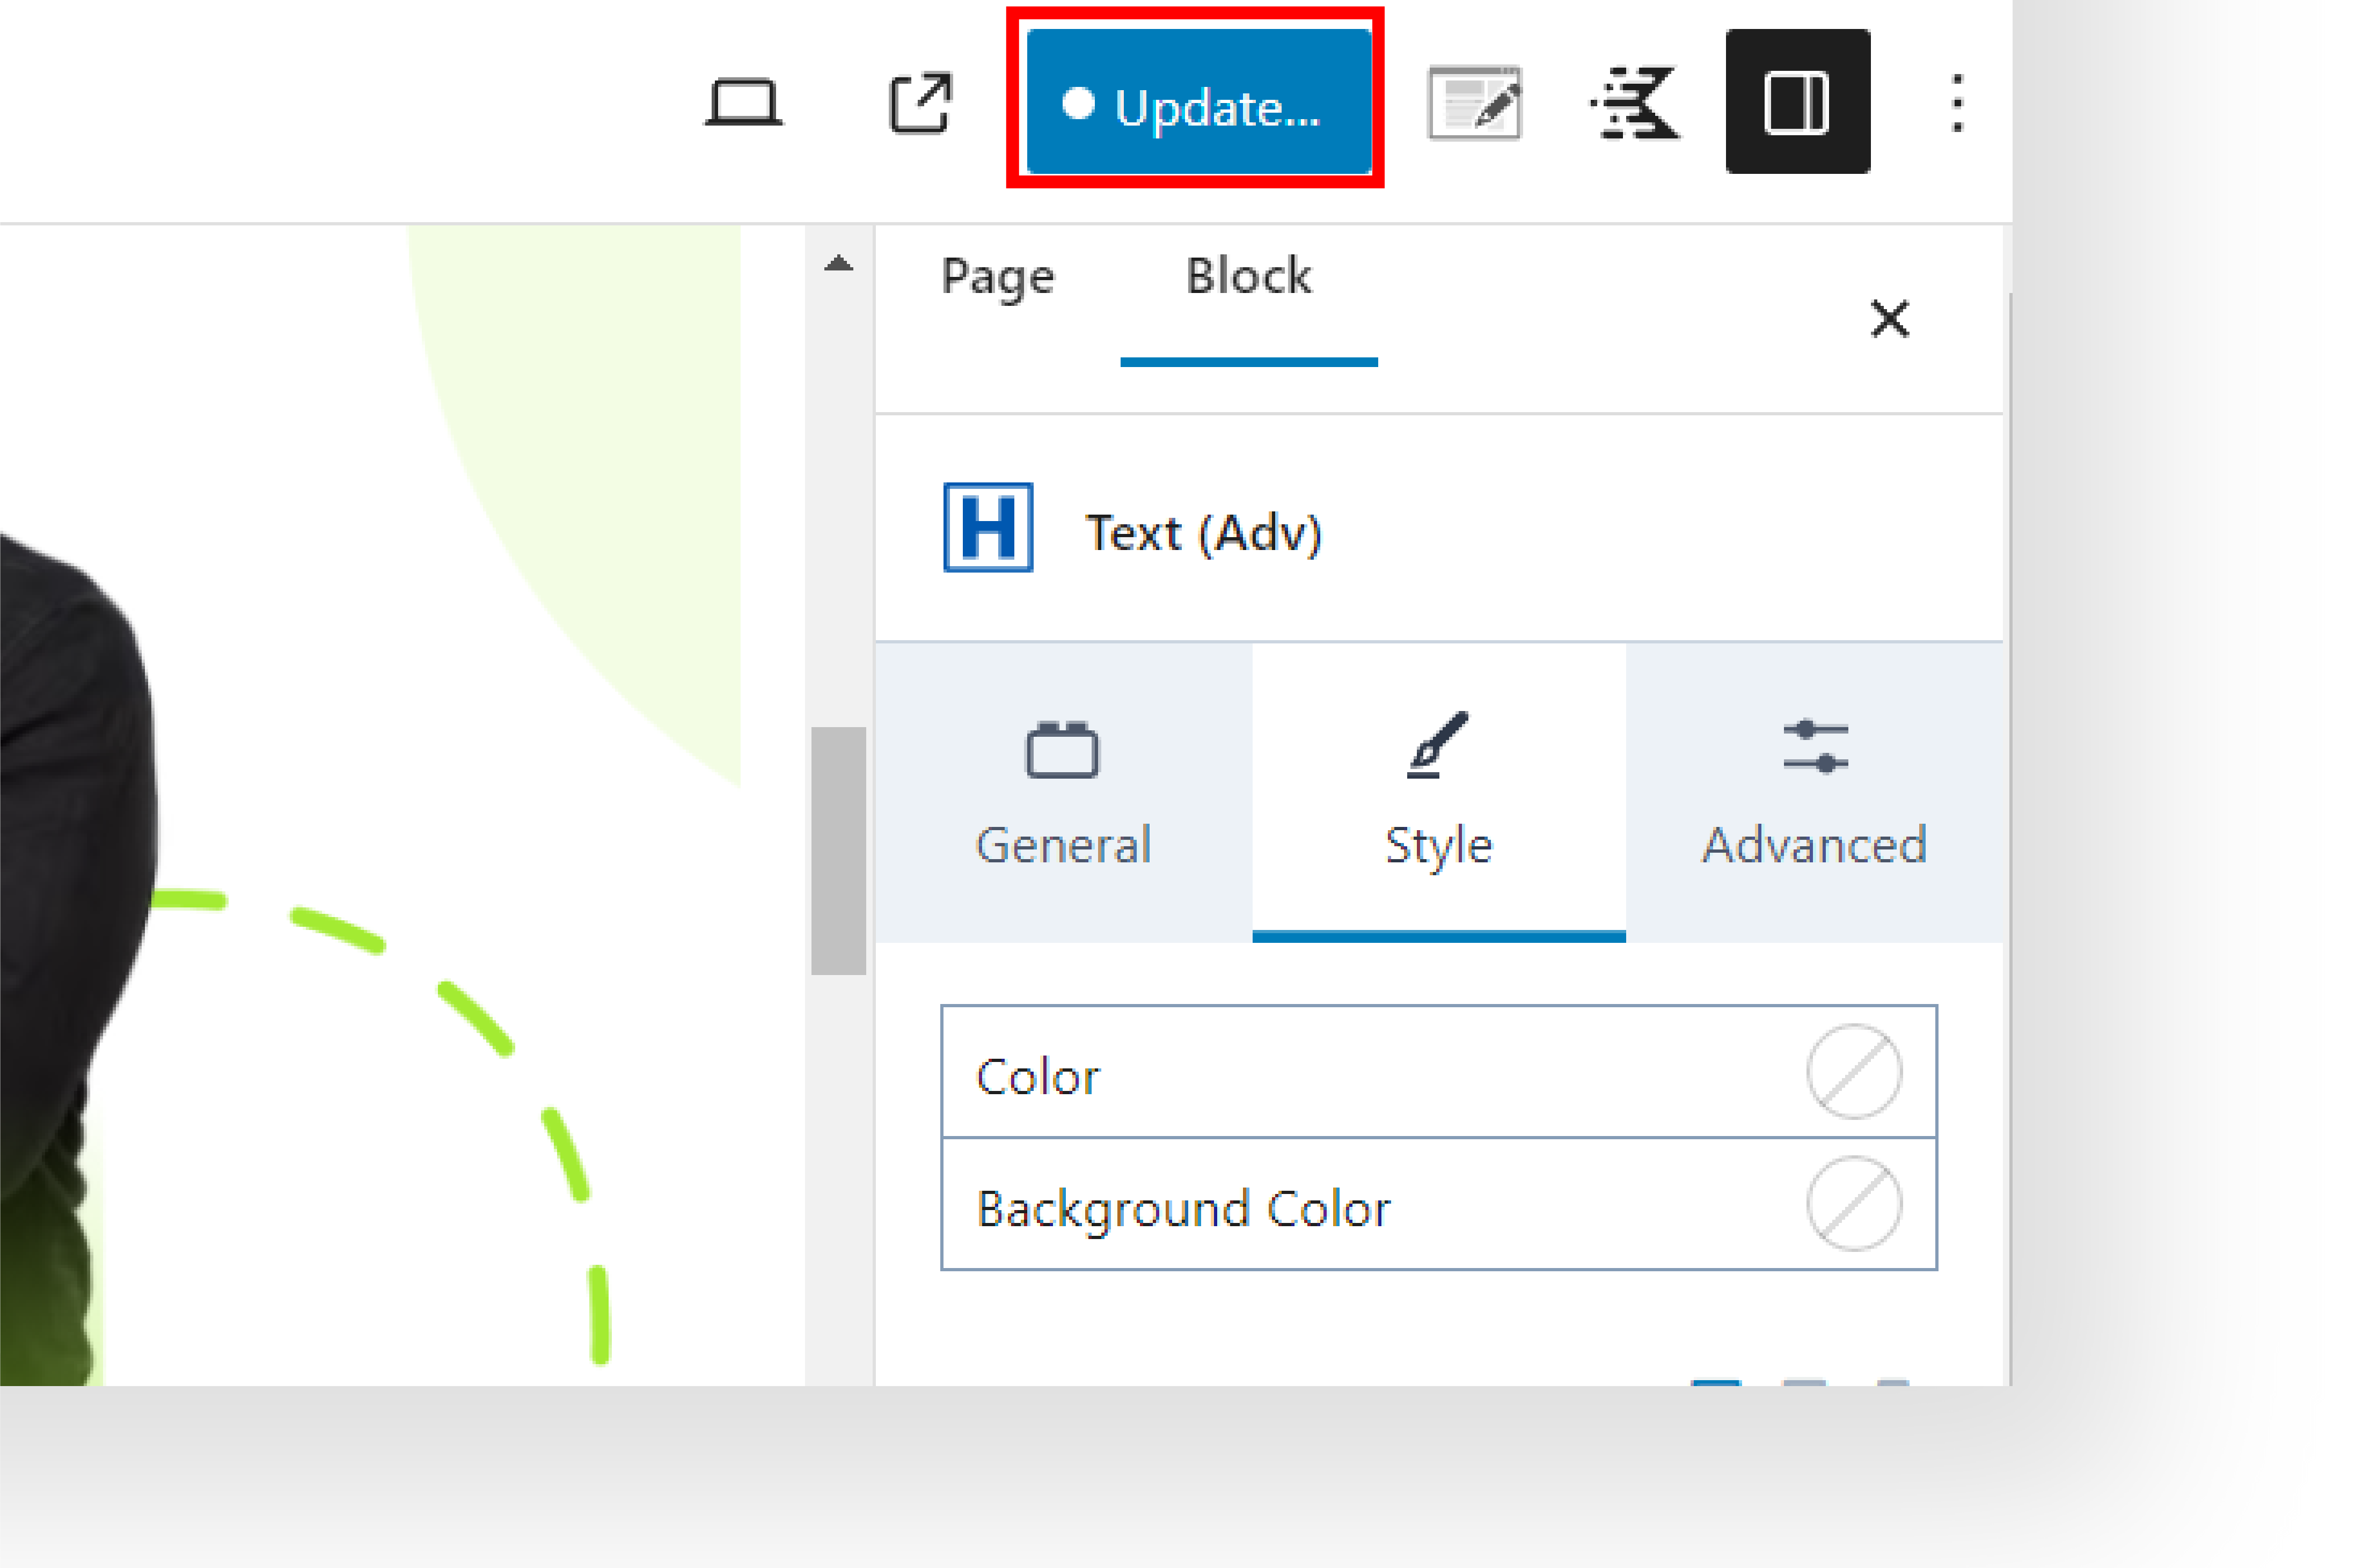
B. Once you’re satisfied with your updates on the theme click Publish/Update button.
Step 6: Launching Your Website #
A. Continuously test and update your site to ensure it meets your audience’s needs and stays current with web trends.
B. Congratulations! You’ve finished the setup process and you’re good to go.